Avigilon
This section provides information on how to integrate QbProtect with Avigilon Unity VMS. Please refer to the ONVIF section beforehand for general information on using ONVIF with QbProtect.
|
The following Avigilon Unity components have been used in the examples below:
|
Add Device
The Avigilon Unity Client is used to add QbProtect into Avigilon Unity VMS.
The procedure includes the following steps:
-
Launch the Avigilon Unity Client and connect to the active Avigilon Unity server instance using
Site Logintab -
Navigate to
Site Setuptab → Select the active server instance → ClickConnect/Disconnect Devices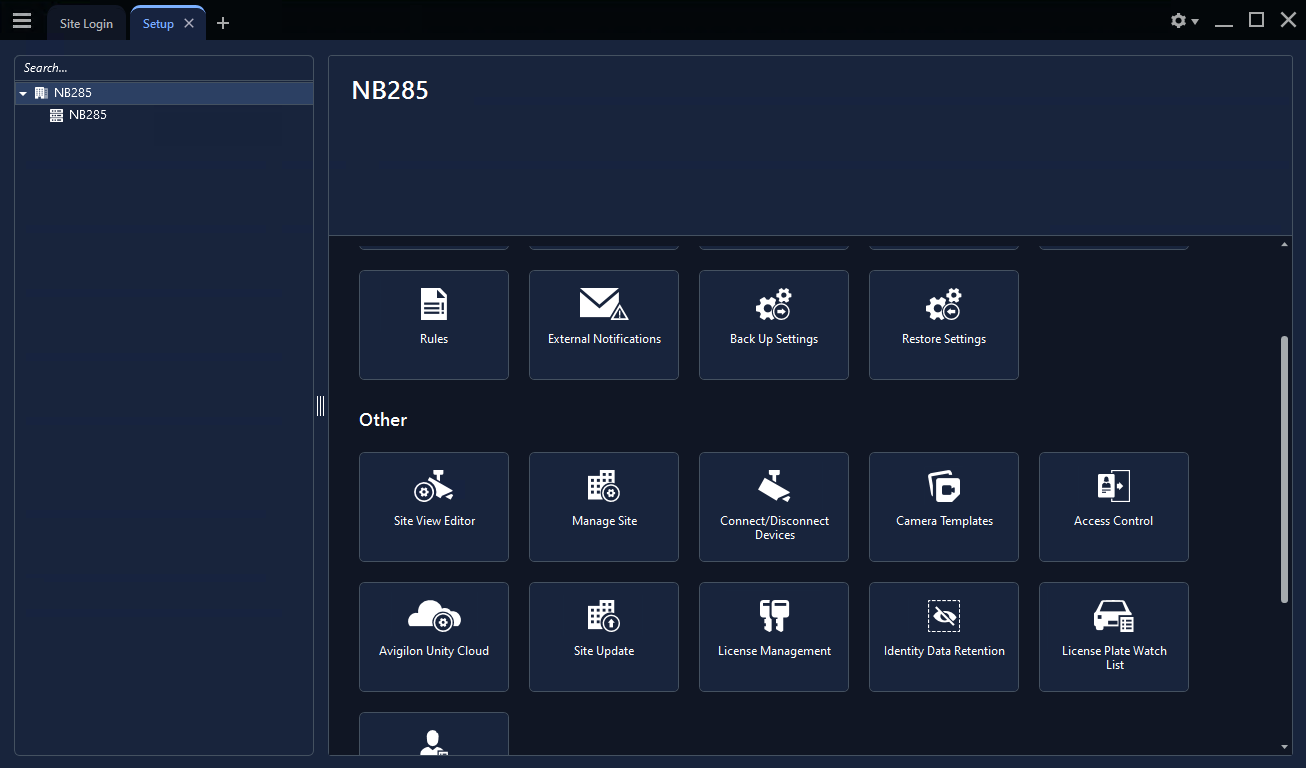 Figure 1. Adding QbProtect into Avigilon Unity: Connect/Disconnect Devices
 -
Click
Find Device→ SetDevice TypetoONVIF→ Enter the FQDN or IP of QbProtect in theHostnamefield andUsername/Passwordin the corresponding credential fields → ClickOKPlease refer to the User Authentication (ONVIF/RTSP) subsection to find out how to obtain valid ONVIF credentials required for QbProtect VMS integrations.
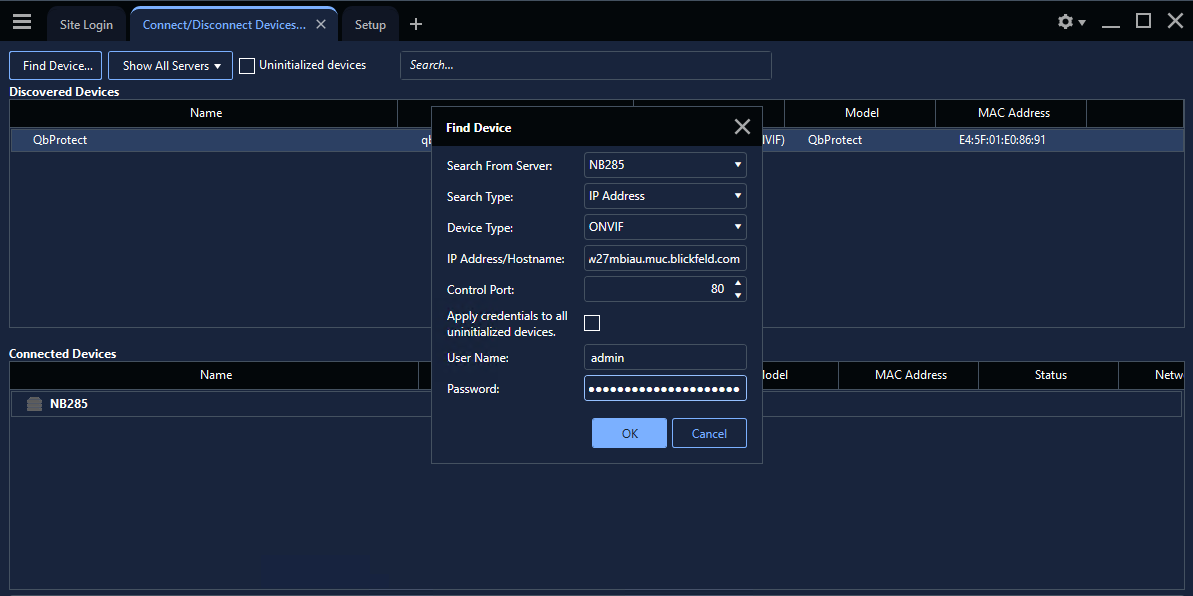 Figure 2. Adding QbProtect into Avigilon Unity: Find device
 -
Select the
QbProtectfrom the list of discovered devices → General Information about the discovered QbProtect should be depicted → ClickConnect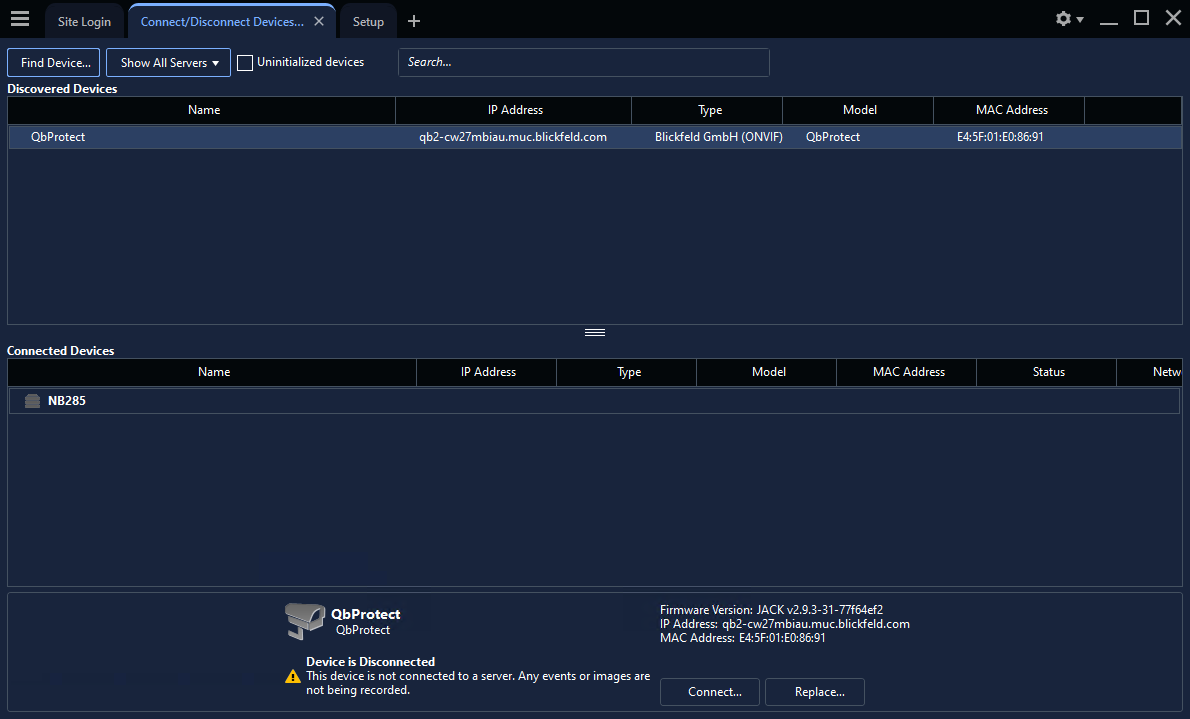 Figure 3. Adding QbProtect into Avigilon Unity: Connect device
 -
Set
Connection TypetoPrimary→ SetNetwork TypetoLAN→ ClickOK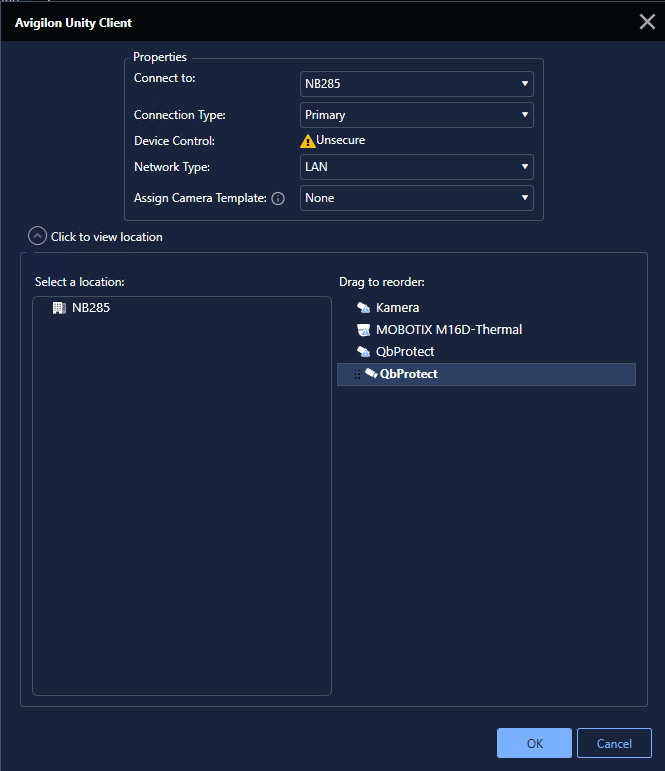 Figure 4. Adding QbProtect into Avigilon Unity: Properties
 -
QbProtect should appear in the
Connected Devicessection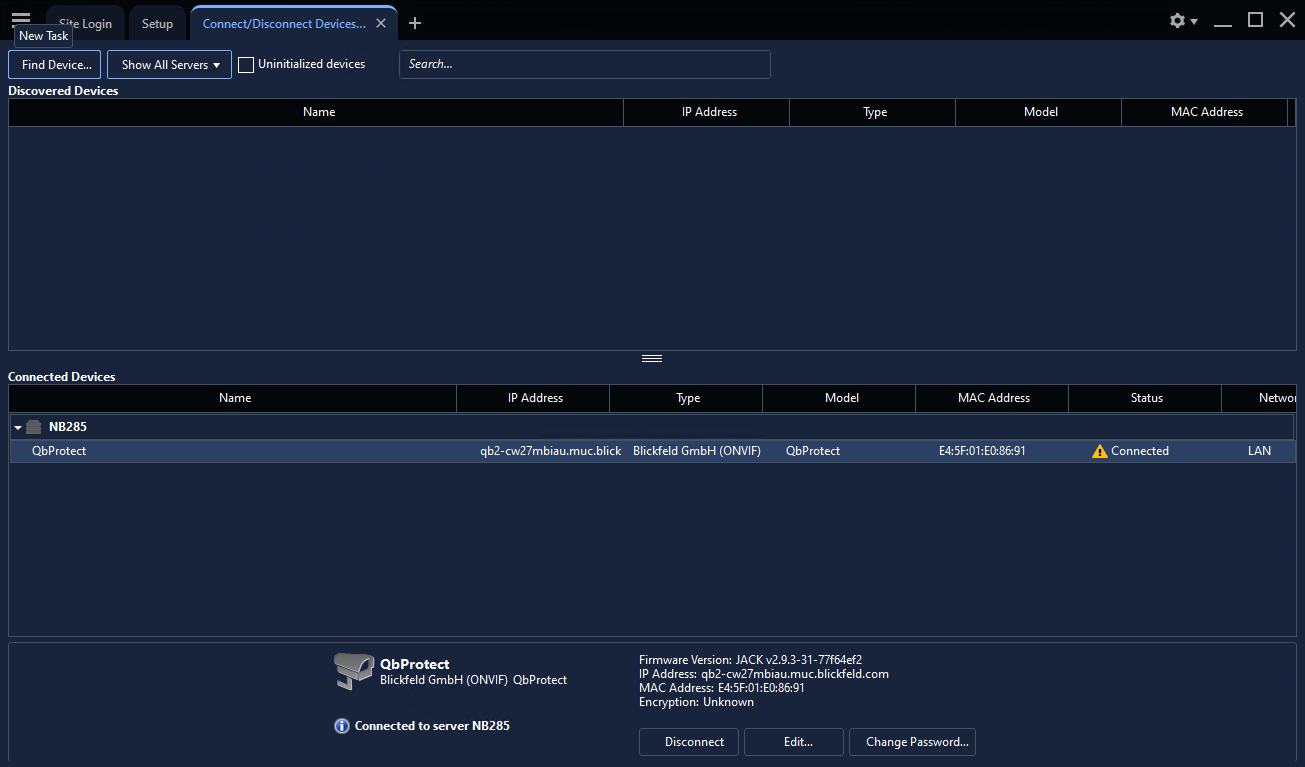 Figure 5. Adding QbProtect into Avigilon Unity: Connected Devices
 -
The live preview of the point cloud should be available in the
Viewtab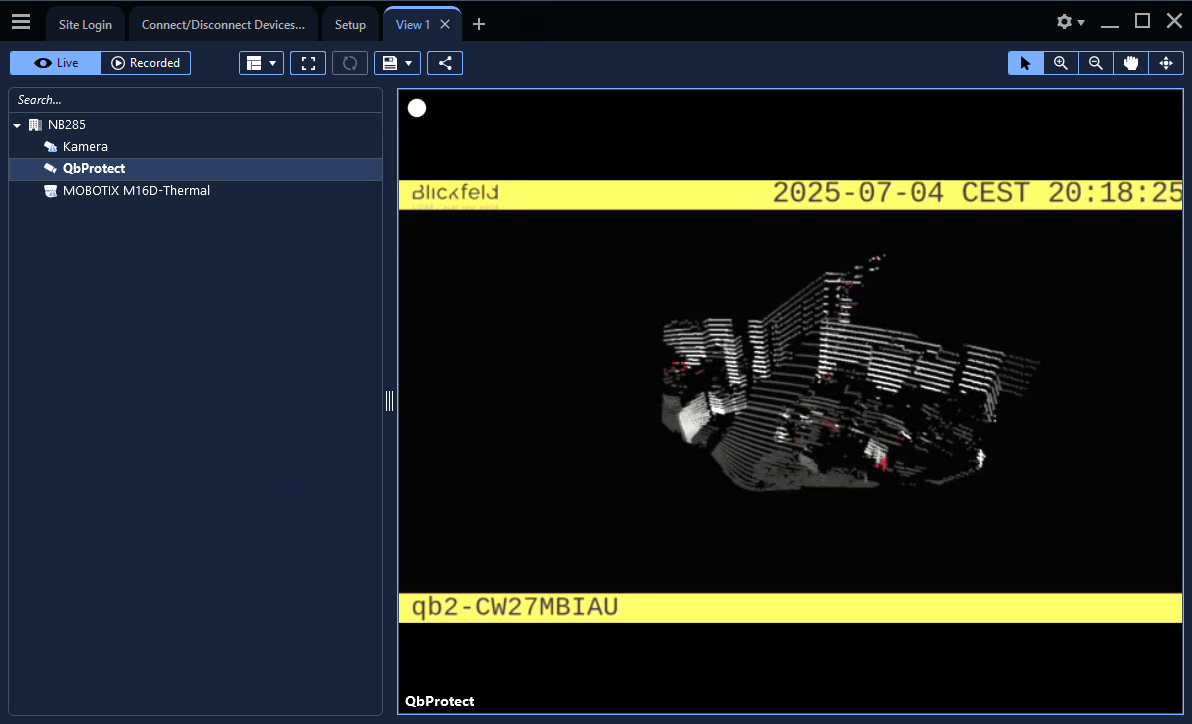 Figure 6. Adding QbProtect into Avigilon Unity: live video stream
The live video stream of the QbProtect point cloud can be accessed and observed in Avigilon Unity after succesfully completing the required steps above.
Events
The example below shows how QbProtect events can be used to trigger alarms in Avigilon Unity VMS. After QbProtect has been added to the Avigilon Unity, it can be configured to use QbProtect events for alarm generation. In this example, the QbProtect TamperingMoved event is used to exemplify the configuration process.
Configure Events Handling
The events configuration procedure includes the following steps:
-
Launch Avigilon Unity Client and connect to the active Avigilon Unity Server instance (optional)
-
Navigate to
Setuptab → Click on the added QbProtect → ClickONVIF Event Subscription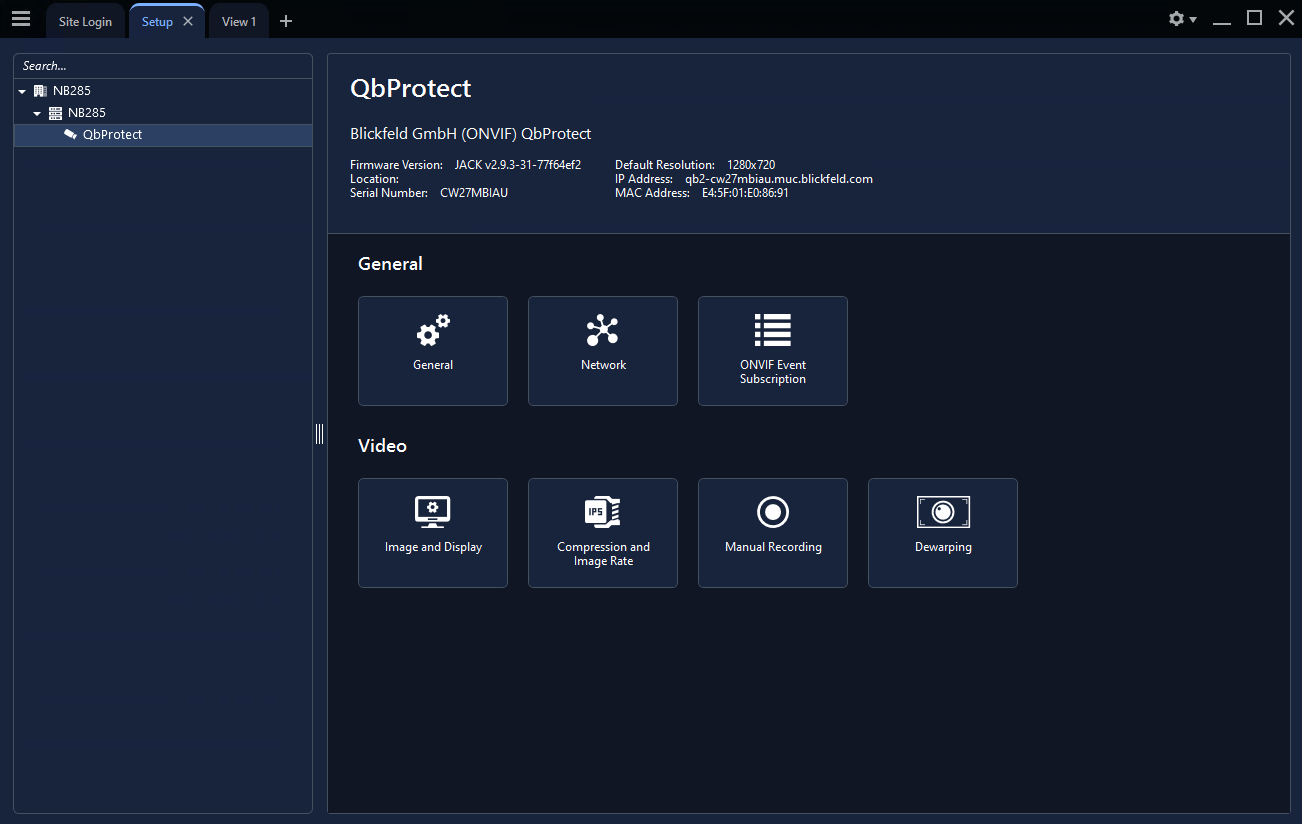 Figure 7. QbProtect events: ONVIF events configuration in Avigilon Unity
 -
Click
Add→ The drop-down menu will show the list of exposed ONVIF events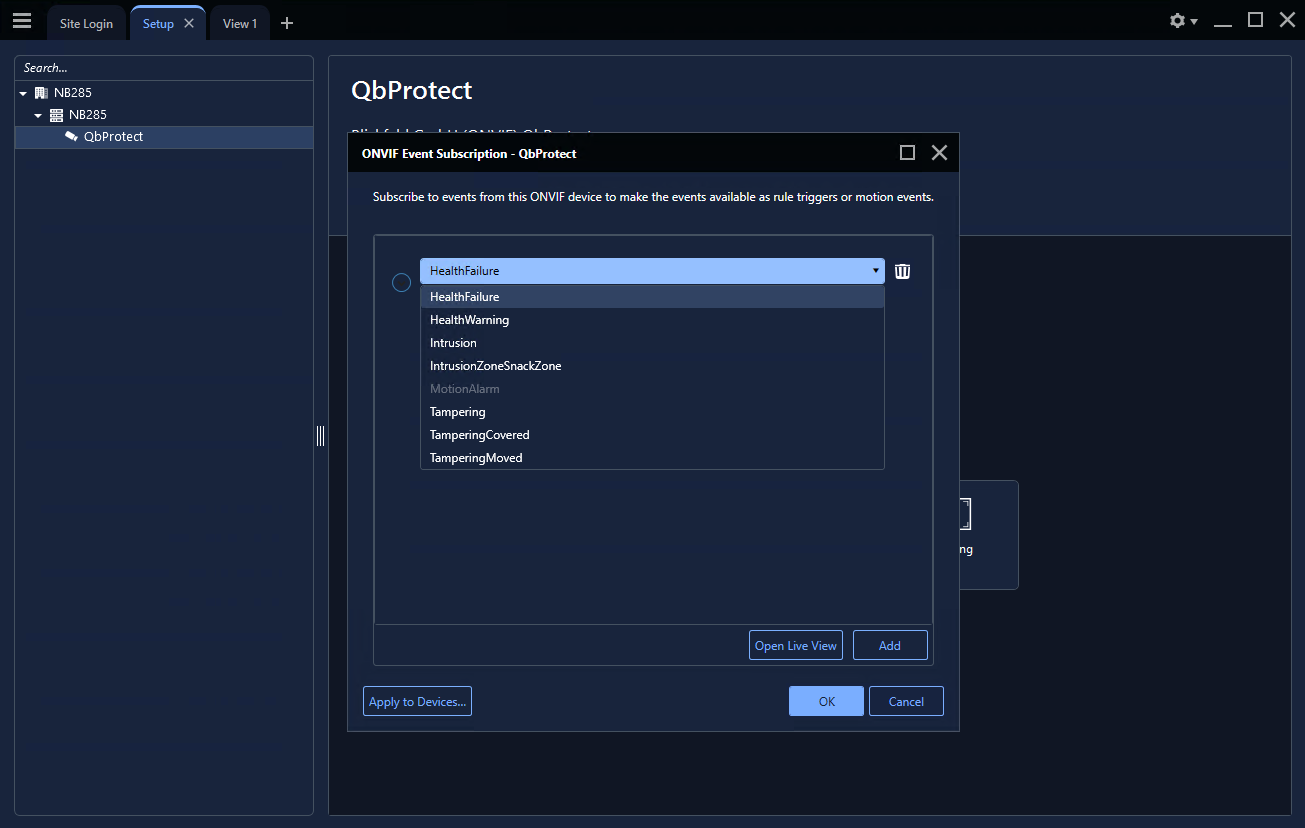 Figure 8. QbProtect events: exposed ONVIF events
 -
Select
TamperingMovedevent from the event list → ClickOK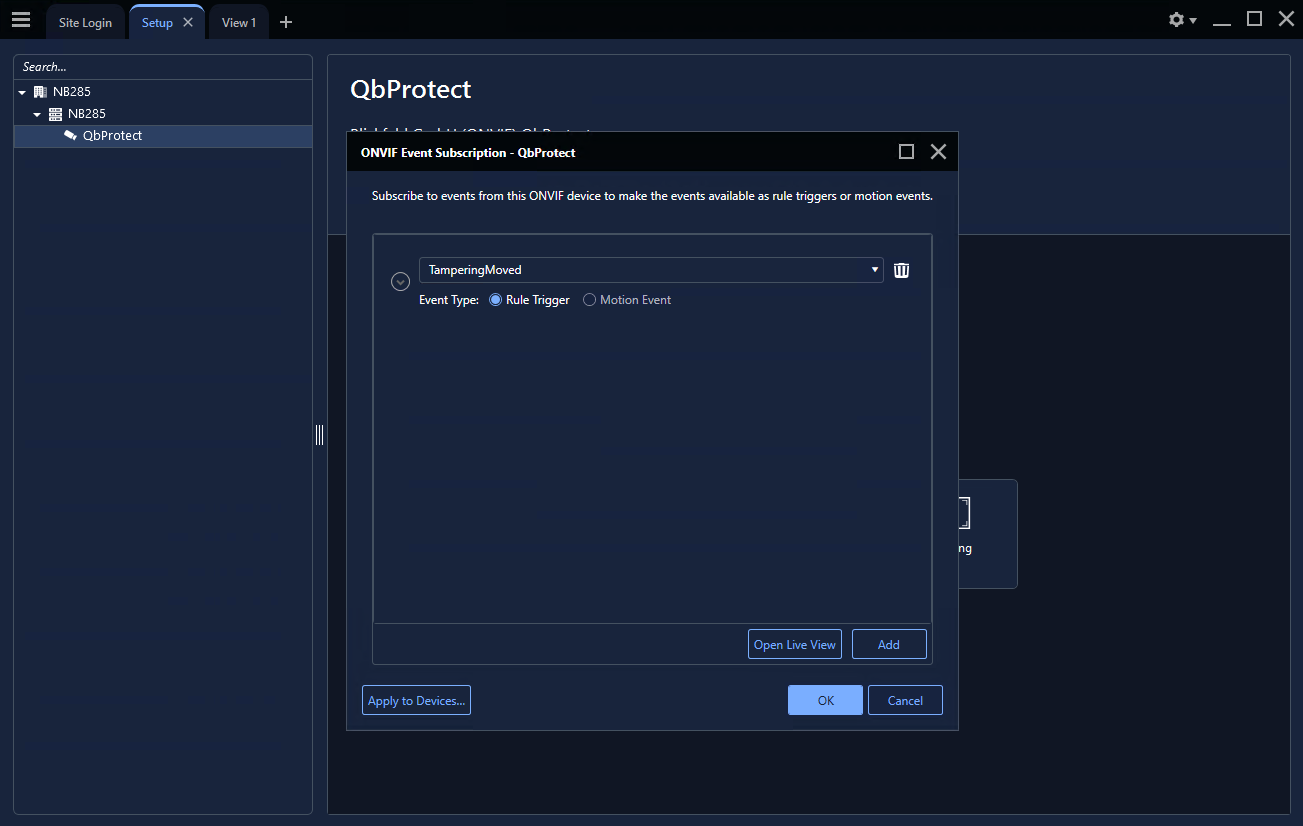 Figure 9. QbProtect events: subscription to Tampering Moved Event
|
Events originating from dynamic event sources (e.g., intrusion events from a particular security zone) have to be correctly exposed to the VMS each time when a new zone configuration is introduced via WebGUI. Please re-add QbProtect in Avigilon Unity Client to re-expose new events from dynamic sources. |
Configure Alarm Rule Chain
The Avigilon Unity alarm rule chain consists of event source (ONVIF Event Started and ONVIF Event Ended hooks) and event action. It allows to map a dedicated action (e.g., a particular alarm, recording of the video stream.etc) to the event of the particular type (e.g., motion, zone intrusion).
The alarm rule chain configuration procedure includes the following steps:
-
Navigate to
Site Setuptab → Select the active server instance → ClickAlarms→ ClickAdd -
Set Alarm Trigger Source to
External Software Event→ ClickNext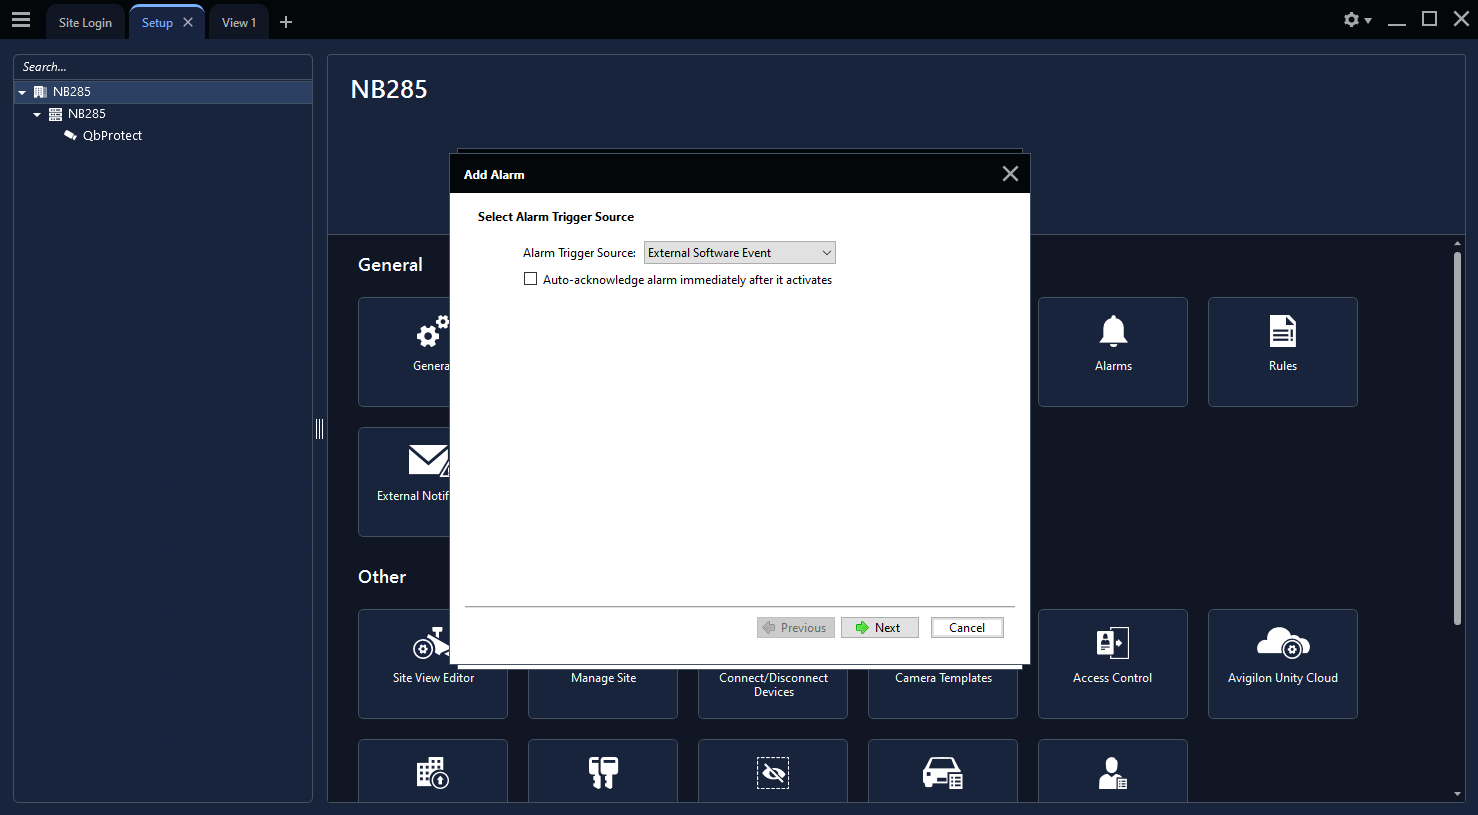 Figure 10. Avigilon Unity alarm configuration: trigger source
 -
Select
QbProtectas a linked device → ClickNext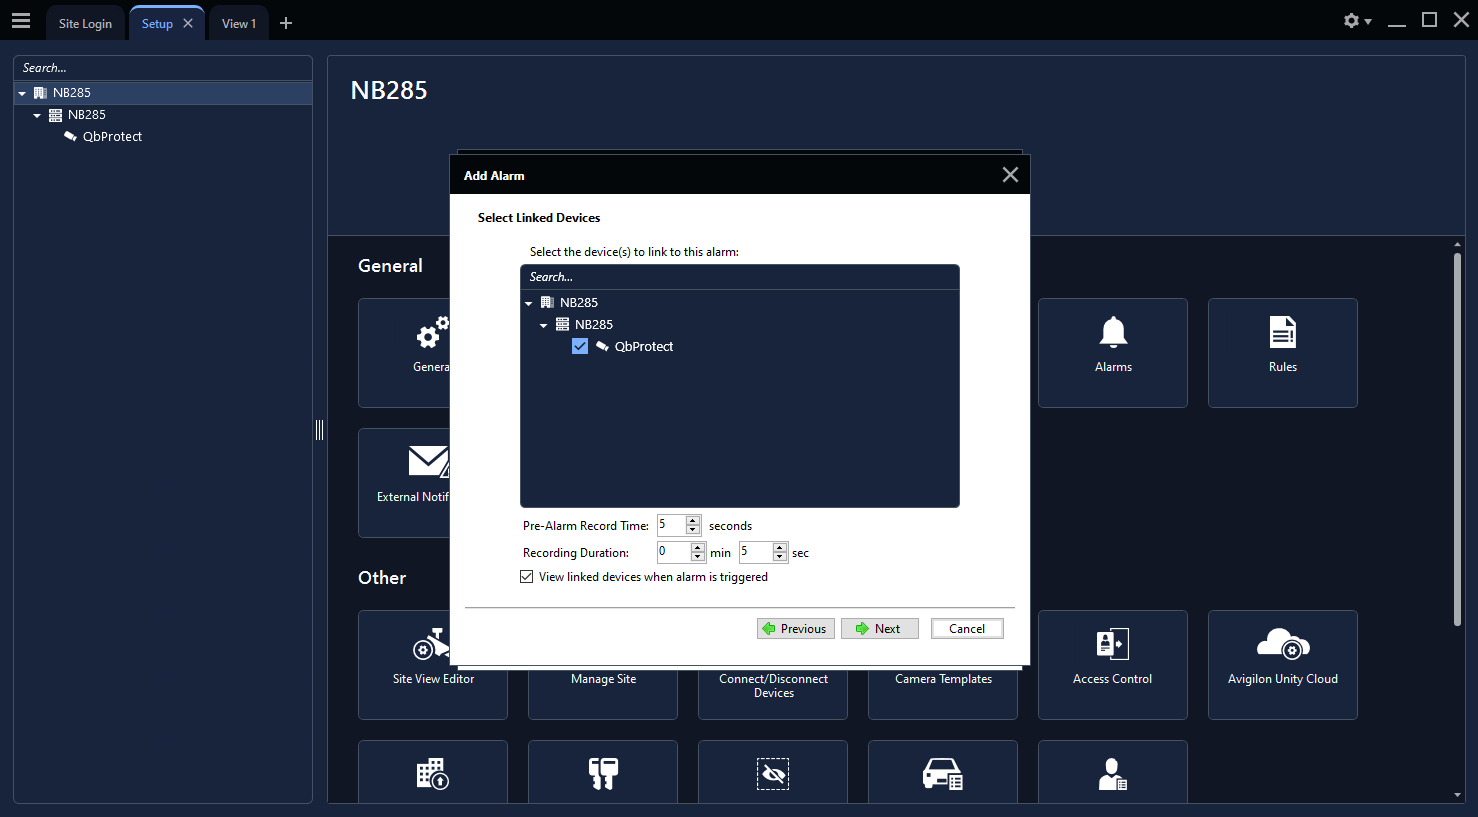 Figure 11. Avigilon Unity alarm configuration: linked device
 -
Select users for being
Alarm Recipients→ ClickNext→ SkipAlarm Acknowledgment Action→ ClickNext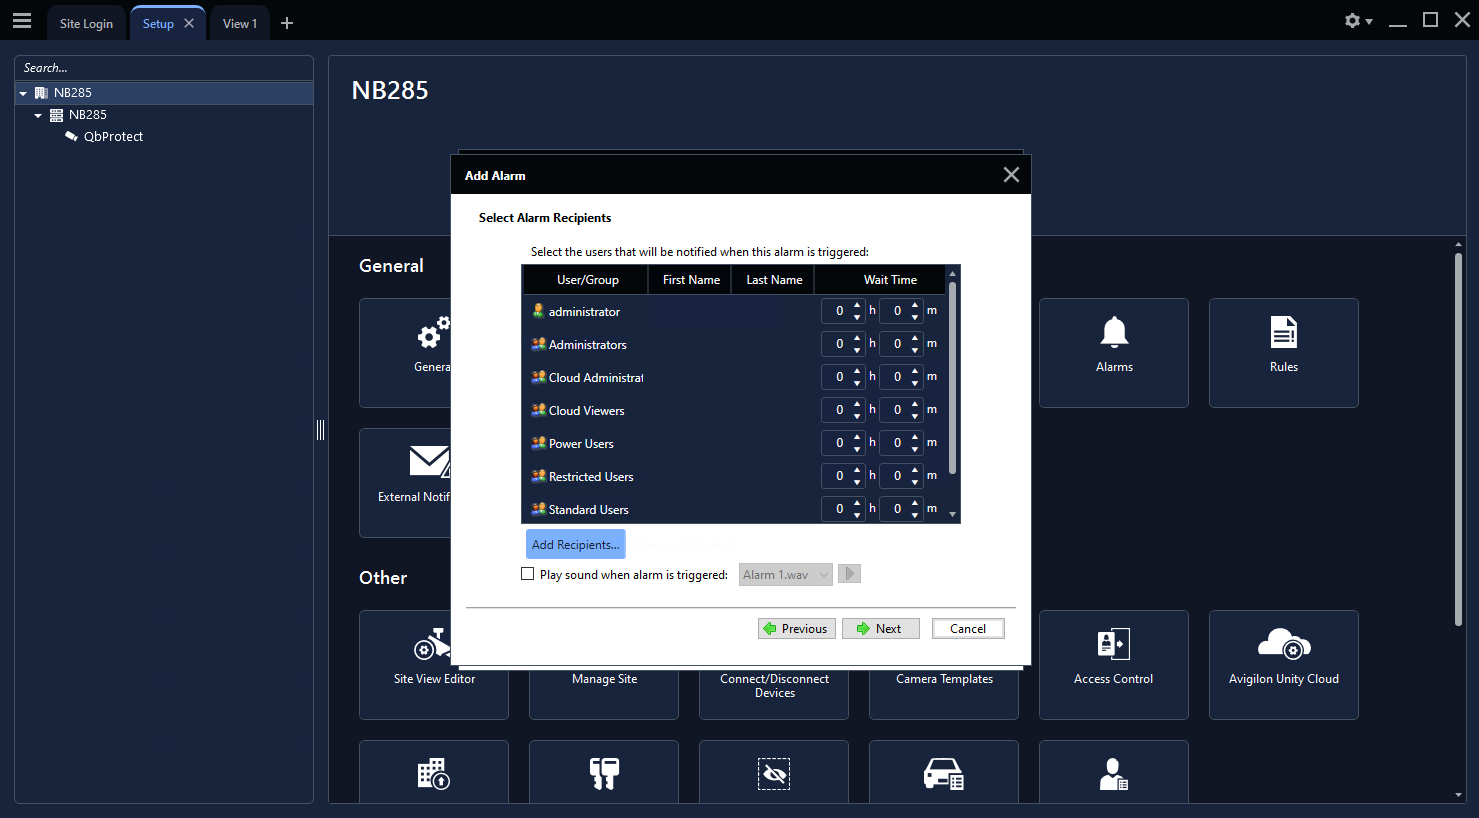 Figure 12. Avigilon Unity alarm configuration: alarm recipients
 -
Give a meaningful name to the configured alarm, e.g.
Alarm Moved→ ClickFinish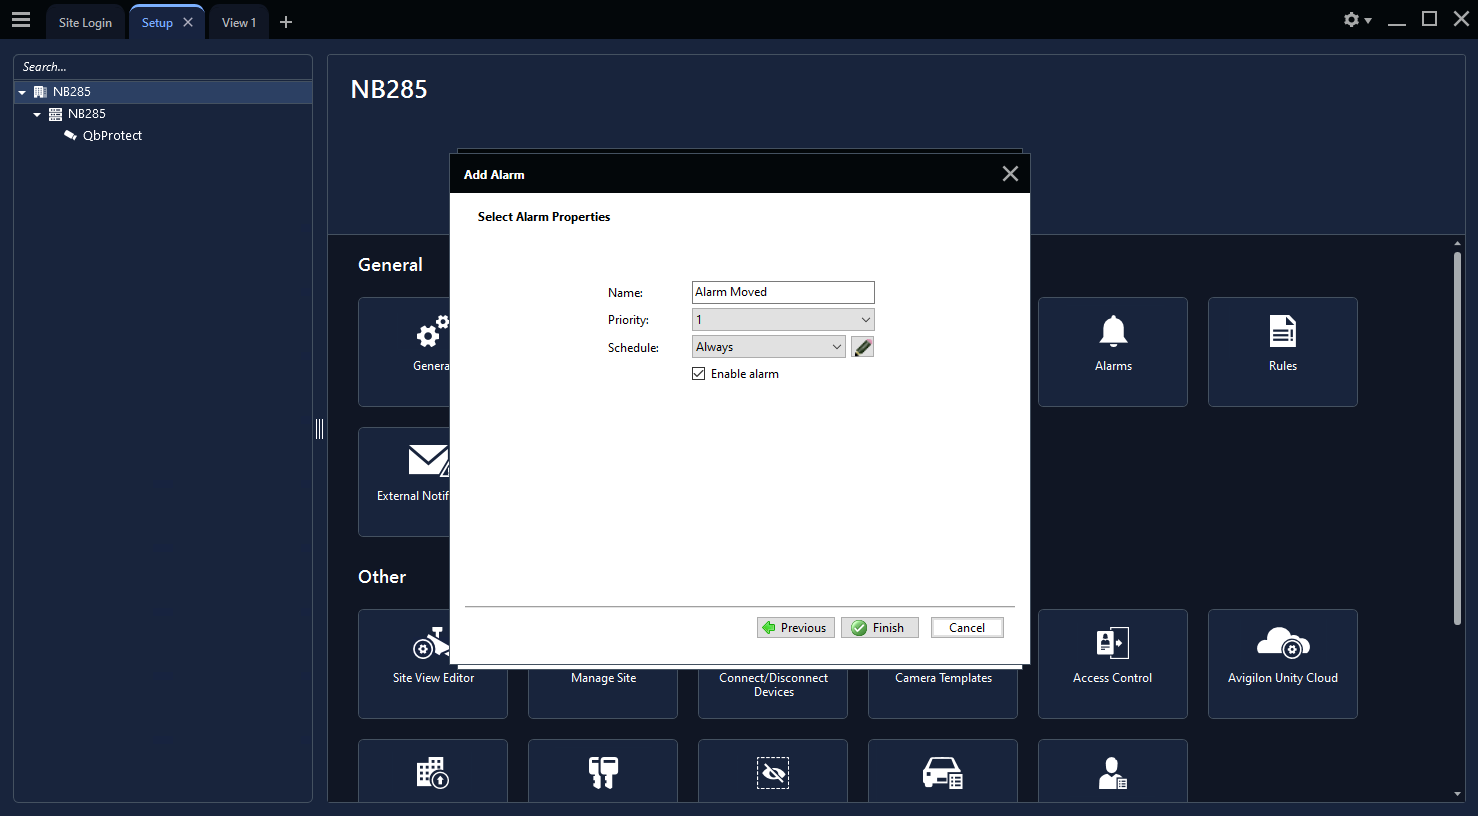 Figure 13. Avigilon Unity alarm configuration: alarm name
 -
Navigate to
Site Setuptab → Select the active server instance → ClickRules→ ClickAdd -
Toggle the
ONVIF event startedunderDevice Eventssubsection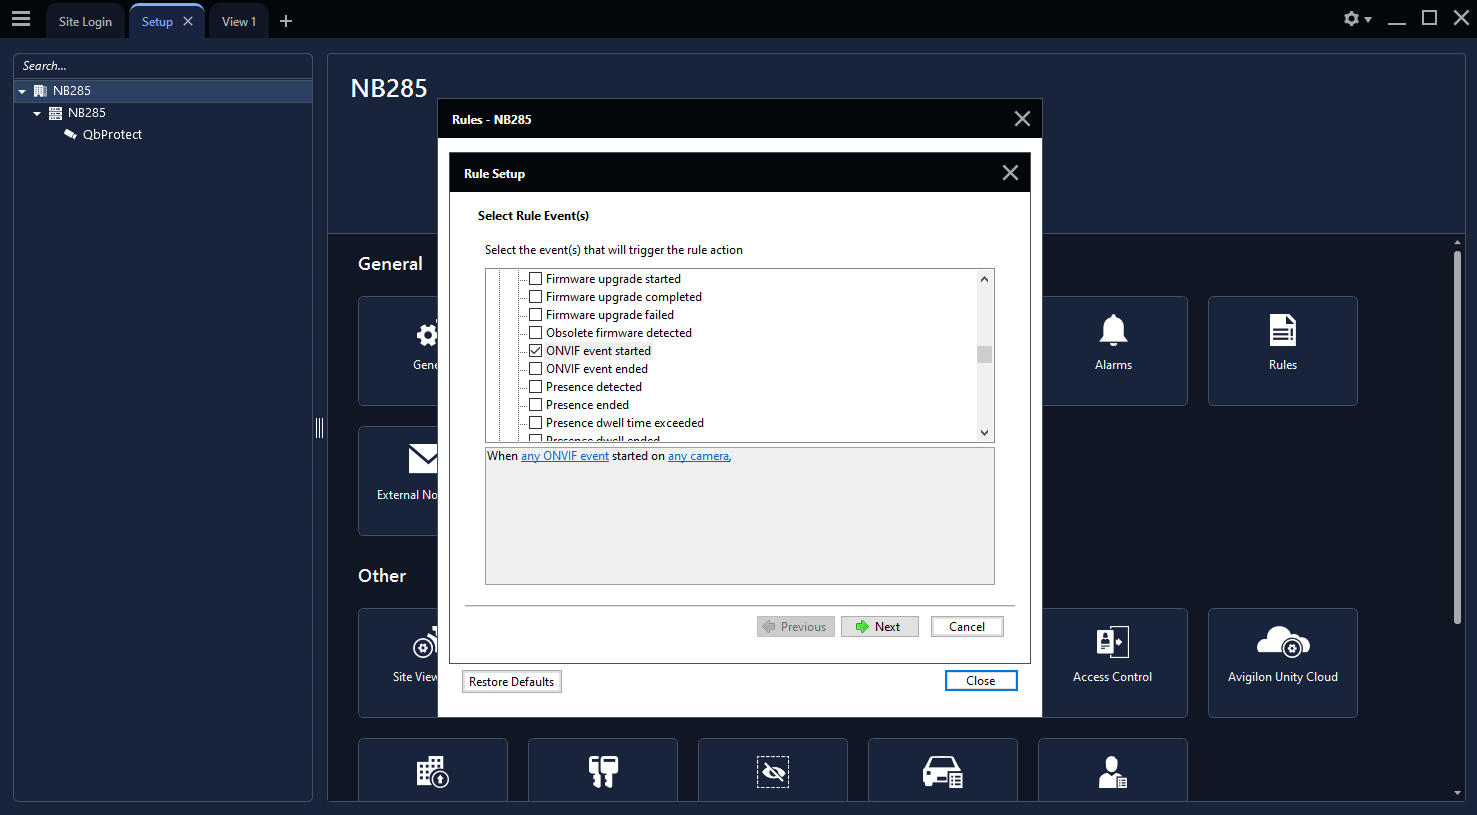 Figure 14. Avigilon Unity rule chain configuration: general
 -
Click
any ONVIF event→ Select previously subscribedTamperingMovedas an event source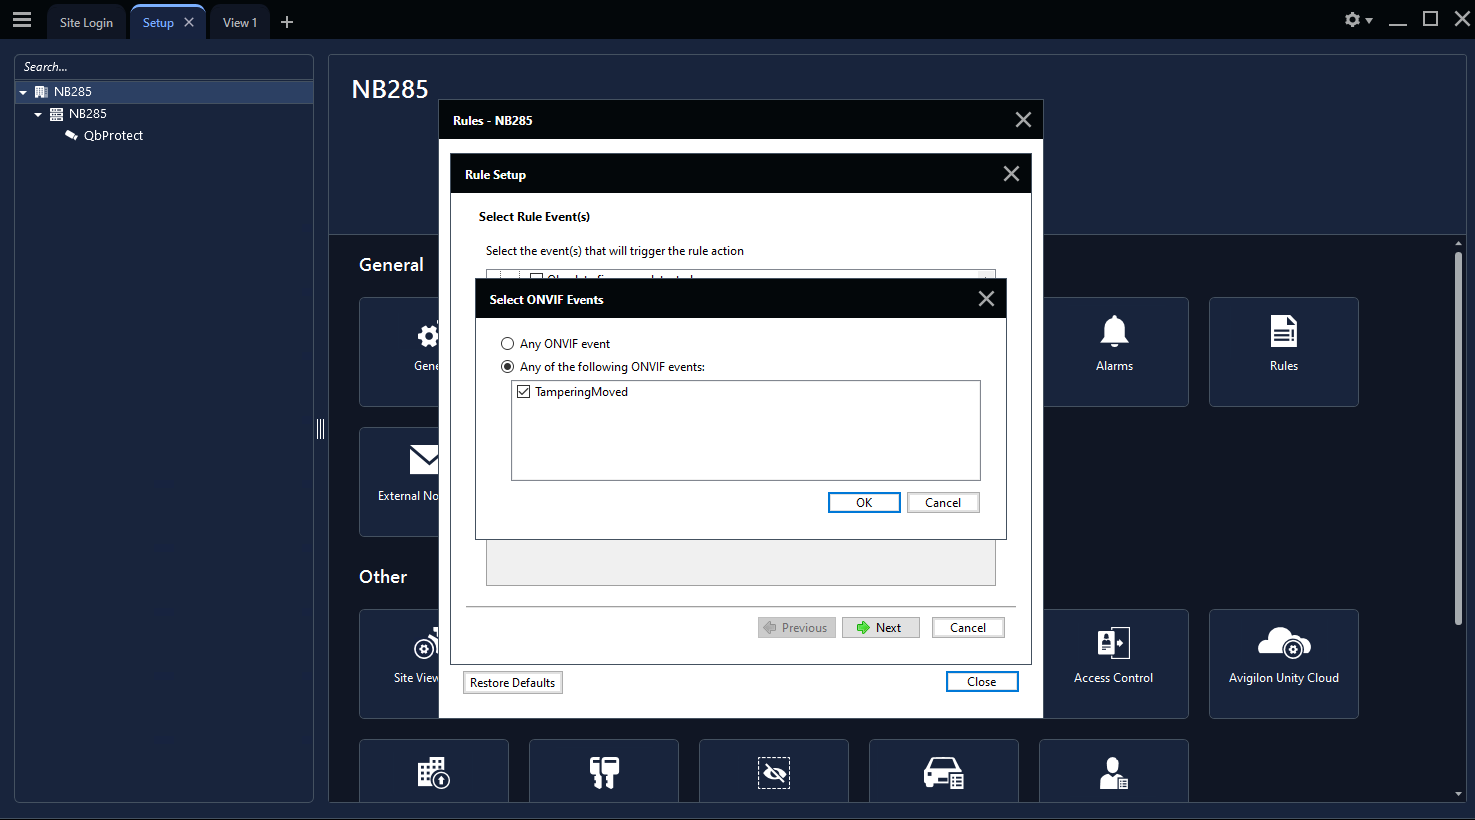 Figure 15. Avigilon Unity rule chain configuration: event source
 -
Click
any Camera→ SelectQbProtectas a camera source → ClickNext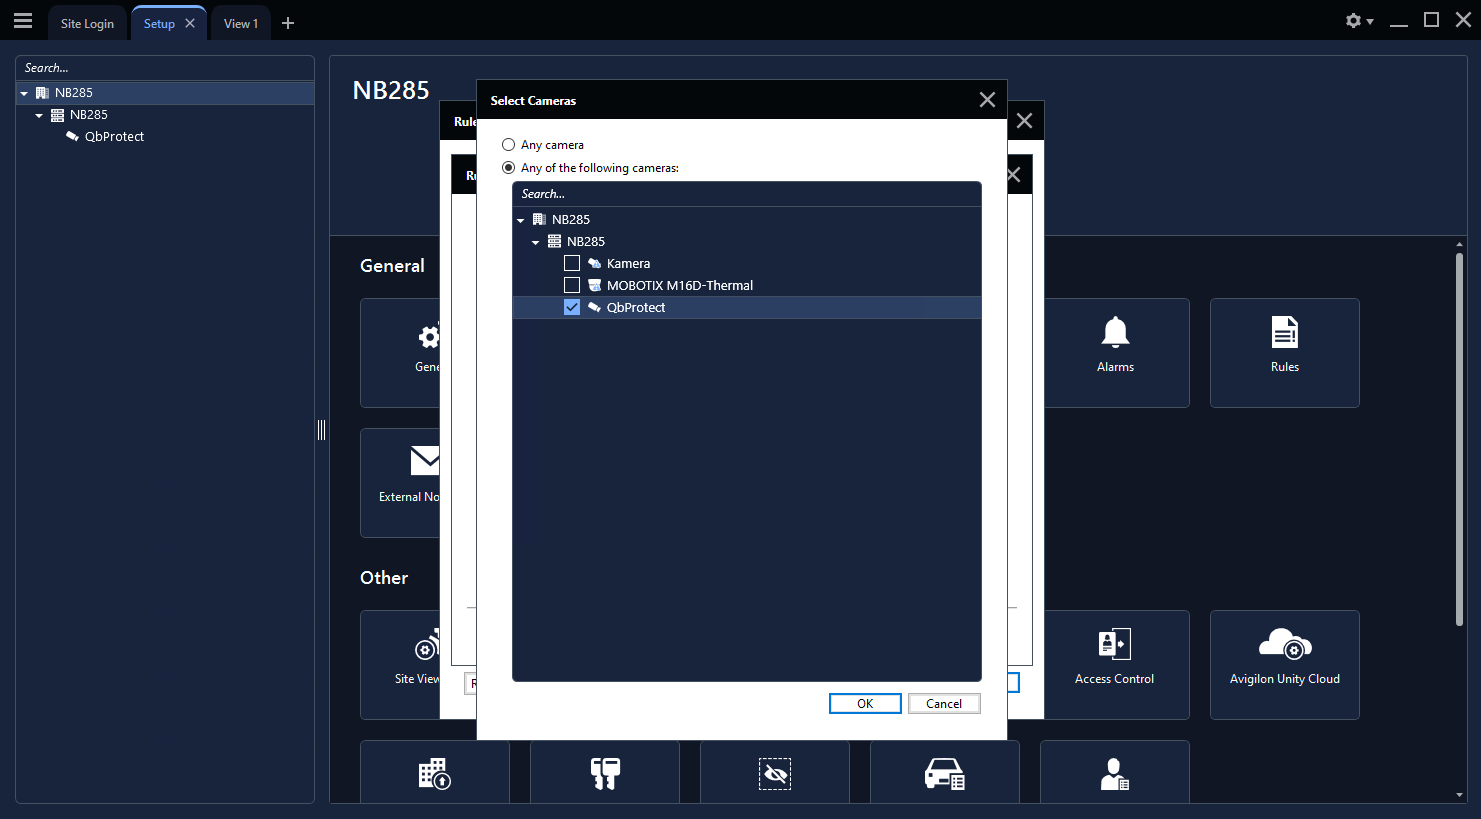 Figure 16. Avigilon Unity rule chain configuration: camera source
 -
Toggle
Display on-screen messageunderUser Notification Actionssubsection -
Toggle
Trigger an alarmunderAlarm Actions→ Clickan alarm→ Select previosly configured alarmAlarm Moved→ ClickNext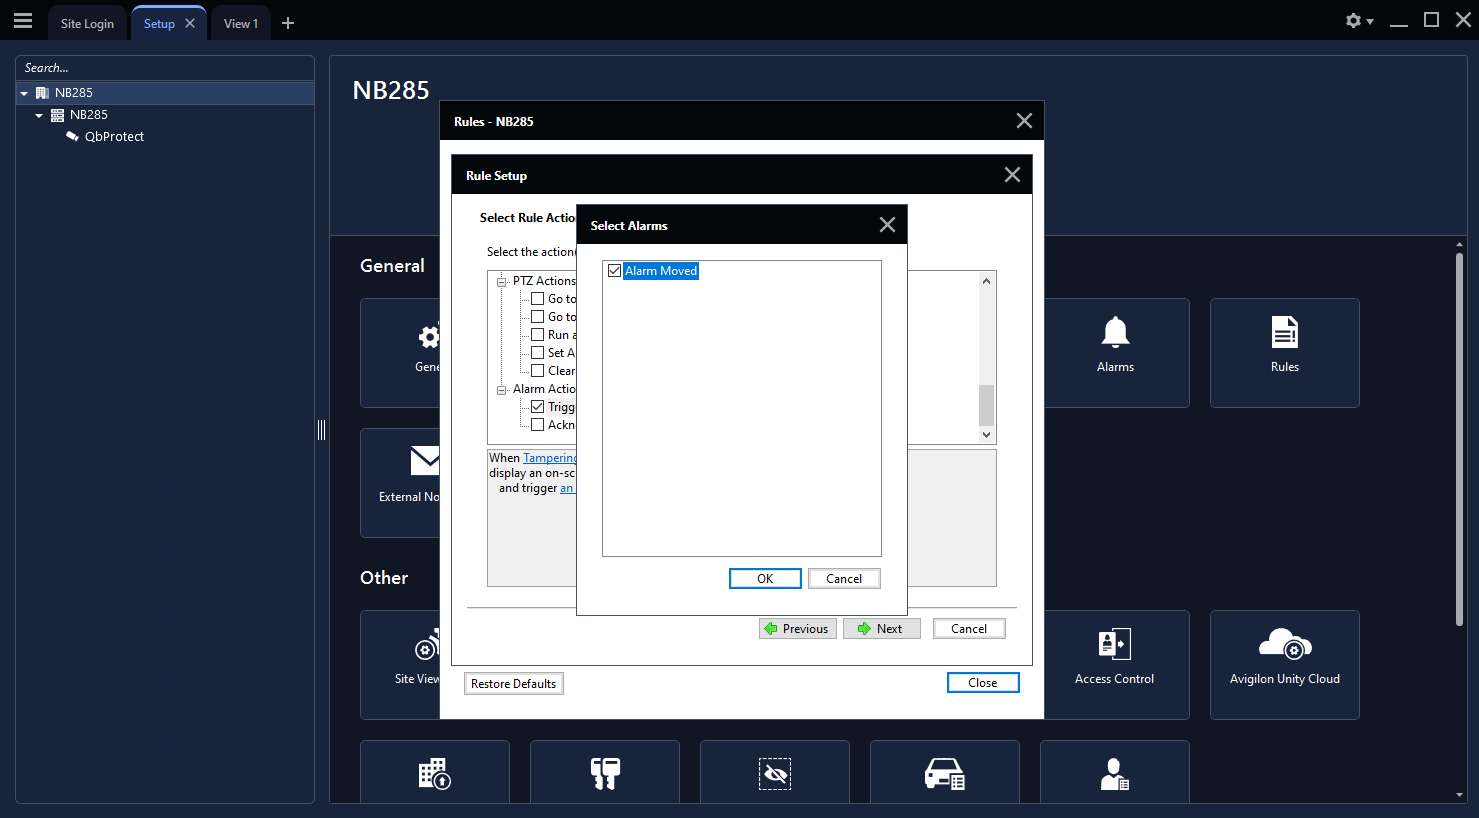 Figure 17. Avigilon Unity rule chain configuration: display message and alarm actions
 -
Click
Nextagain (skipping theDigital inputconfiguration) → Give a meaningful name to this rule chain, e.g.Rule Moved→ Set schedule toAlways→ ToggleRule is enabled→ ClickFinish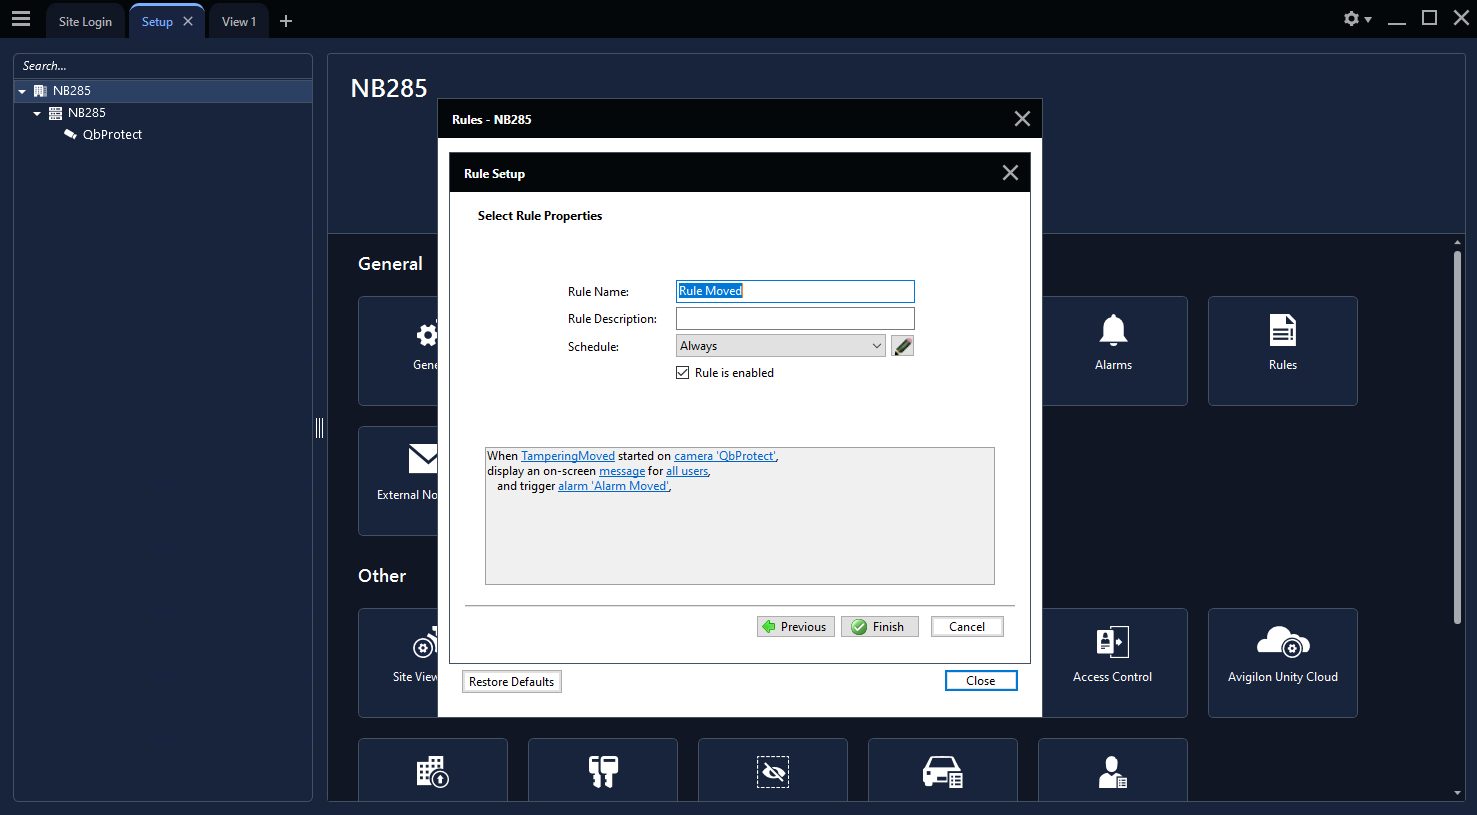 Figure 18. Avigilon Unity rule chain configuration: rule chain name
 -
Navigate to
Viewtab. When the QbProtect is moved, theTamperingMovedONVIF event and the configured alarm rule chain will be generating an alarm as shown in the Figure below.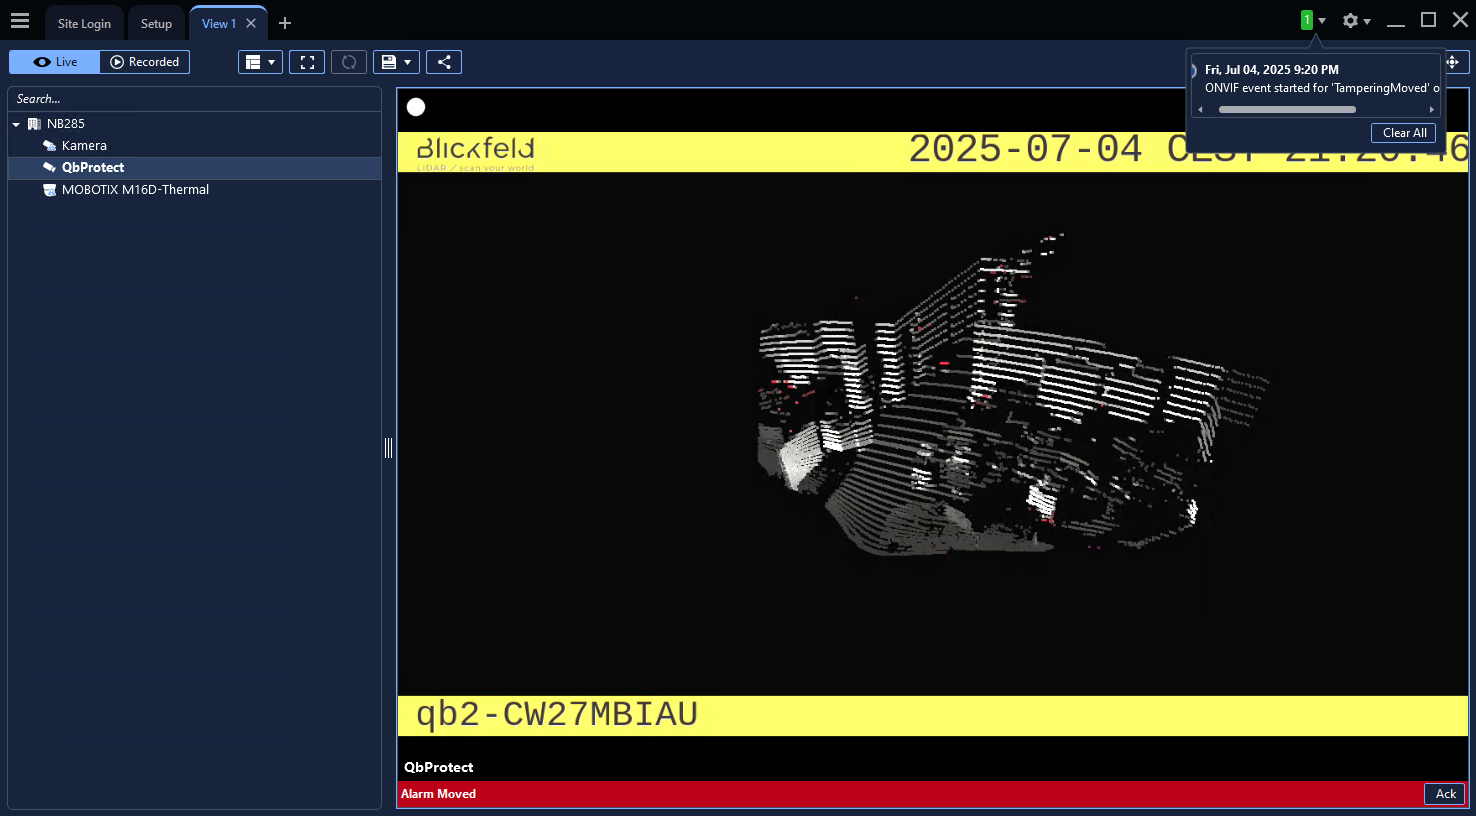 Figure 19. Avigilon Unity Client: the tampering movement of QbProtect triggers the alarm