Hexagon
This section provides information on how to integrate QbProtect with Hexagon dC3. Please refer to the ONVIF section beforehand for general information on using ONVIF with QbProtect.
|
The following Hexagon dC3 components have been used in the examples below:
|
Add Device
The HxGN dC3 Video Client is used to add QbProtect into HxGN dC3 VMS.
The procedure includes the following steps:
-
Launch the HxGN dC3 Video Client and connect to the active HxGN dC3 server instance
-
Navigate to
Configuration Modetab → ClickCreate camera→ Give a distinguishable name to the QbProtect device, e.g.QbProtect -
Set the
ManufacturertoOnvifTab → SetTypetoONVIF Smart Driver -
Click
Use Authorizationtoggle → Enter the FQDN or IP of QbProtect in theHostnamefield andUsername/Passwordin the corresponding credential fields.Please refer to the User Authentication (ONVIF/RTSP) subsection to find out how to obtain valid ONVIF credentials required for QbProtect VMS integrations.
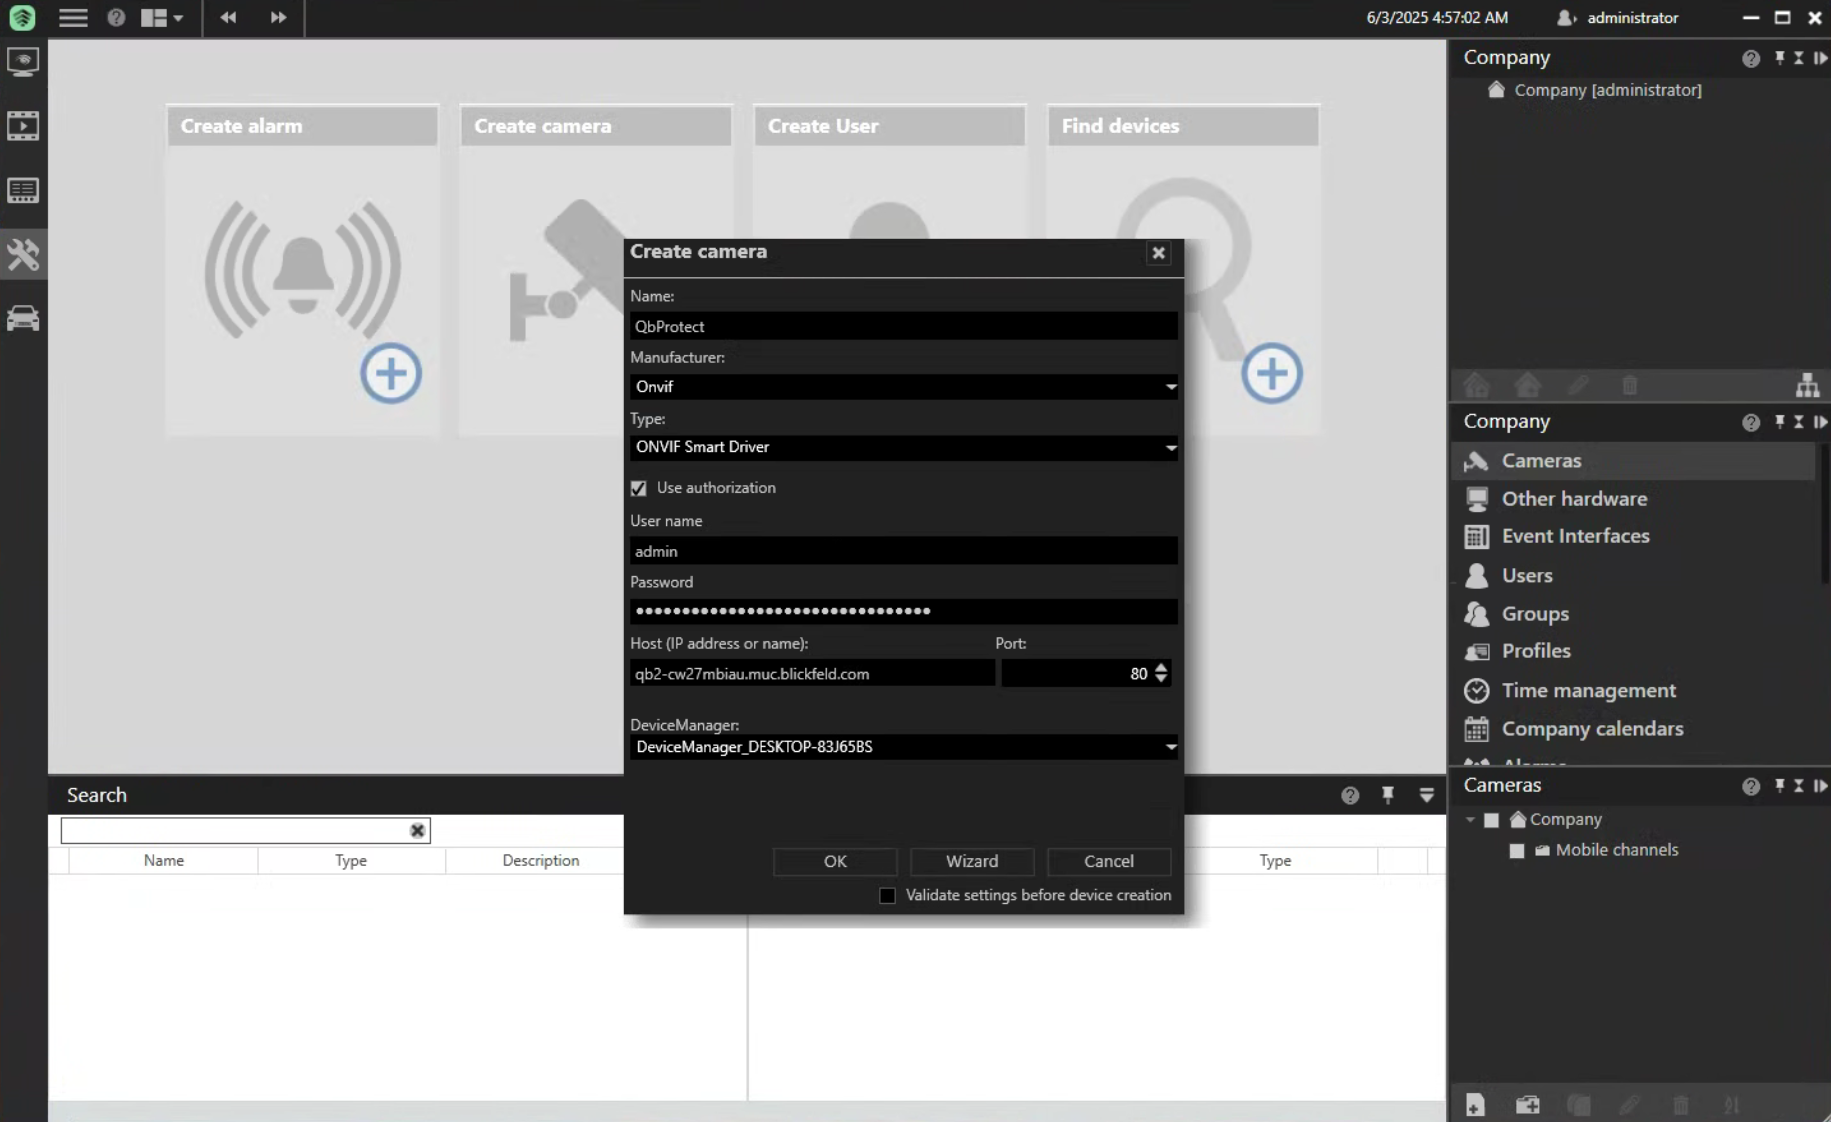 Figure 1. Adding QbProtect into HxGN dC3: camera creation
 -
Untoggle 'Validate Settings before device creation' → Click 'Ok' → Click 'Apply'
-
General Information about the added QbProtect should be depicted in section
Encoder/camera→ 'General'. Device should also pop up in the available 'Cameras' section.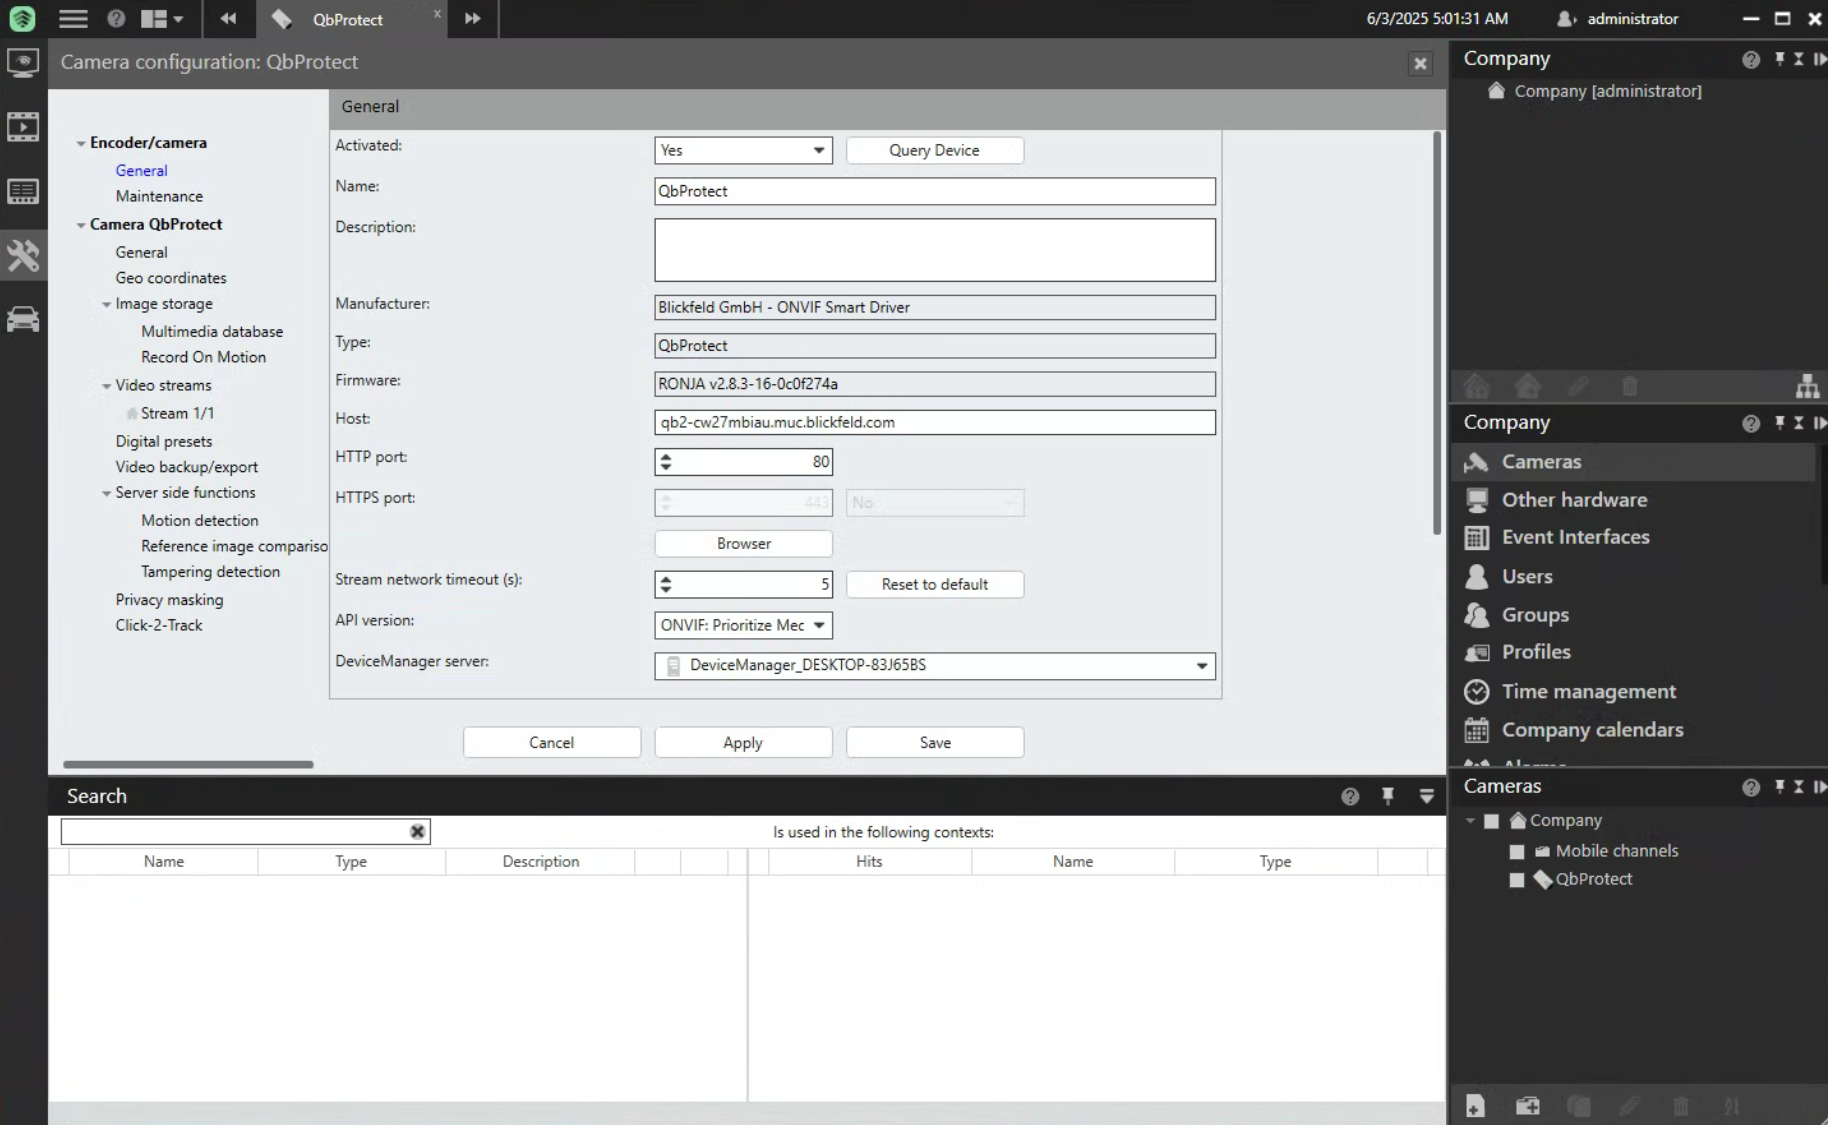 Figure 2. Adding QbProtect into HxGN dC3: general device information
 -
The live preview of the point cloud should be available in the
Surveillance Modetab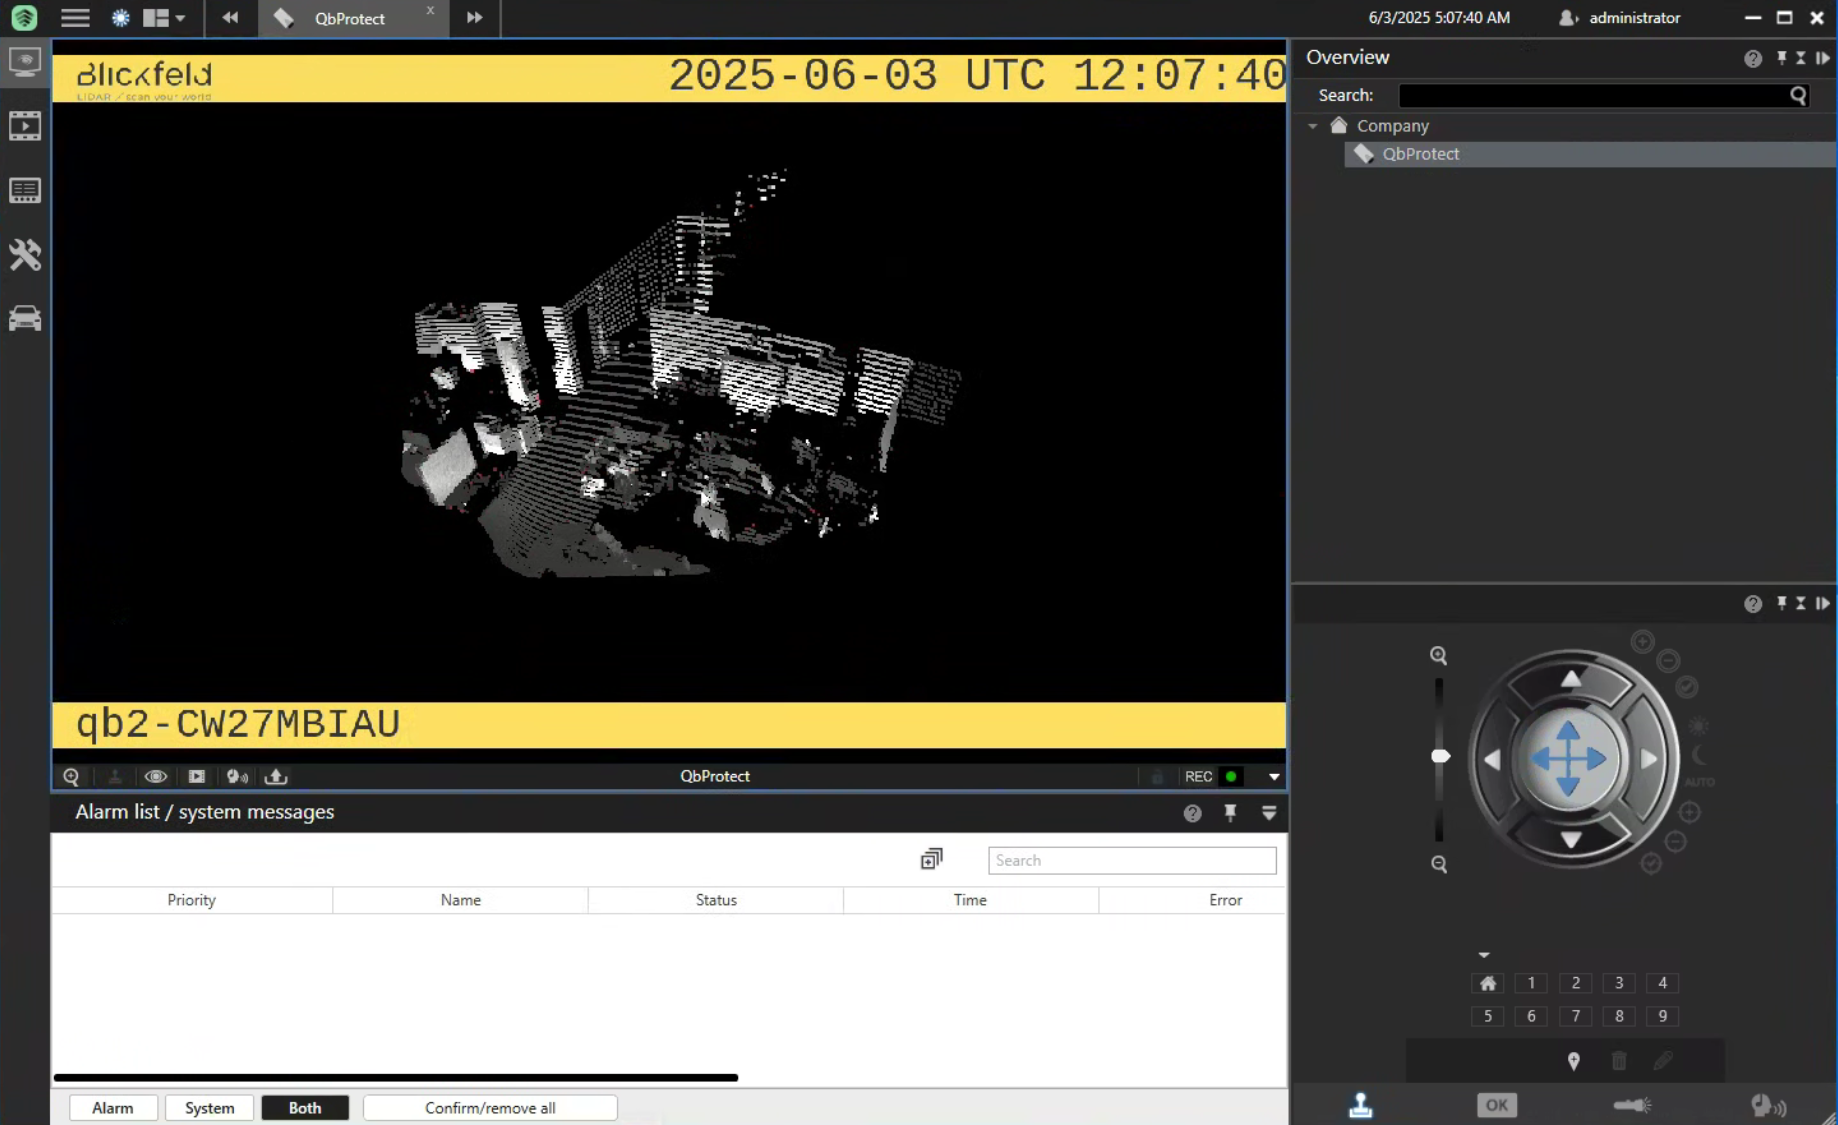 Figure 3. Adding QbProtect into HxGN dC3: live video stream
The live video stream of the QbProtect point cloud can be accessed and observed in HxGN dC3 after succesfully completing the required steps above.
Events
The example below shows how QbProtect events can be used to trigger alarms in HxGN dC3 VMS. After QbProtect has been added to the HxGN dC3, it can be configured to use QbProtect events for alarm generation. In this example, the QbProtect tampering movement event is used to exemplify the configuration process.
Configure Events Handling
The events configuration procedure includes the following steps:
-
Launch HxGN dC3 Video Client and connect to the active HxGN dC3 Server instance (optional)
-
Navigate to
Configuration Modetab → ClickCameras(right pane) → Click on the added QbProtect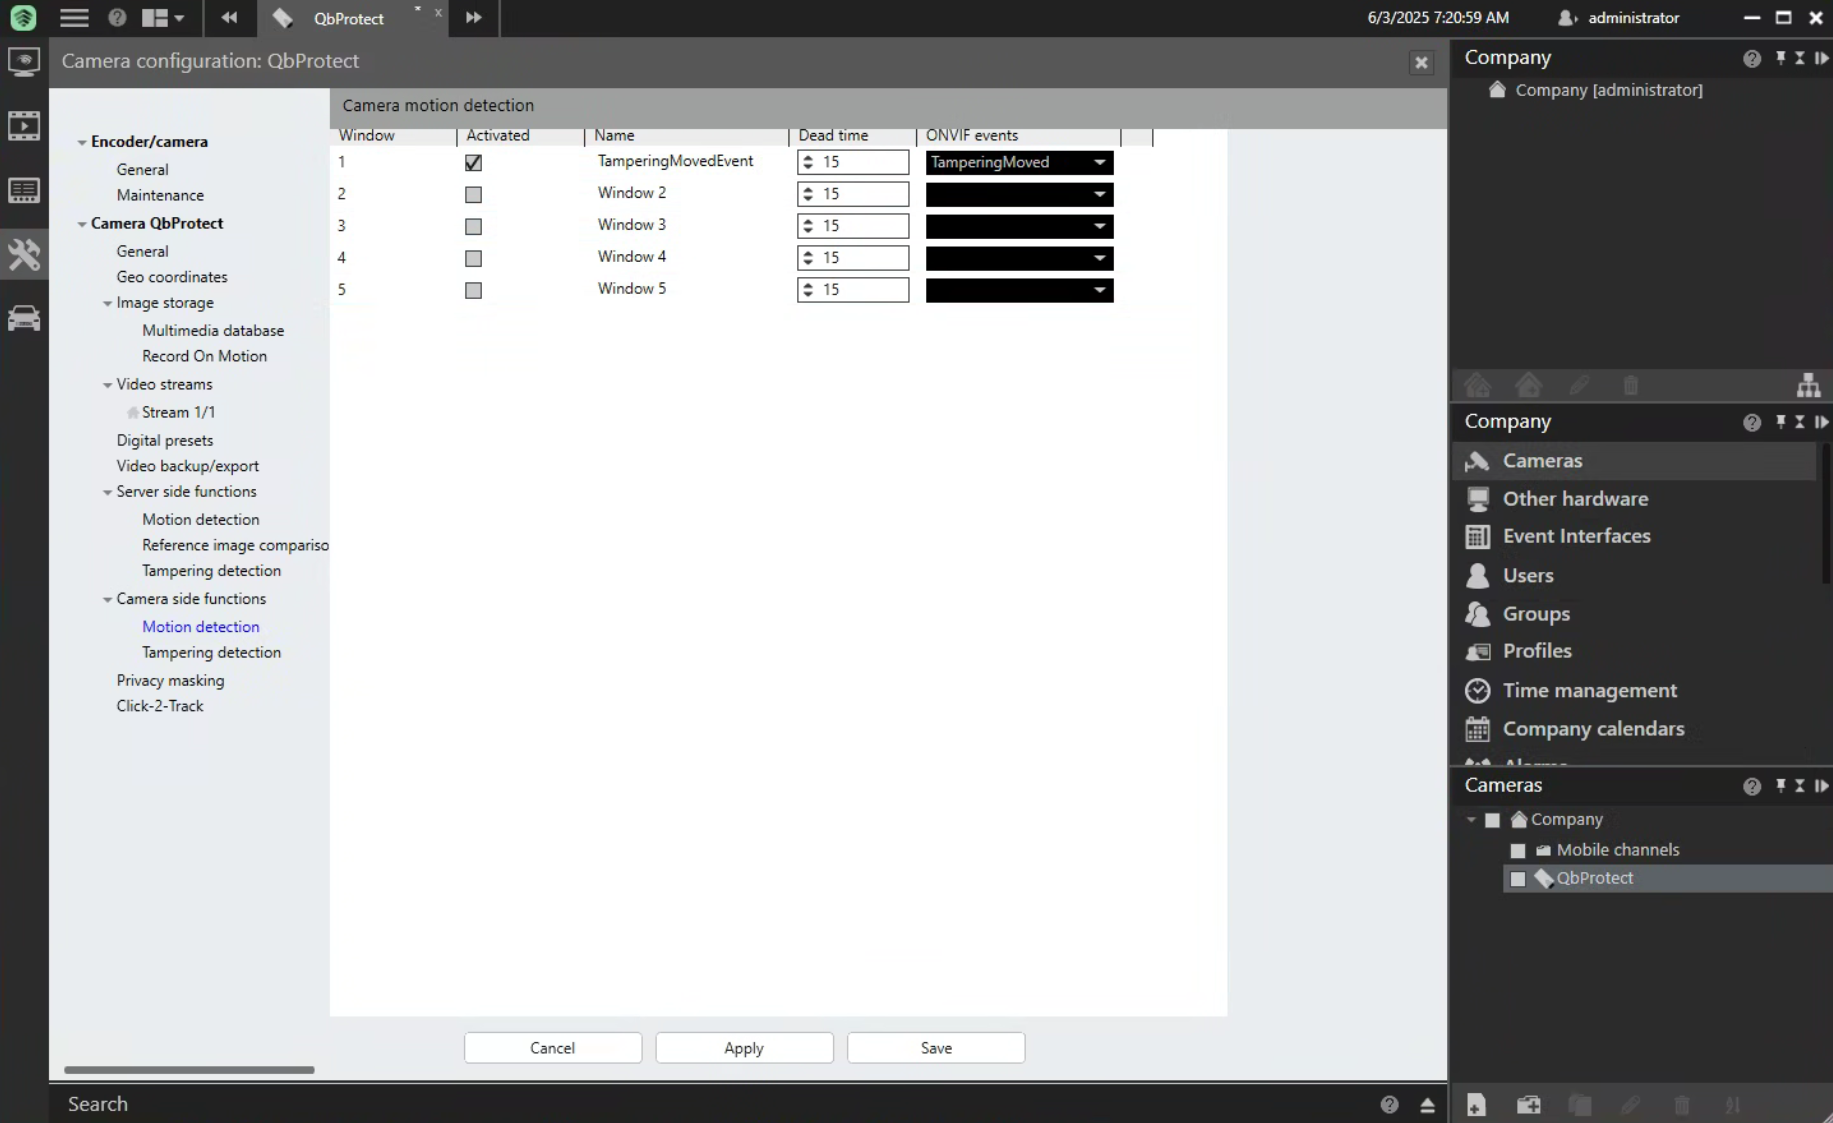 Figure 4. QbProtect events: ONVIF events configuration in HxGN dC3
 -
Navigate to
Camerasettings (left pane) →Camera side functions→Motion detection -
Select
TamperingMovedevent in theONVIF eventscolomn → Give a distinguishable name to the event, e.g.TamperingMovedEvent→ ClickApply`→ ClickSave -
Navigate to
Configuration Modetab → SelectCamerasinCompanypane → Click onQbProtectcamera → Navigate toGeneral→Encoder/camera→General→ ClickQuery Device
|
Events originating from dynamic event sources (e.g., intrusion events from a particular security zone) have to be correctly exposed to the VMS each time when a new zone configuration is introduced via WebGUI. Please either re-add the device to the VMS or navigate to |
Configure Alarm Rule Chain
The HxGN dC3 alarm rule chain consists of event source (Start and End hooks) and event action (Actions at start of alarm and Actions at end of alarm hooks). It allows to map a dedicated action (e.g., AlarmWatchDog, recording of the video stream.etc) to the event of the particular type (e.g., motion, zone intrusion).
The alarm rule chain configuration procedure includes the following steps:
-
Perform the ONVIF events configuration as shown in the subsection above
-
Navigate to
Configuration Modetab → ClickCreate Alarm→ Give a distinguishable name to the alarm, e.g.TamperingMovementAlarm→ ClickOk -
Navigate to
Generalof the opened alarm configuration window → ToggleActivated→ SelectValidityand color of the alarm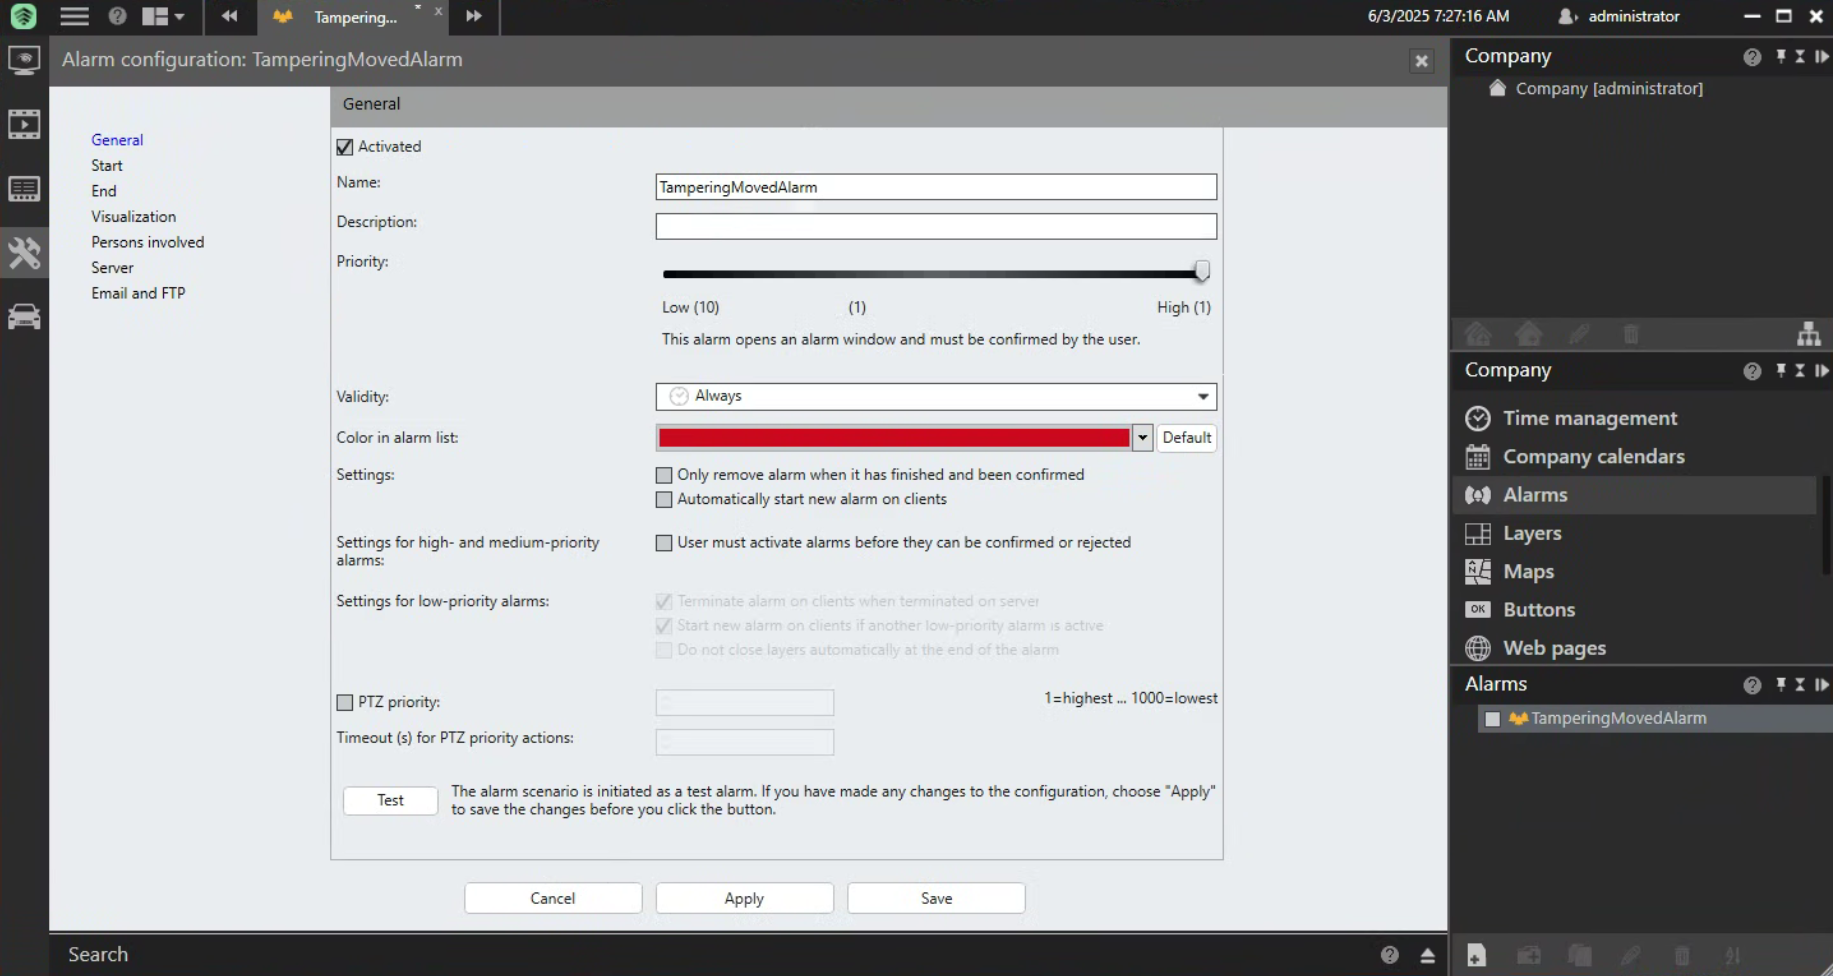 Figure 5. HxGN dC3 alarm rule chain: general configuration
 -
Navigate to
Start→Events that trigger the alarm→ 'Edit' →Company→QbProtect→ Toggle the previously configuredTamperingMovedEvent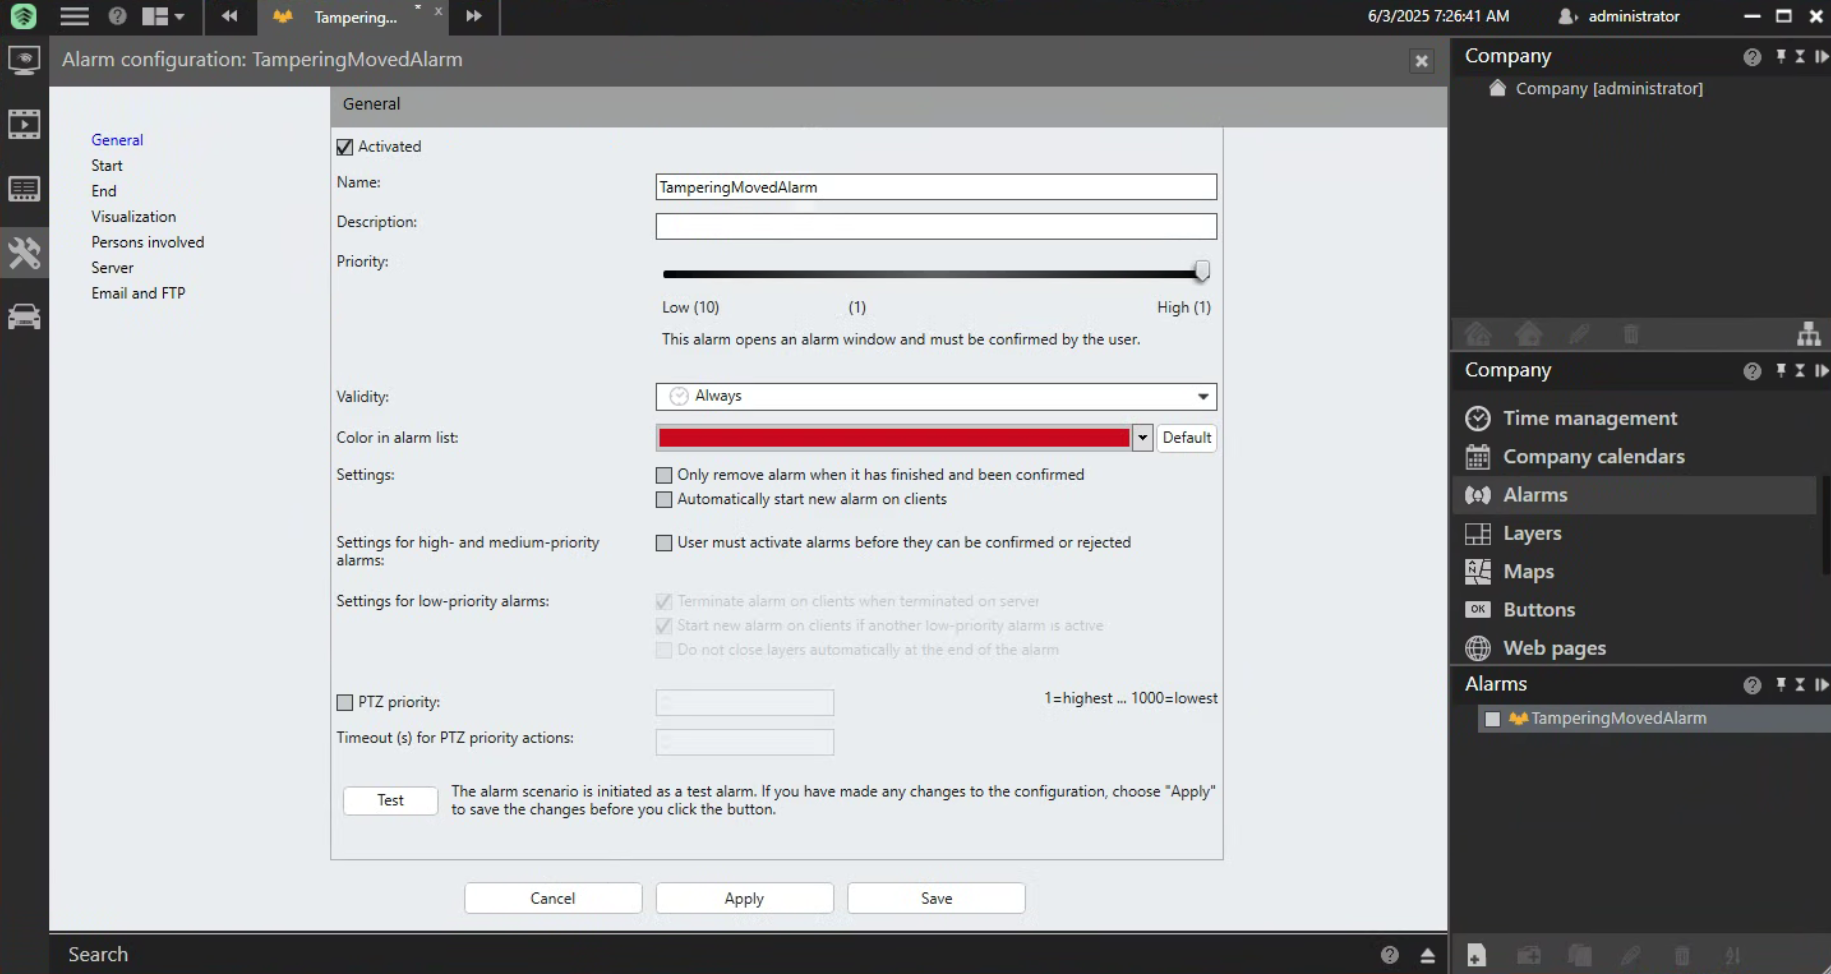 Figure 6. HxGN dC3 alarm rule chain: start hook configuration
 -
Navigate to
End→ Add termination condition (in this example is left empty) → SetMaximum server alarm duration(in this example is set to 2 seconds)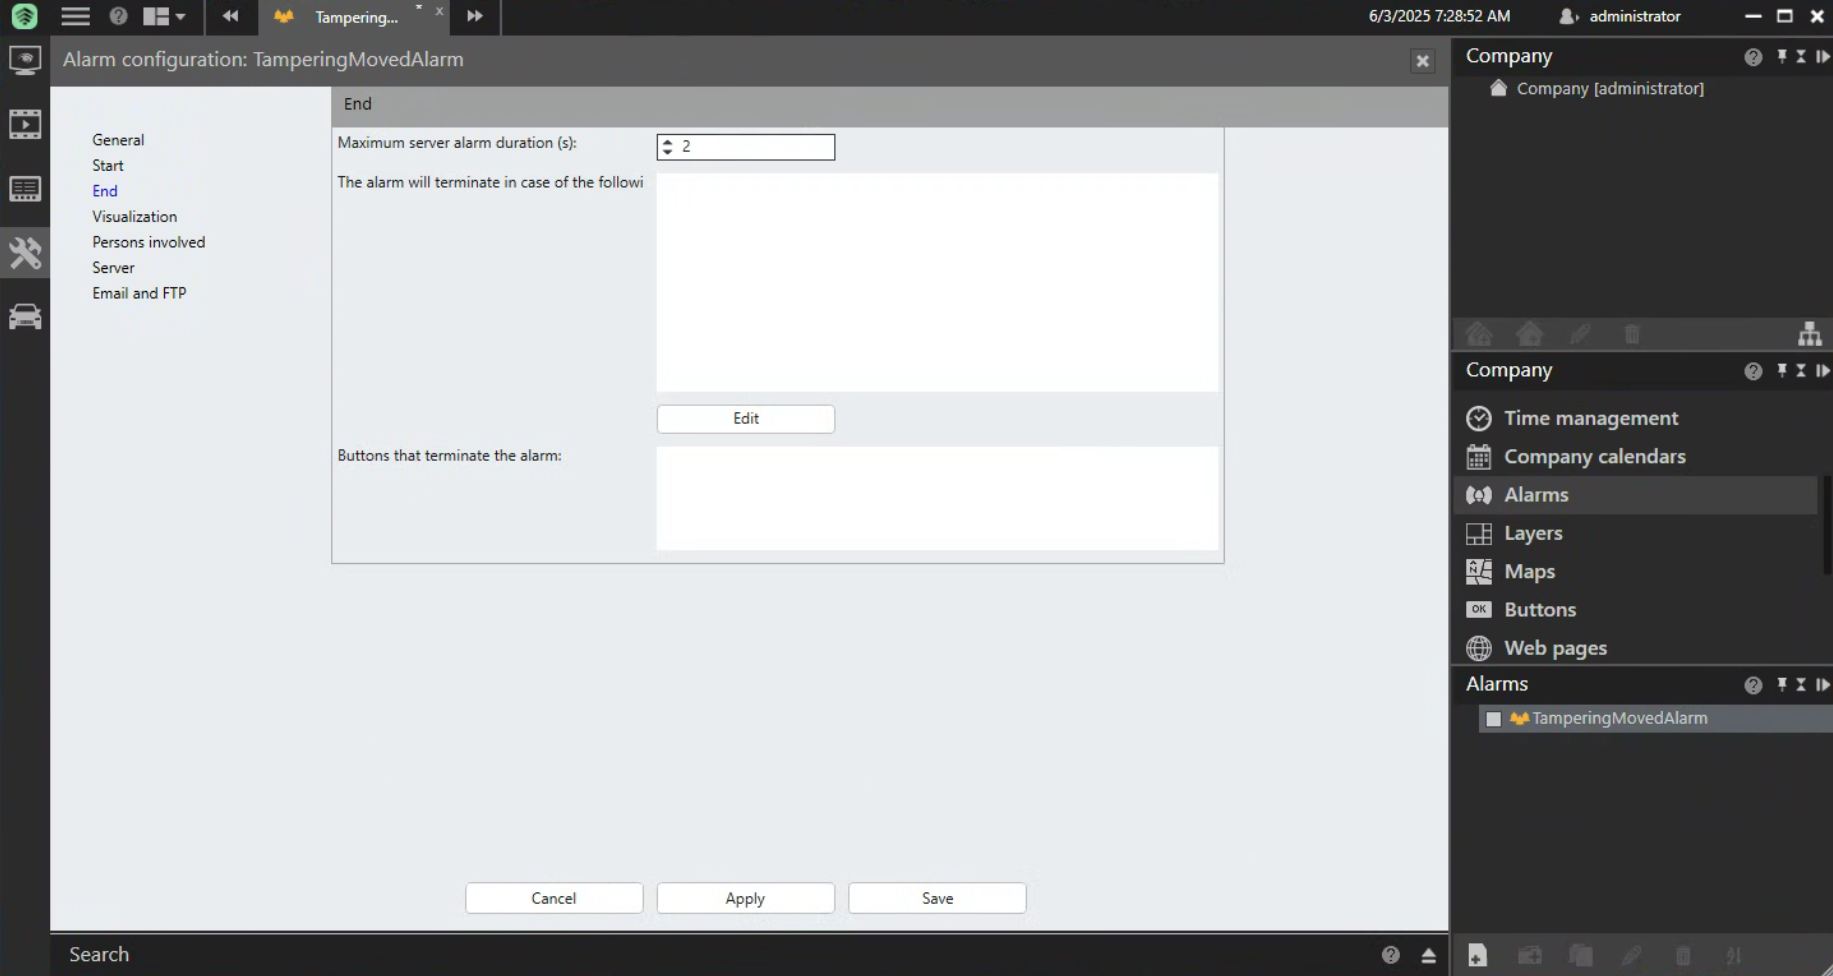 Figure 7. HxGN dC3 alarm rule chain: end hook configuration
 -
Navigate to
Visualization→ ToggleAlarm cameraandAlarm view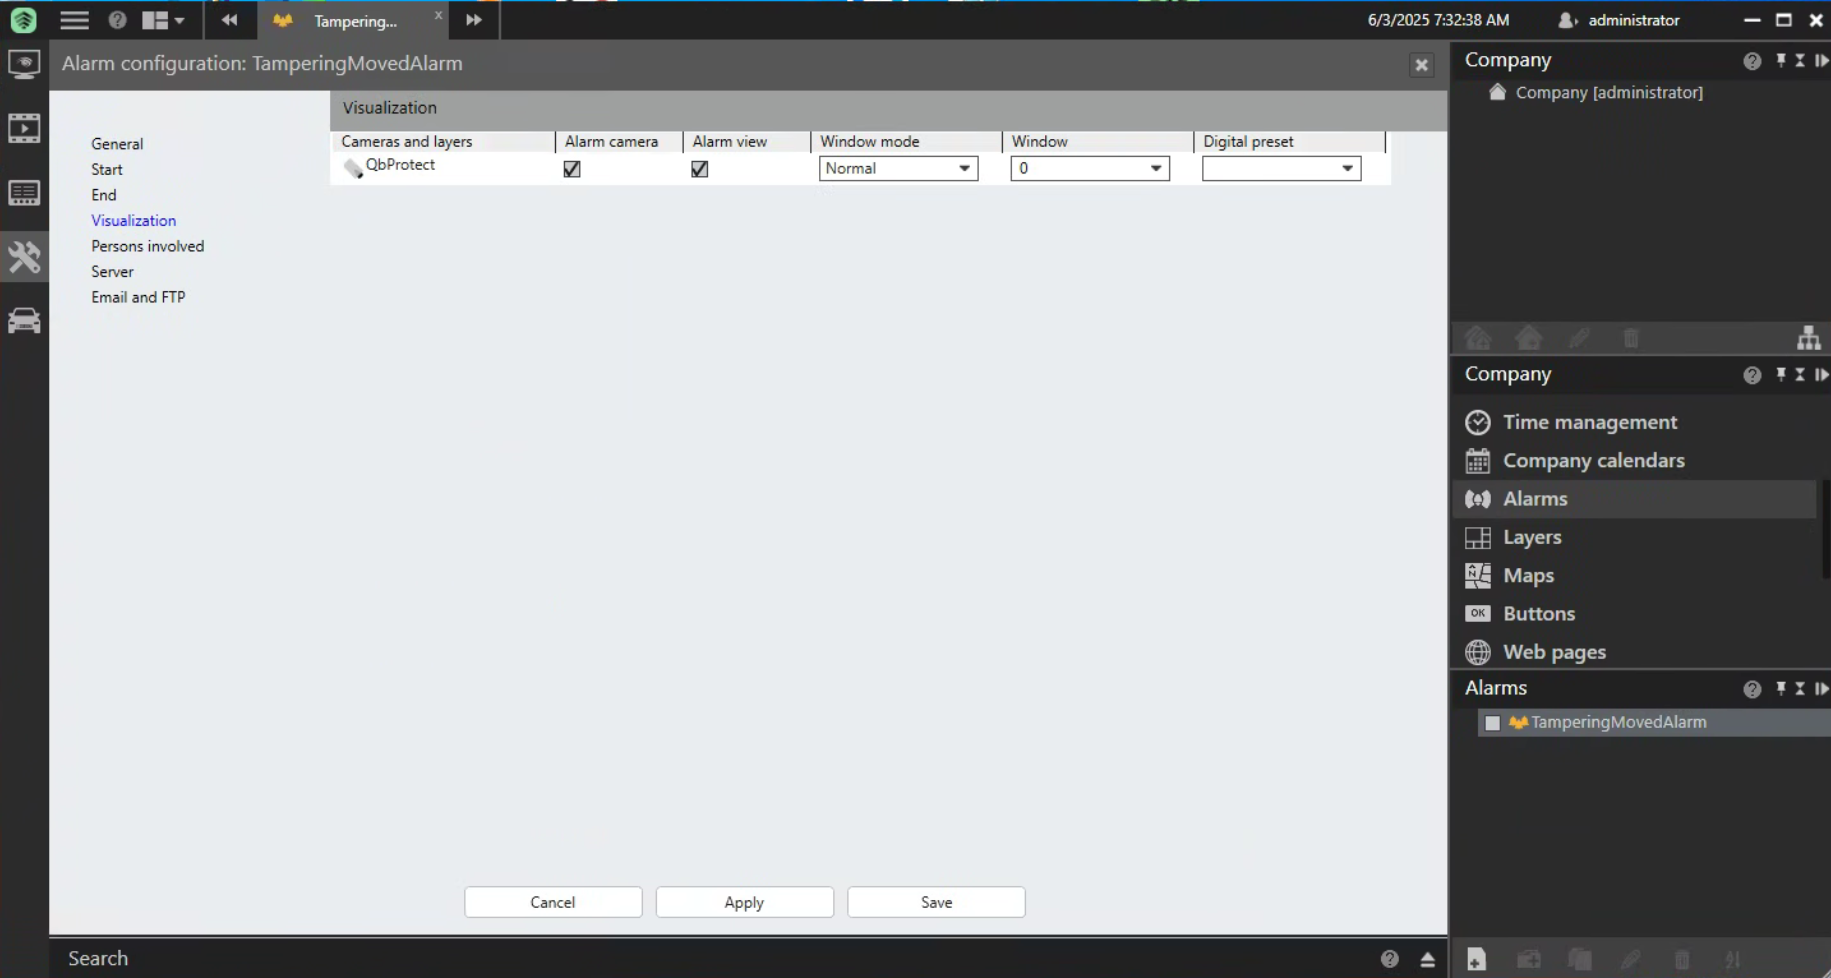 Figure 8. HxGN dC3 alarm rule chain: visualization configuration
 -
Navigate to
Persons involved→ Toggle userProfilesto which alarm under configuration should be applicable (in this example is applied toadministrator) Figure 9. HxGN dC3 alarm rule chain: user profiles configuration
 -
Navigate to
Server→ AddActions at start of alarmandActions at end of alarm(in this example are set toAlarmWatchDogand empty correspondingly) → SetPre-alarm duration for camera recordings(in this example is set to 0 seconds) → clickApply→ ClickSave Figure 10. HxGN dC3 alarm rule chain: start/stop actions configuration
 -
Navigate to
Surveillance Modetab. The QbProtect Tampering movement ONVIF event and the configured alarm rule chain will be generating an alarm in HxGN dC3 Video Client as shown in the Figure below.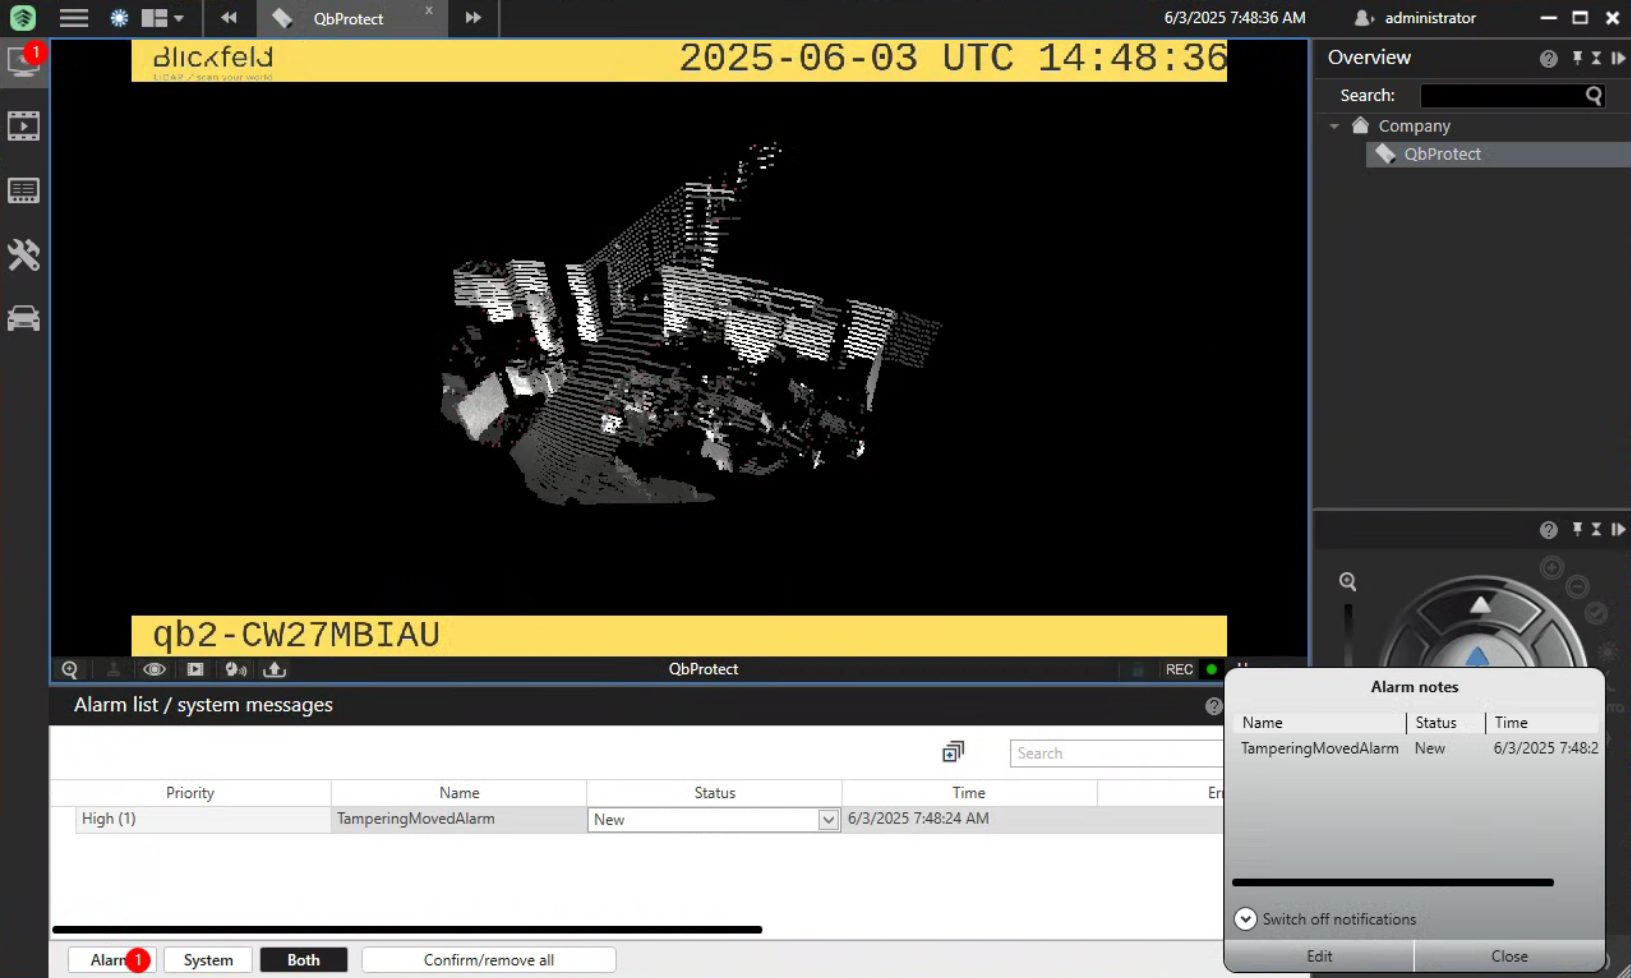 Figure 11. HxGN dC3 Video Client: the tampering movement of QbProtect triggers the alarm