Dallmeier
This section provides information on how to integrate QbProtect with Hemisphere SeMSy Compact. Please refer to the ONVIF section beforehand for general information on using ONVIF with QbProtect.
|
The following software and hardware components have been used in the examples below:
|
Add Device
|
The delivery of ONVIF events over metadata stream is currently work in progress. Please get access to events from QbProtect via gRPC API or Blickfeld Flow. |
In this example the NetConfig3 tool is used to add QbProtect into Hemisphere SeMSy Compact VMS via the VideoNetBox (MK4) recorder.
The procedure includes the following steps:
-
Launch the NetConfig3 tool and login to the configured VideoNetBox (MK4) recorder using the recorder credentials
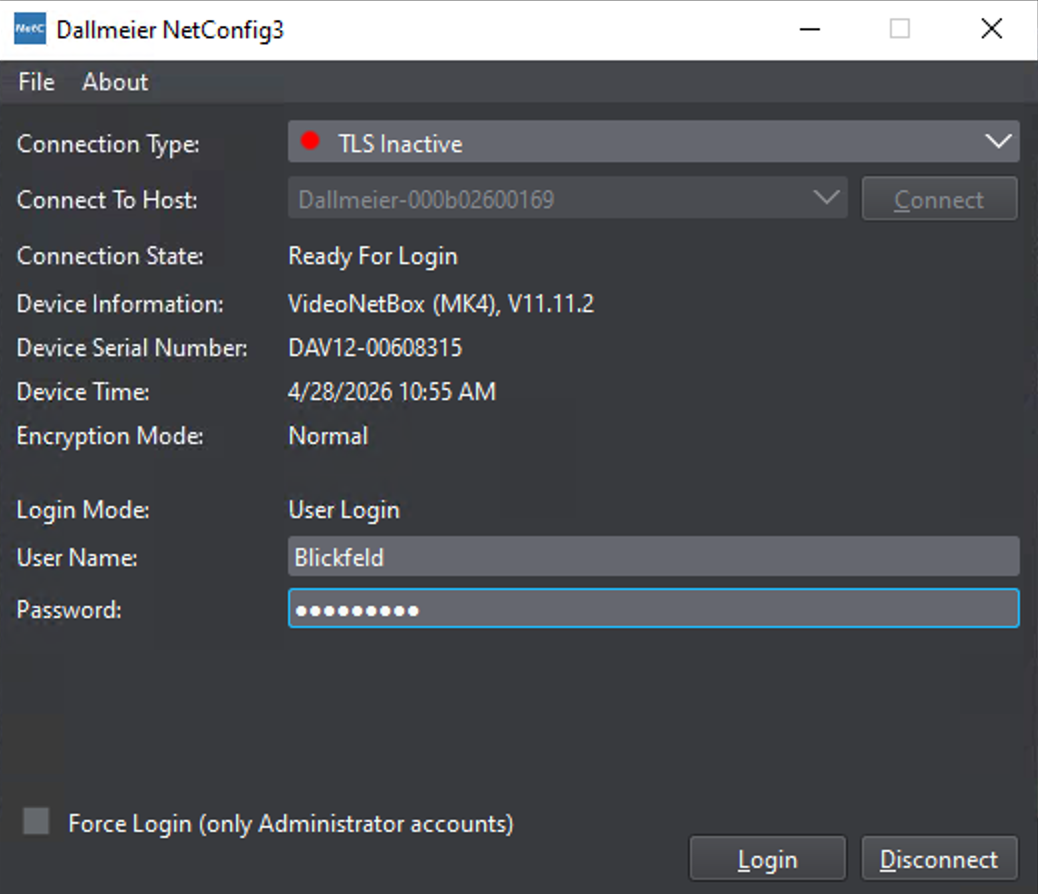 Figure 1. Login into VideoNetBox (MK4) recorder using NetConfig3 tool
 -
Navigate to the
Recordingtab → ClickCameras / Tracks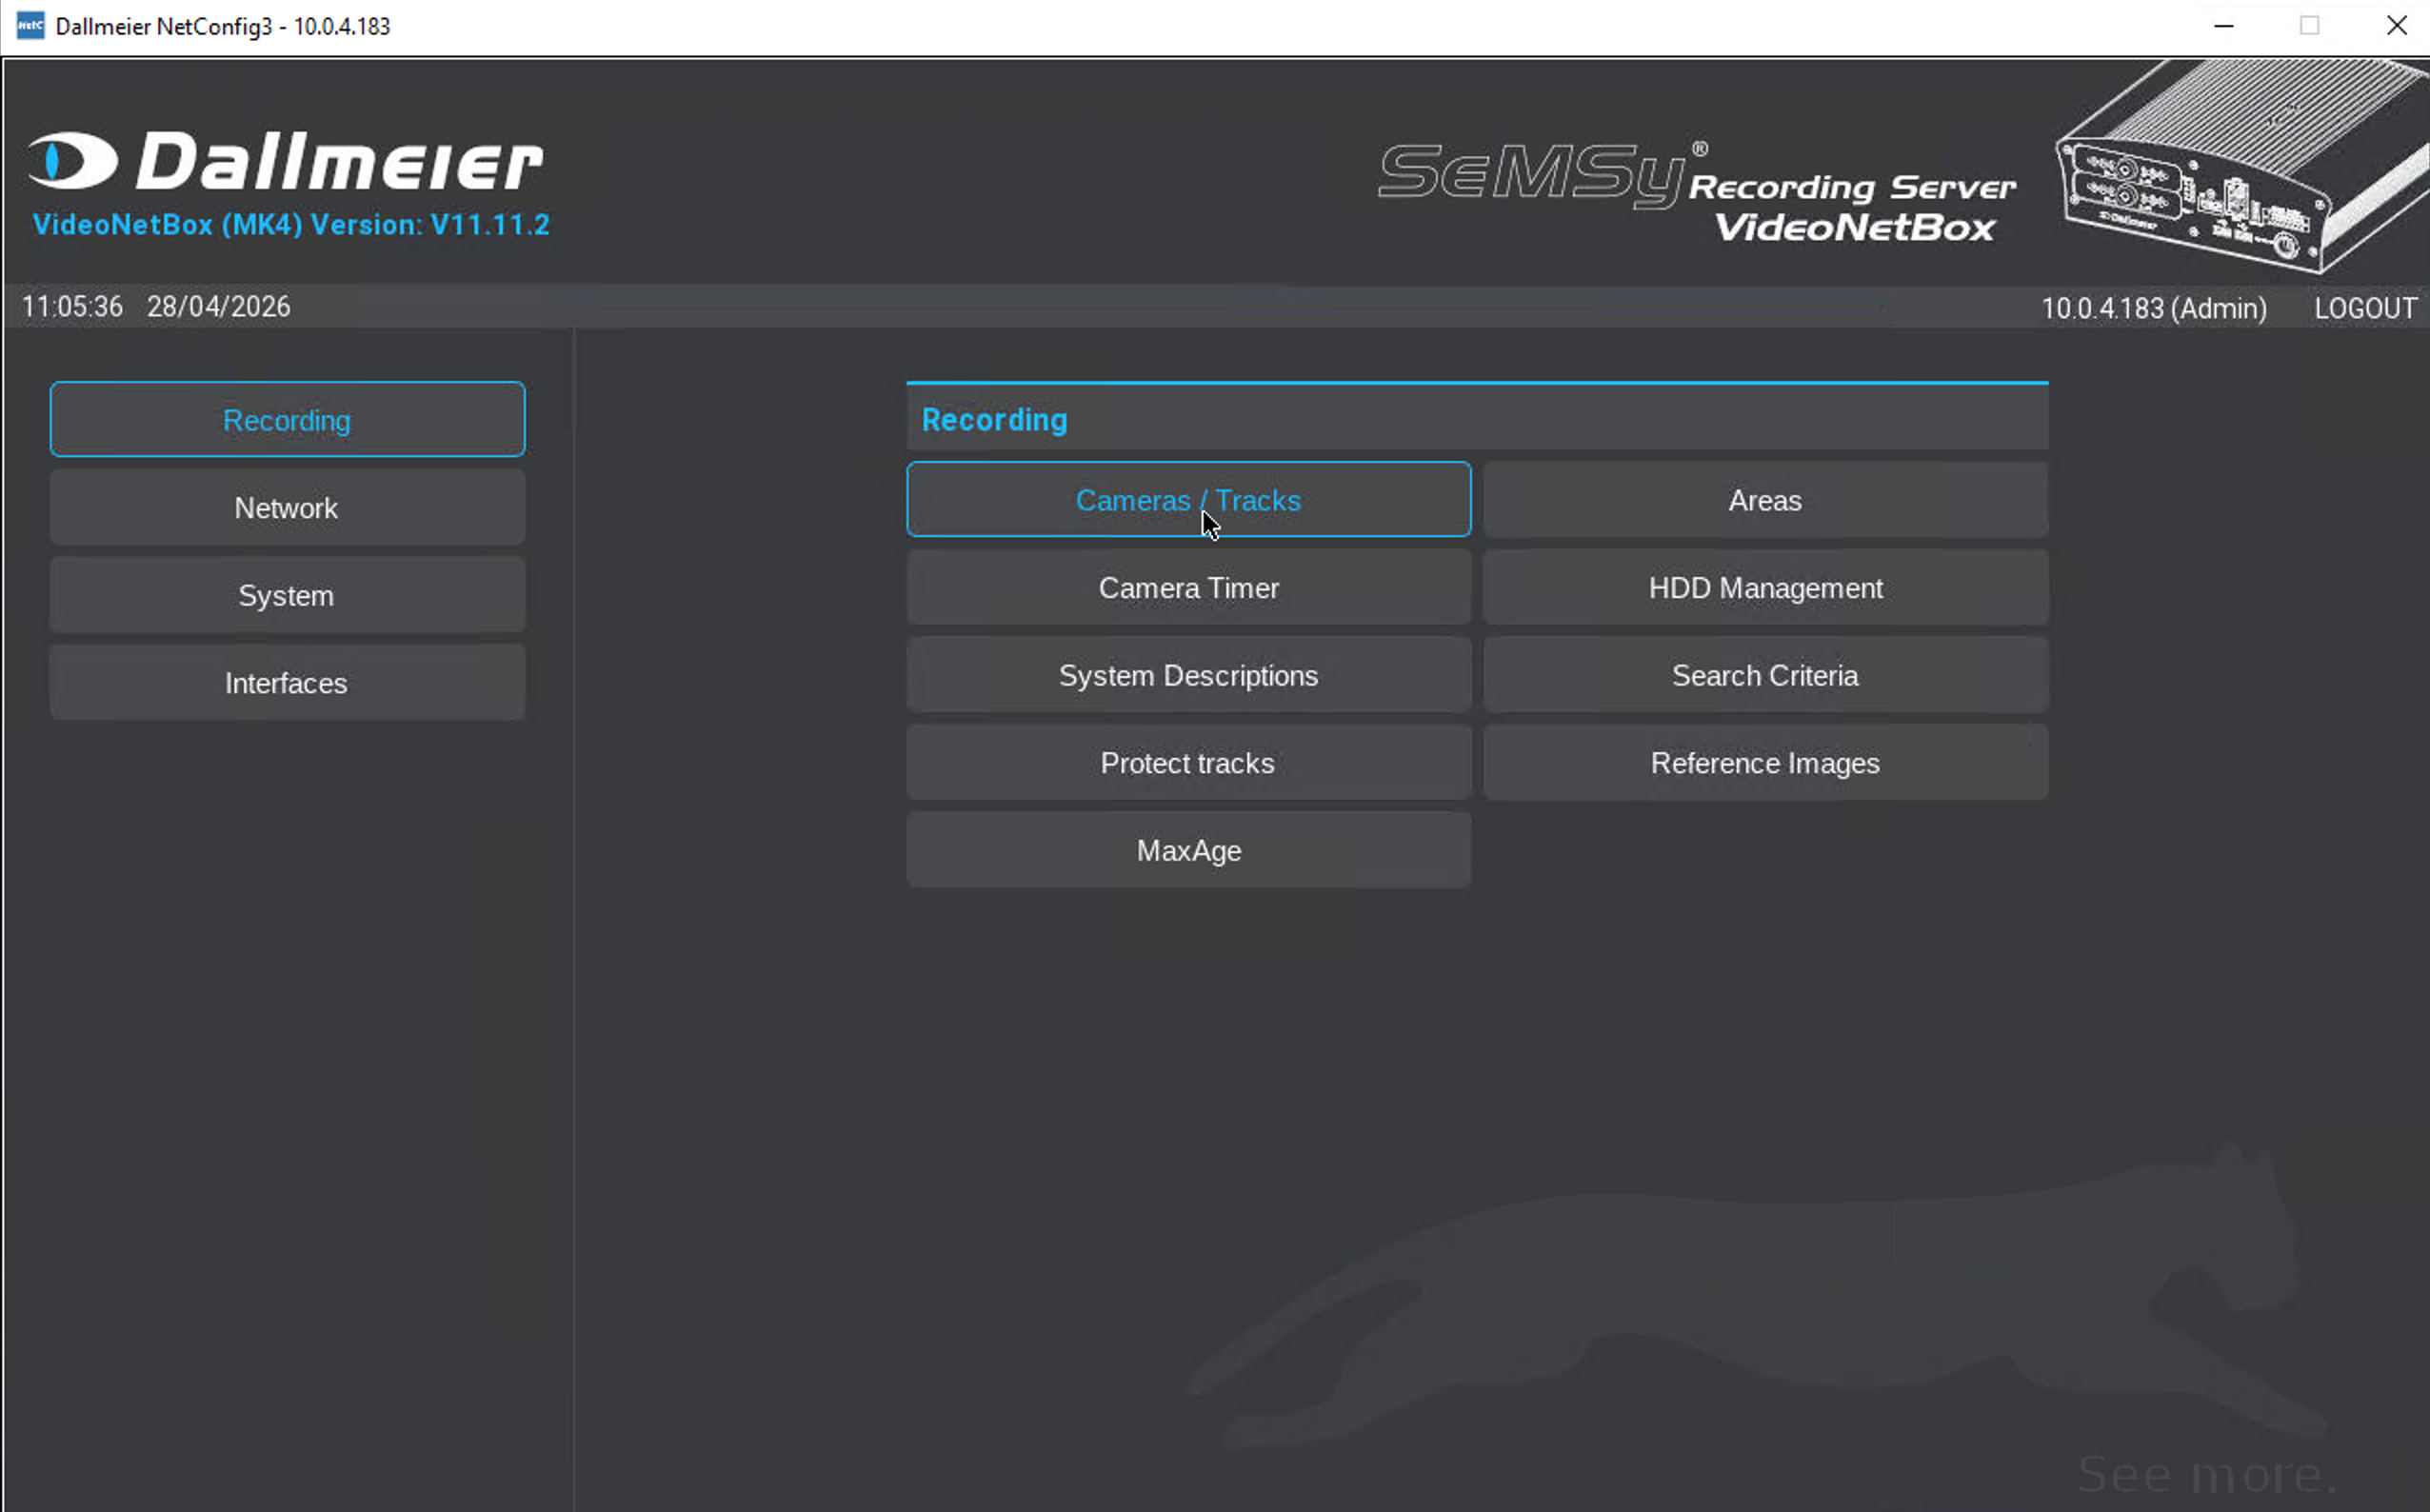 Figure 2. Adding QbProtect into Hemisphere SeMSy Compact: cameras and tracks
 -
Select and click a free slot under
Camera Namecolumn. Give a distinguishable name to the QbProtect device, e.g.QbProtect Figure 3. Adding QbProtect into Hemisphere SeMSy Compact: camera name
 -
Click on the corresponding slot under
LP Trackcolumn → Select3rd Partyto be the camera category → SelectONVIF Cameraas a camera type → ClickOK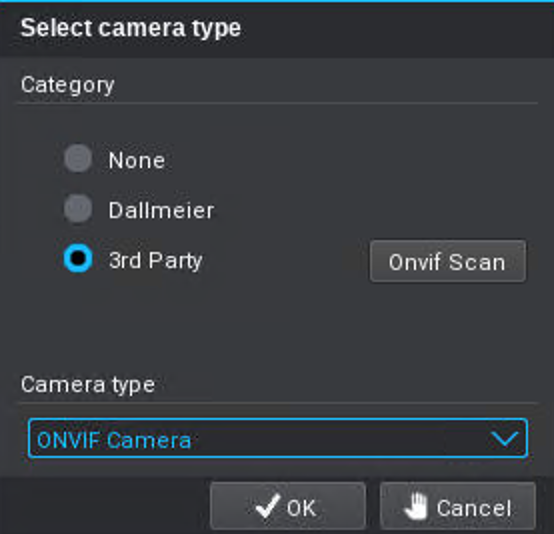 Figure 4. Adding QbProtect into Hemisphere SeMSy Compact: 3rd party ONVIF camera
 -
Make sure that both
Recording activeandNATtoggles are set to be active -
Make sure that Port is set to
80and protocol is set tohttp -
Enter the FQDN or IP of QbProtect in the
IP Adressfield andUsername/Passwordin the corresponding credential fields → ClickCheck Camera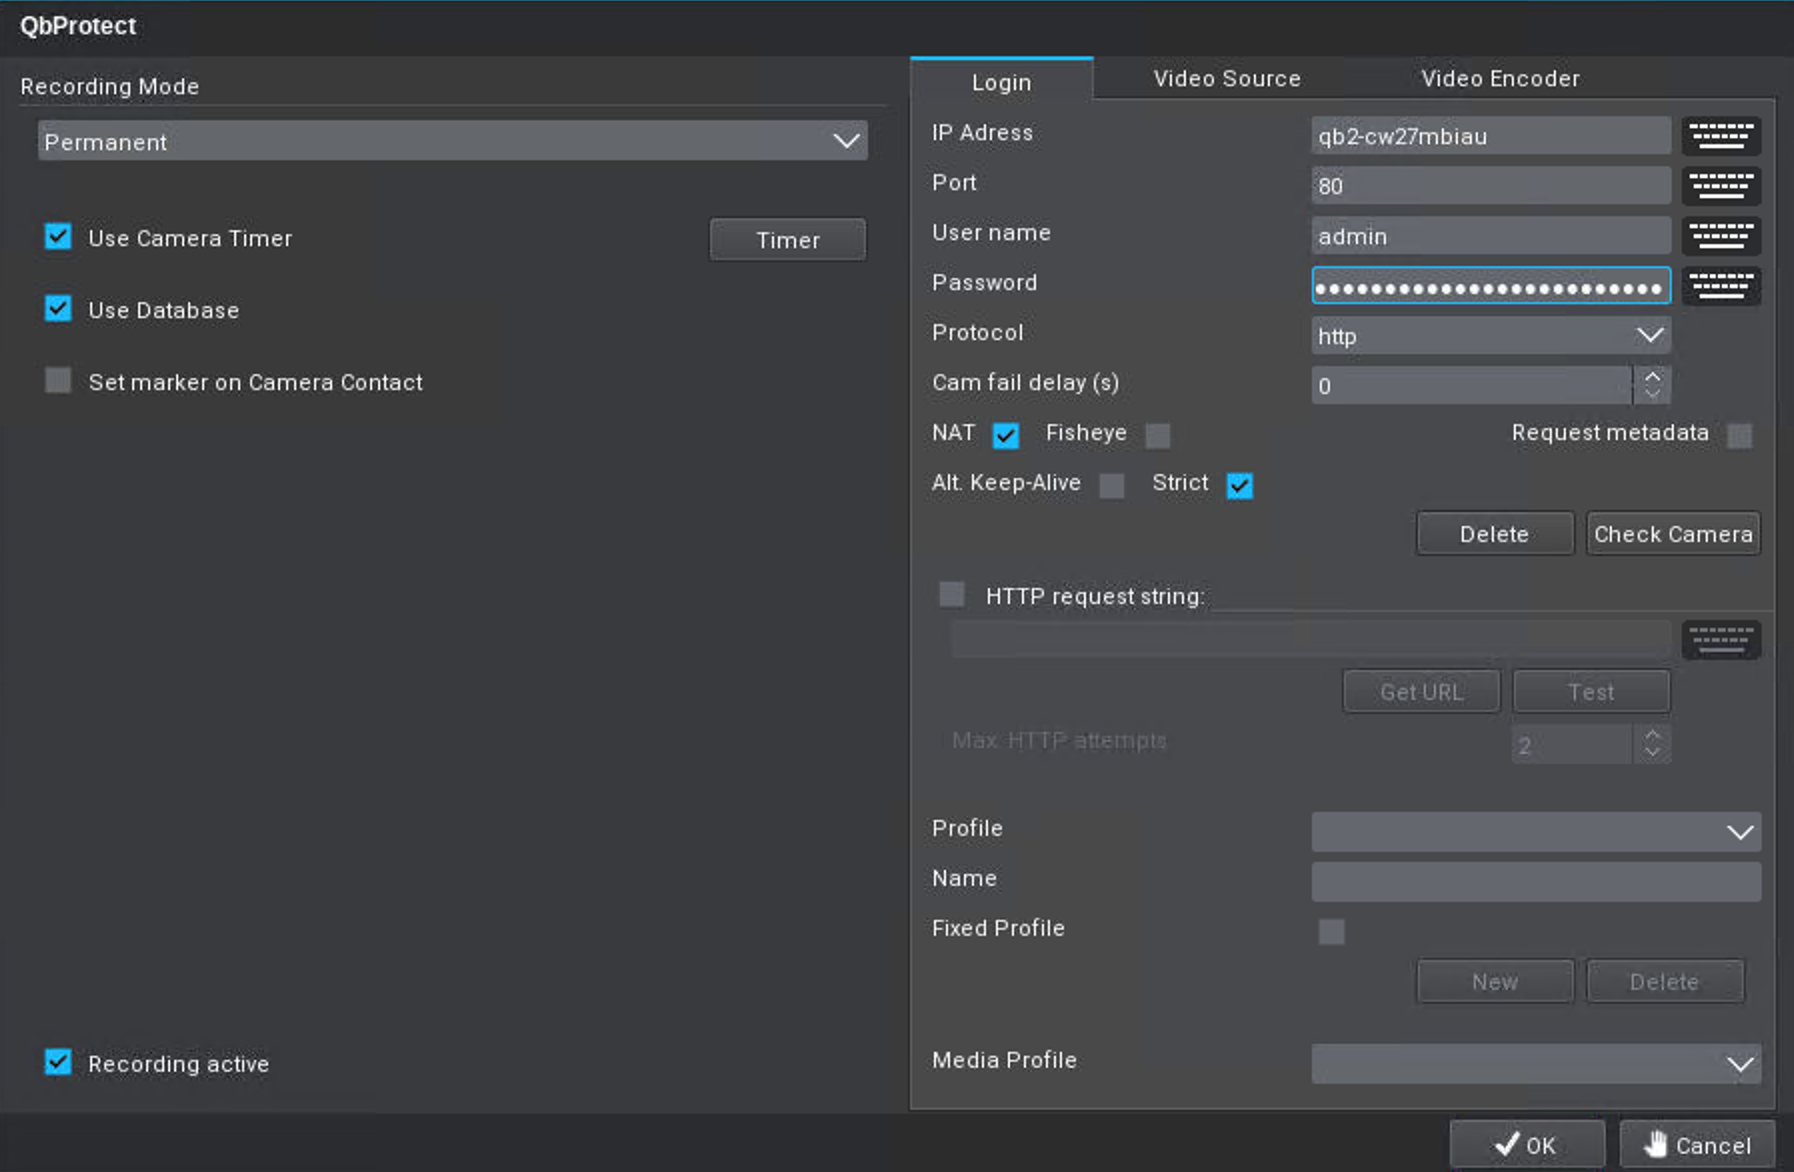 Figure 5. Adding QbProtect into Hemisphere SeMSy Compact: add device
Please refer to the User authentication subsection to find out how to obtain valid ONVIF credentials required for QbProtect VMS integrations.
-
QbProtect should be succesfuly detected as a third party ONVIF camera → The firmware version of the device appear in the popup window → Click
OK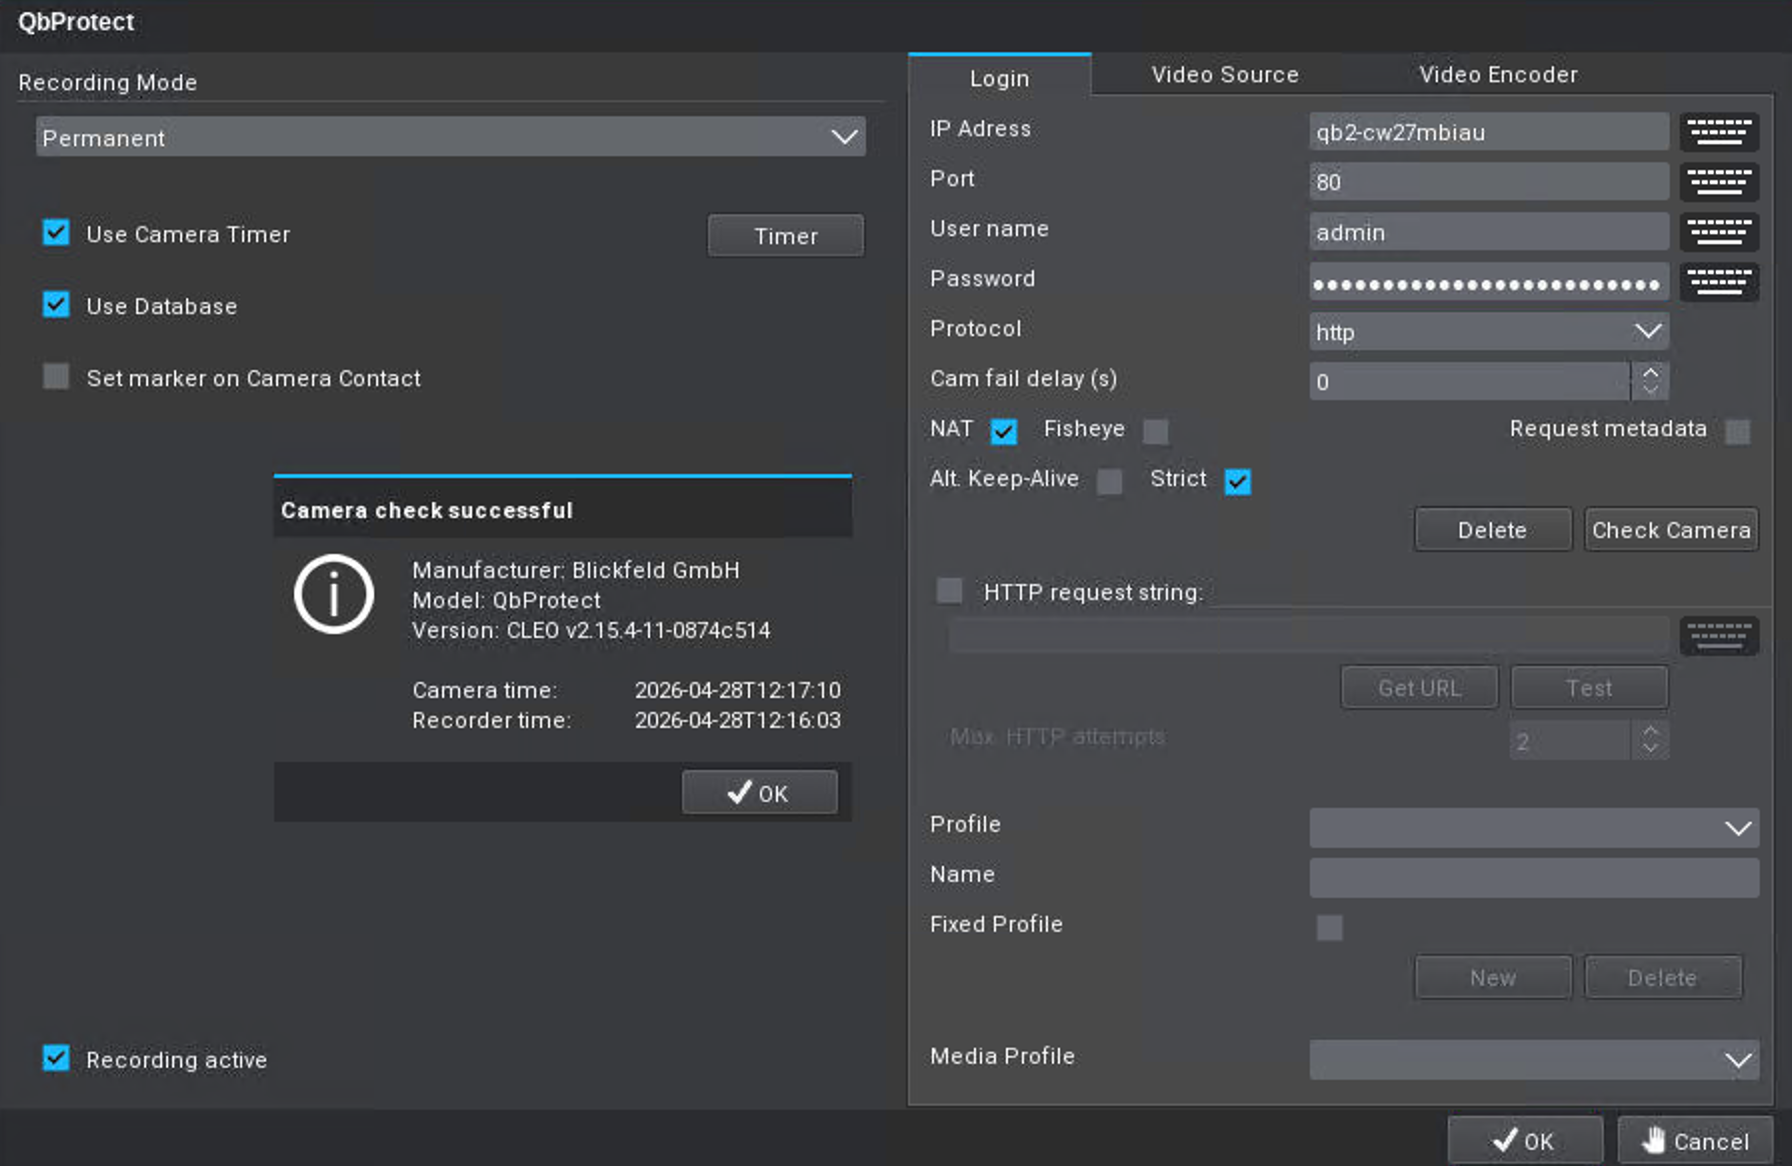 Figure 6. Adding QbProtect into Hemisphere SeMSy Compact: general device information
 -
The available media profile should be detected in the corresponding
Profile section→ ClickOK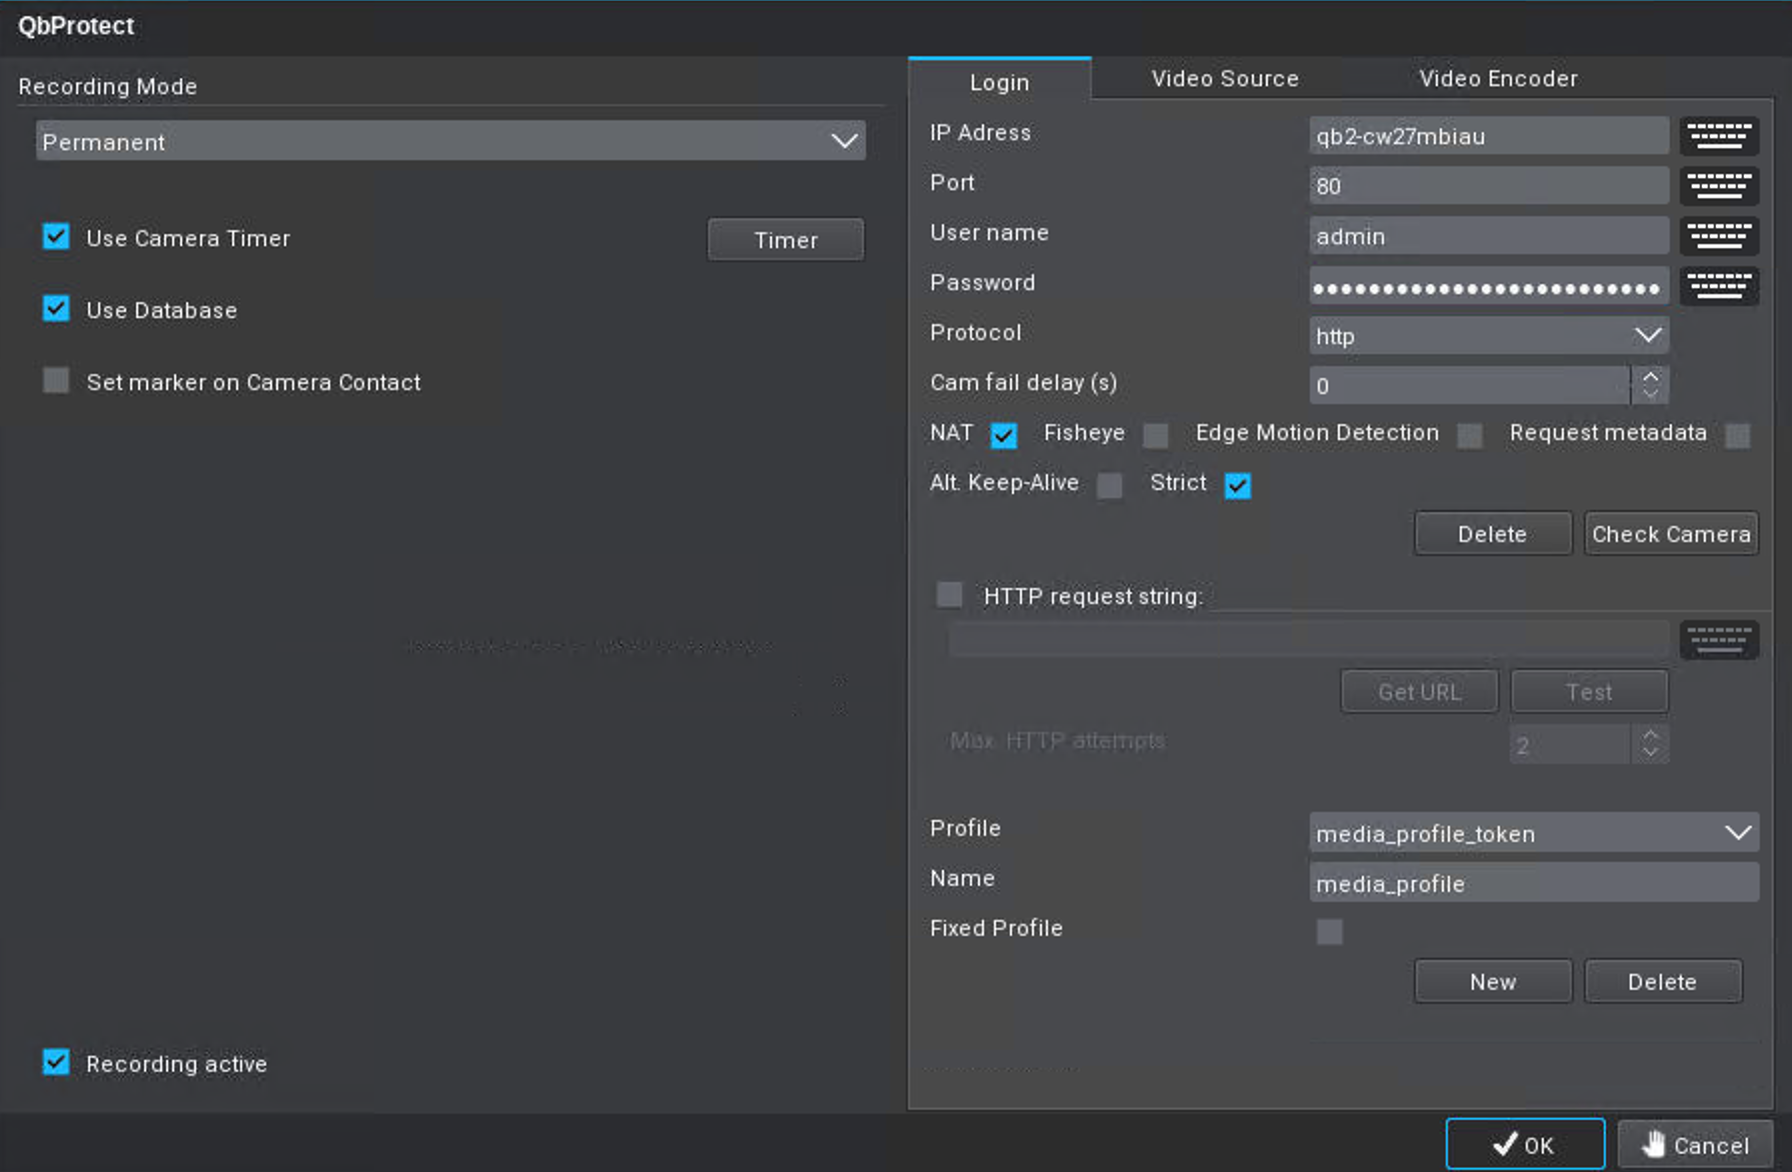 Figure 7. Adding QbProtect into Hemisphere SeMSy Compact: media profile
 -
Launch the
Hemisphere SeMSy CompactVMS → Make sure that Dallmeier VideoNetBox is added in the VMS (in this example the VideoNetBox was added to the VMS under theVNBname as shown in Figure below)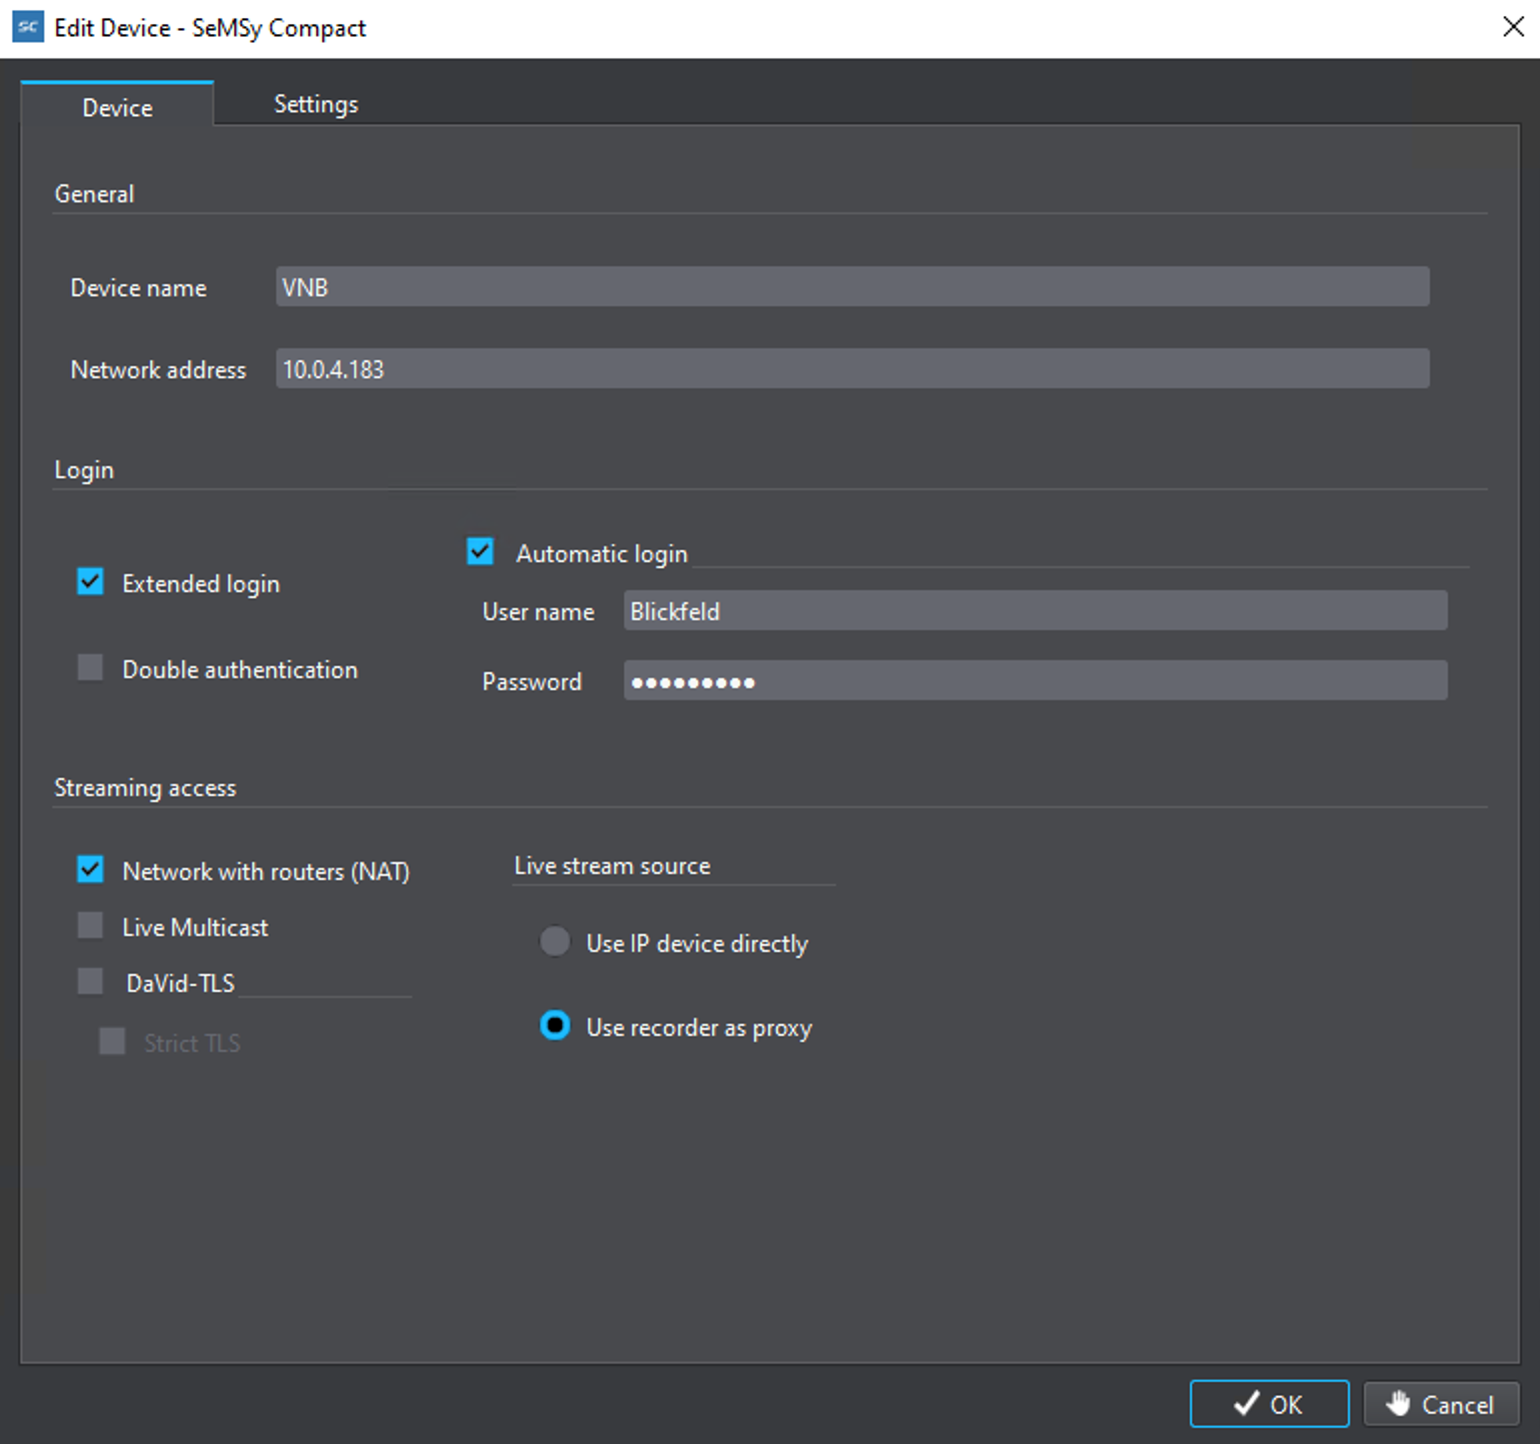 Figure 8. Adding QbProtect into Hemisphere SeMSy Compact: edit VideoNetworkBox device
 -
Right click on
VNB→ ClickUpdate all devices→ theQbProtectshould appear in the list of the devices connected via VideoNetworkBox -
Select the device and drop it in the viewer → The live view of the point cloud should be available in the SeMSy Compact viewer
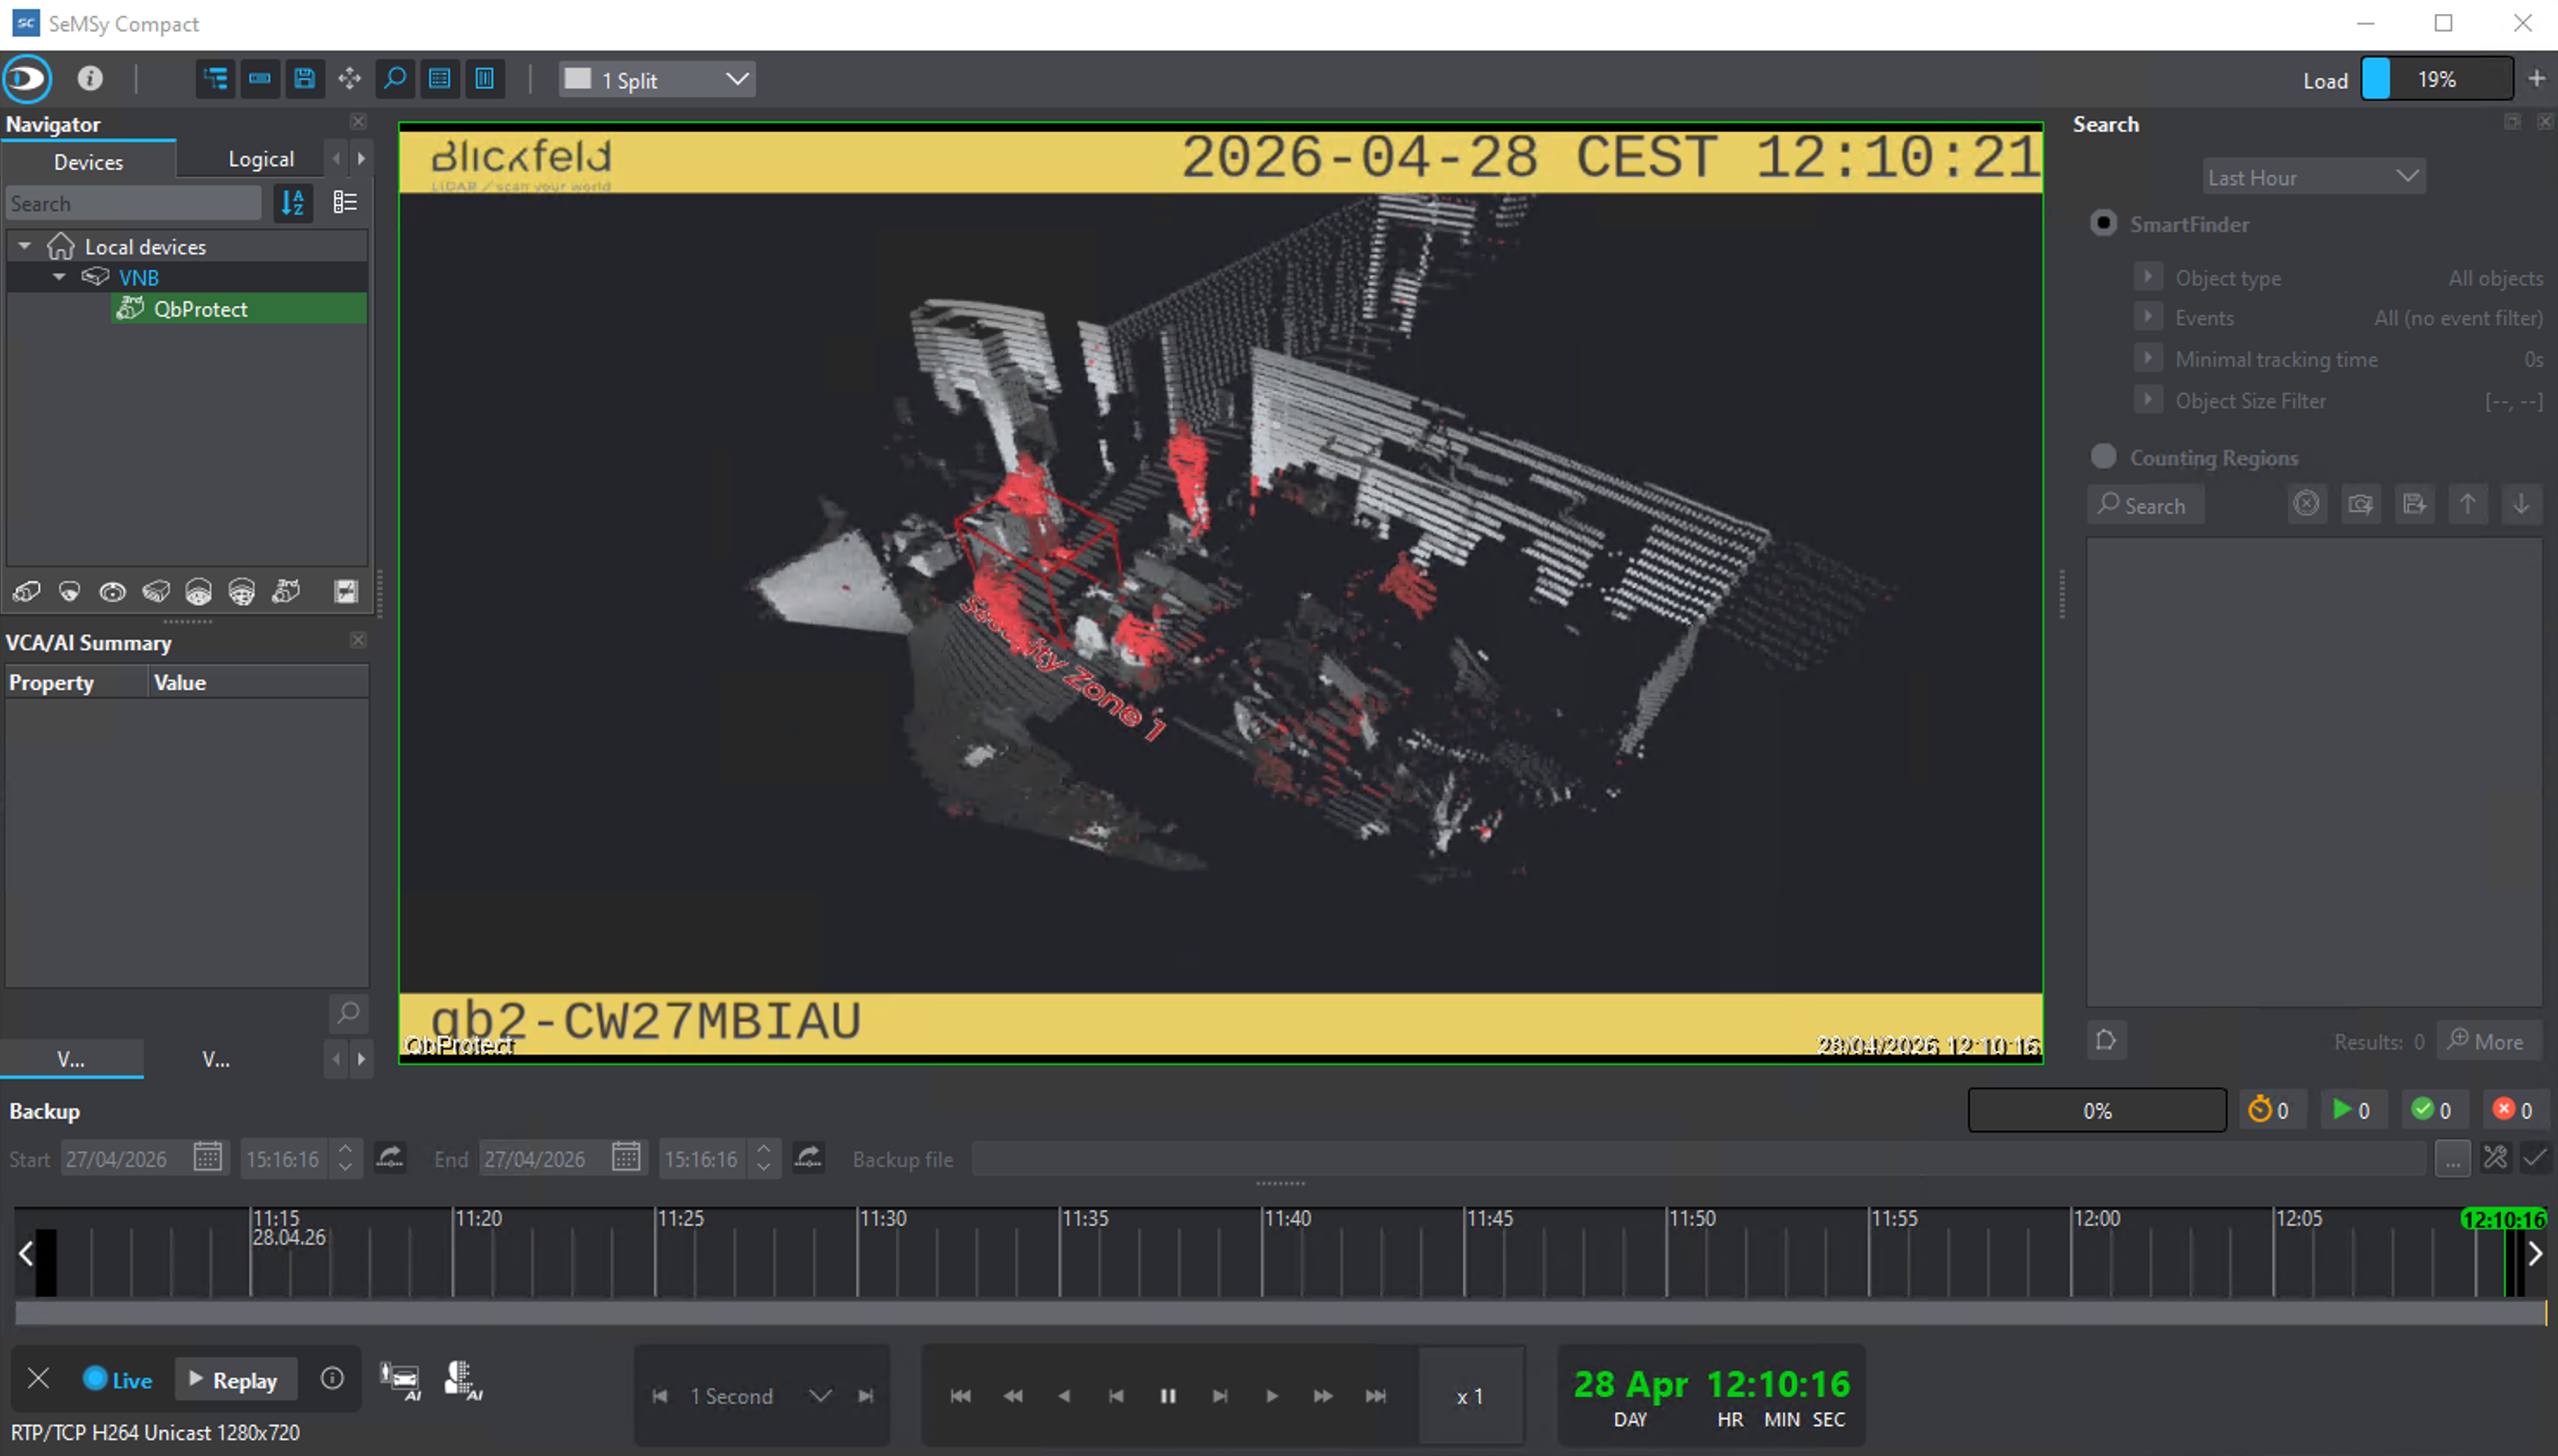 Figure 9. Adding QbProtect into Hemisphere SeMSy Compact: live video stream
|
The perspective of the RTSP video stream in VMS can be synchronized with the one configured in the WebGUI. For that, navigate to the Viewer page of the QbProtect WebGUI, configure the desired view perspective, and apply the keyboard shortcut Shift+V. |
The live video stream of the QbProtect point cloud can be accessed and observed in Hemisphere SeMSy Compact after successfully completing the required steps above.