Genetec
This section provides information on how to integrate QbProtect with Genetec Security Center. Please refer to the ONVIF section beforehand for general information on using ONVIF with QbProtect.
|
The following Genetec components have been used in the examples below:
|
Add Device
The Genetec Config Tool is used to add QbProtect into Genetec Security Center.
The procedure includes the following steps:
-
Launch the Config Tool and enter your user credentials
-
Navigate to
Tasks→Administration→Video→Role and units -
Right click on the
Archiver→ SelectAdd an entry→ SelectVideo Unit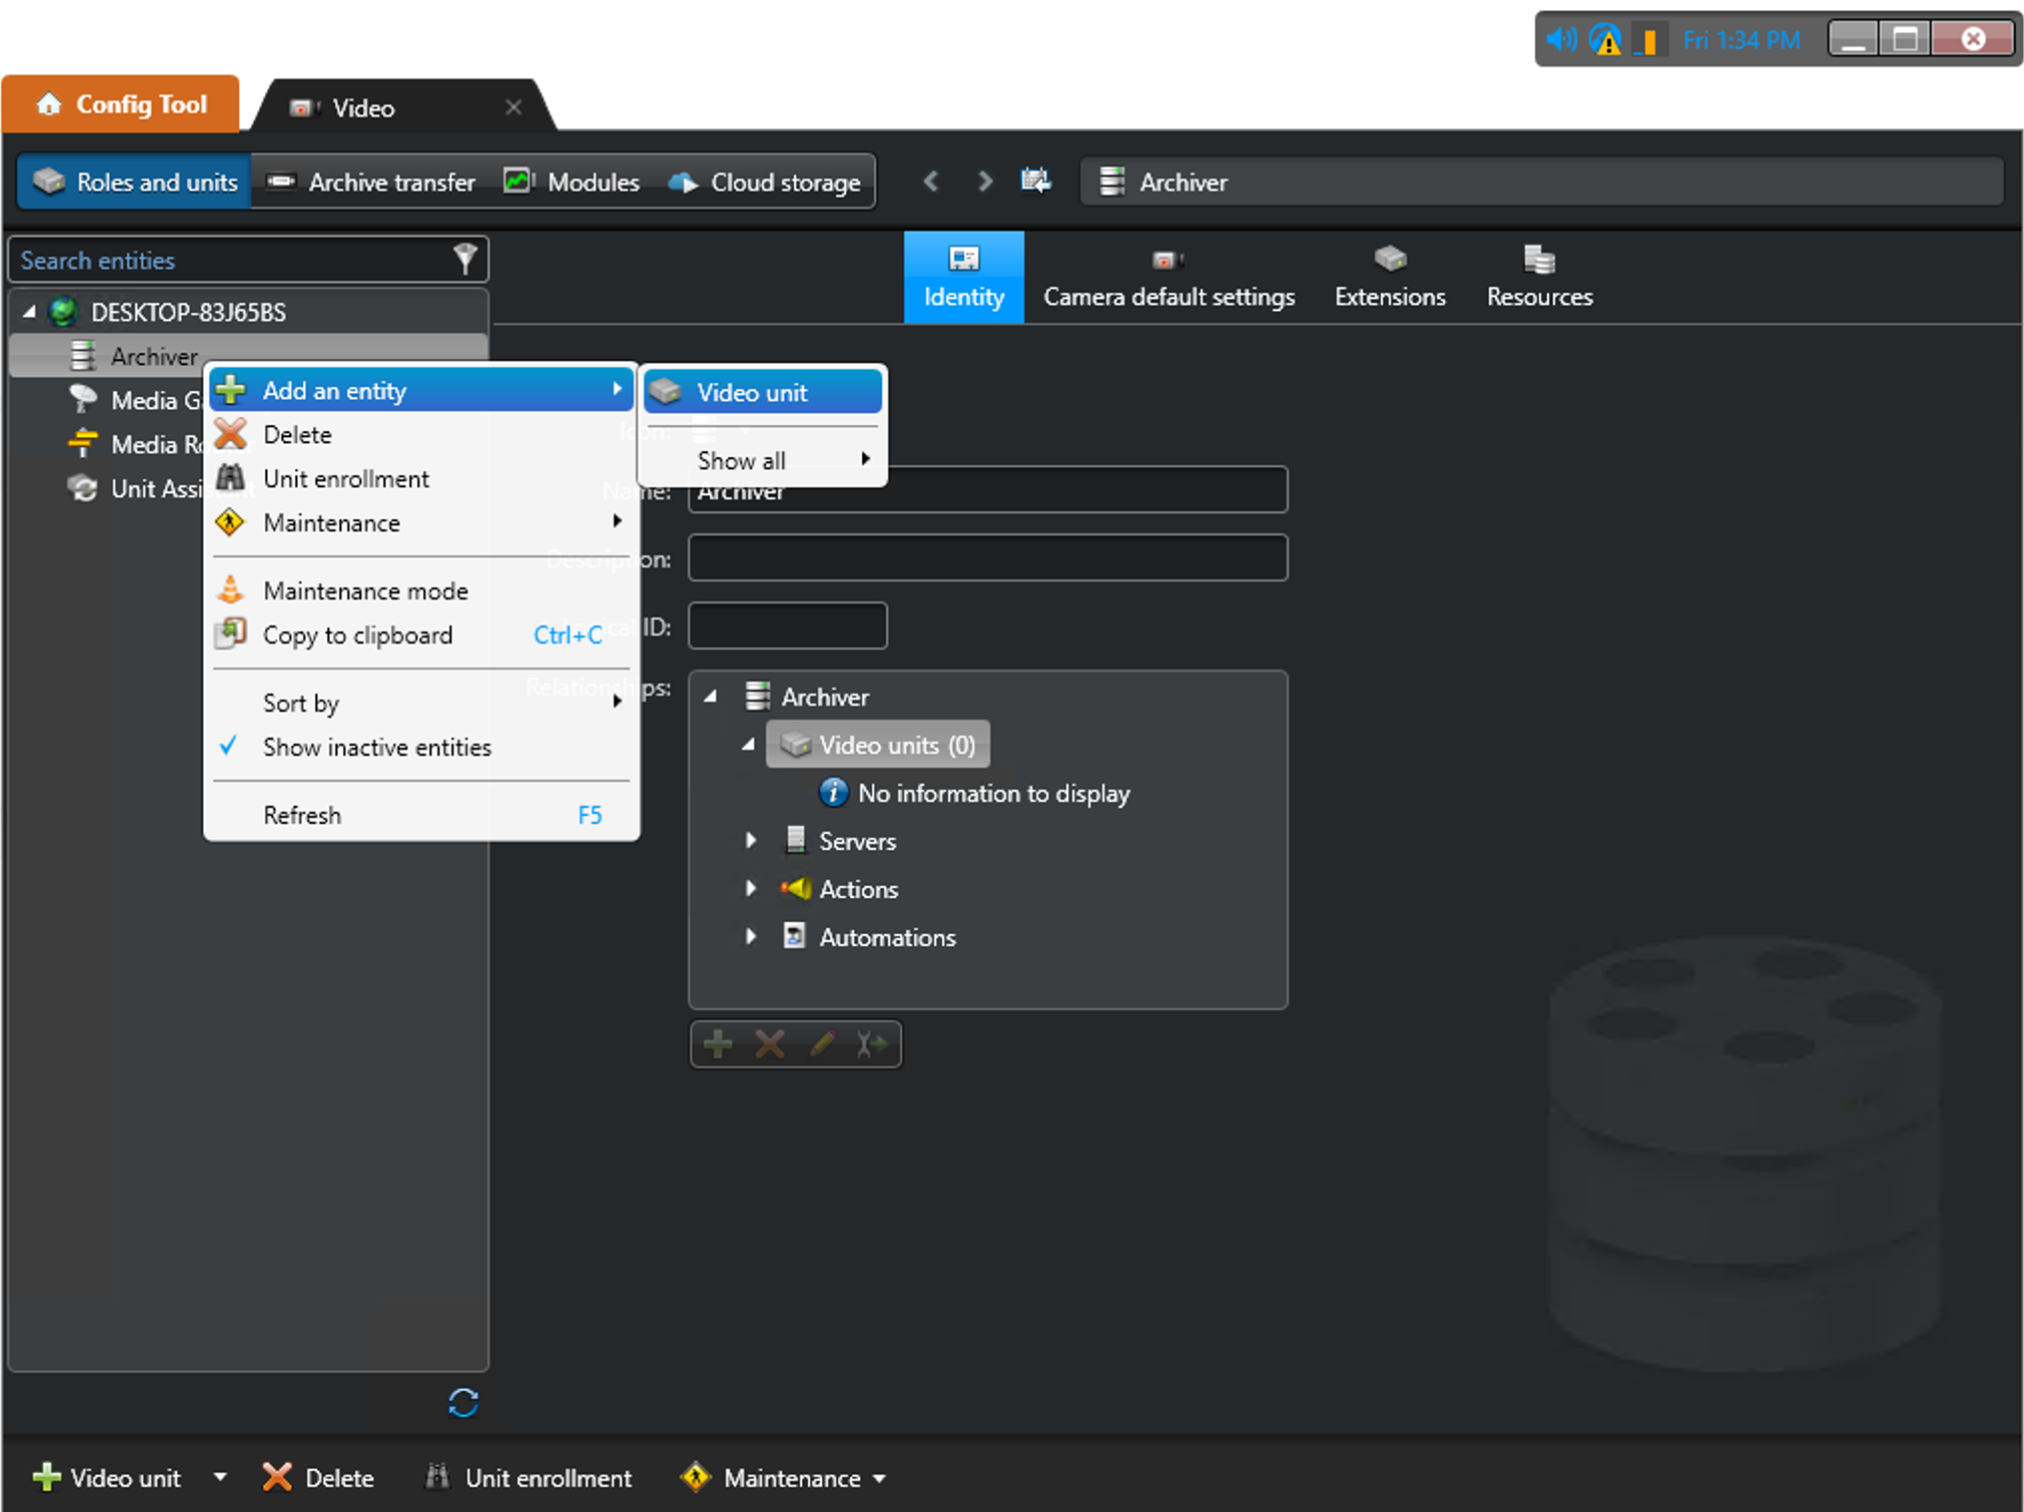 Figure 1. Adding QbProtect into Genetec Security Center: add video unit
 -
Select
ONVIFin Manufacturer drop-down menu → SelectAllin Product type -
Enter the FQDN or IP of QbProtect and
Username/Passwordin the corresponding credential fields -
Set Port to
80→ ClickAdd and closePlease refer to the User authentication subsection to find out how to obtain valid ONVIF credentials required for QbProtect VMS integrations.
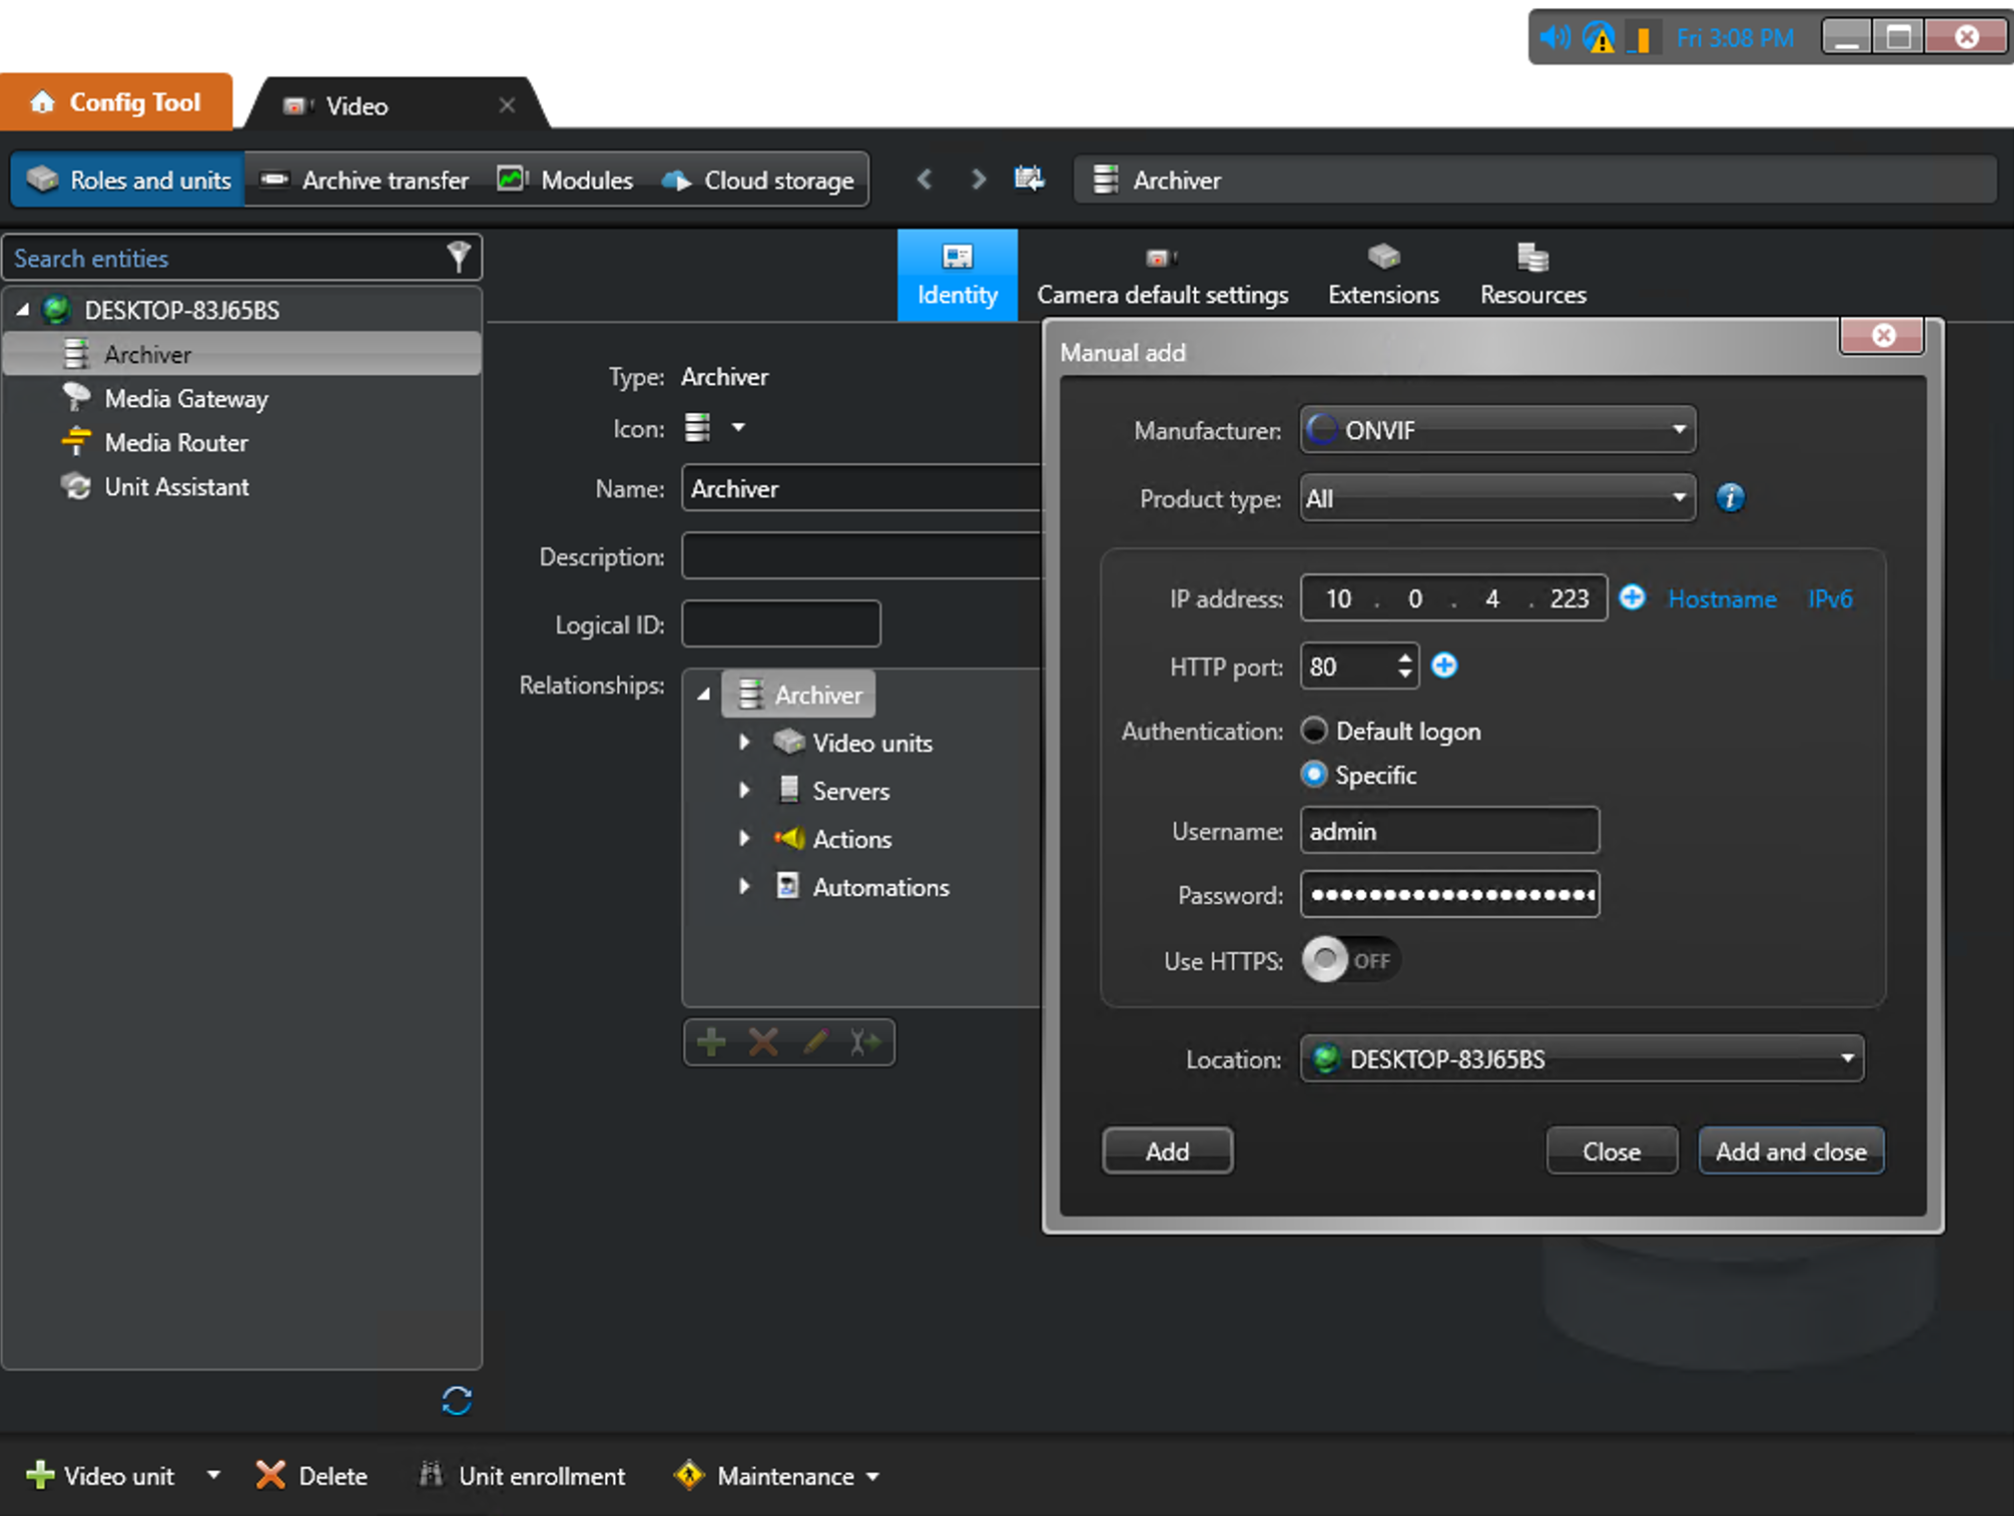 Figure 2. Adding QbProtect into Genetec Security Center: video unit configuration
 -
Give a distinguishable name to the QbProtect device, e.g.
QbProtect→ ClickApply -
General information about detected QbProtect should be available in the
Identitytab as well as the RTSP live preview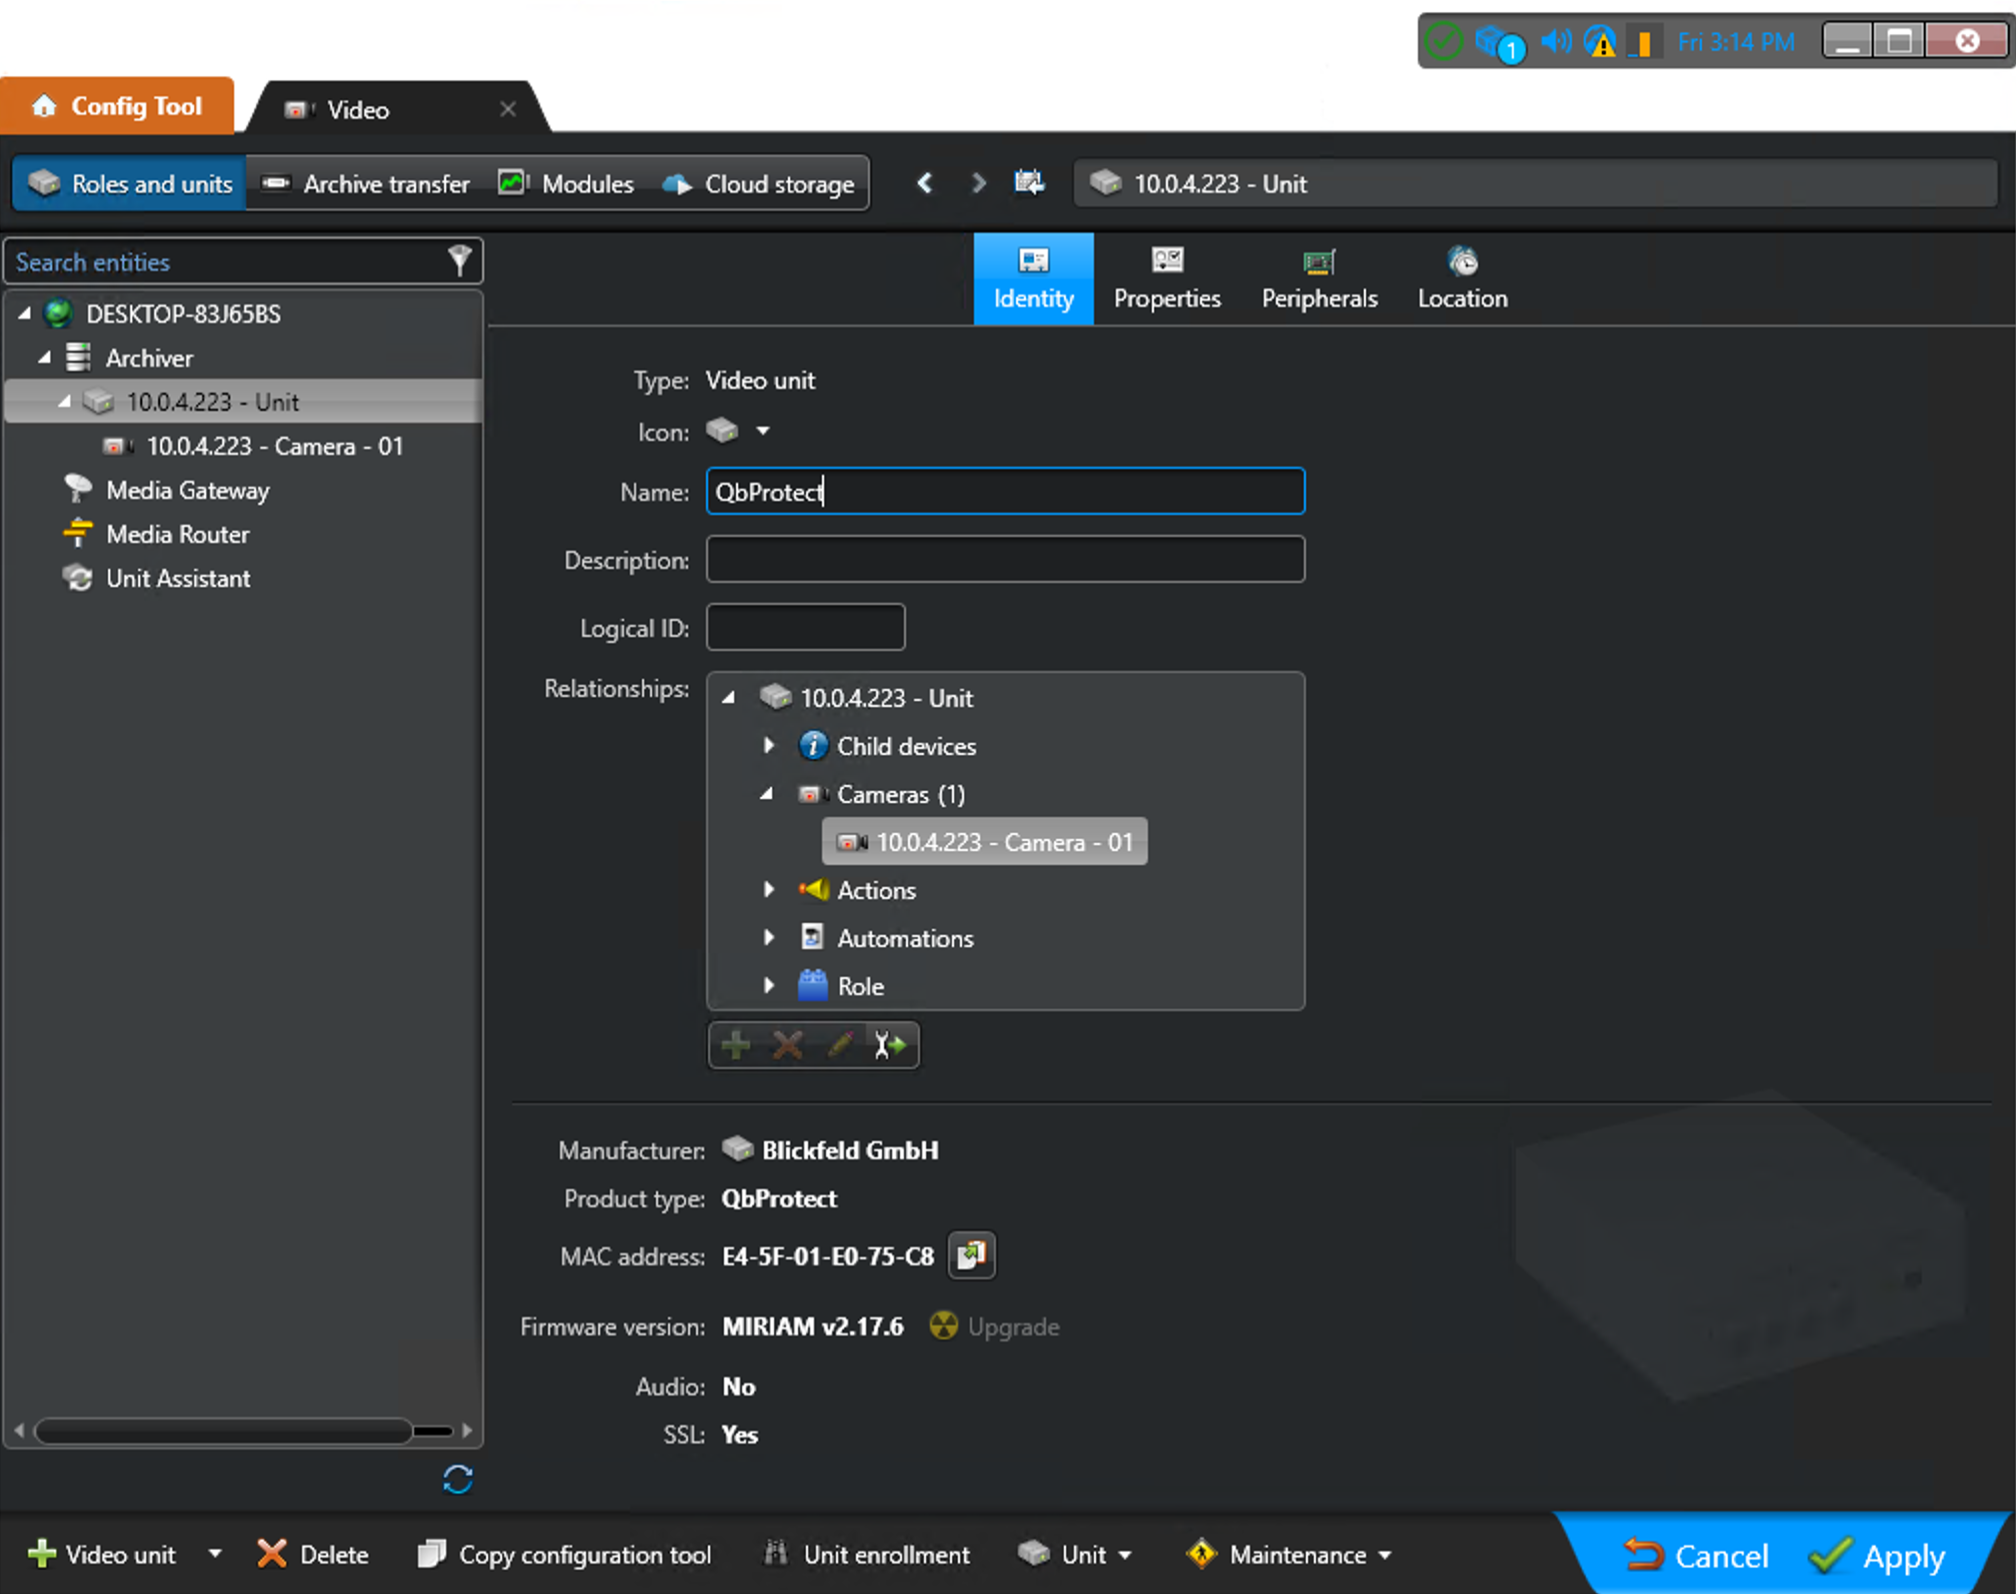 Figure 3. Adding QbProtect into Genetec Security Center: general information about QbProtect
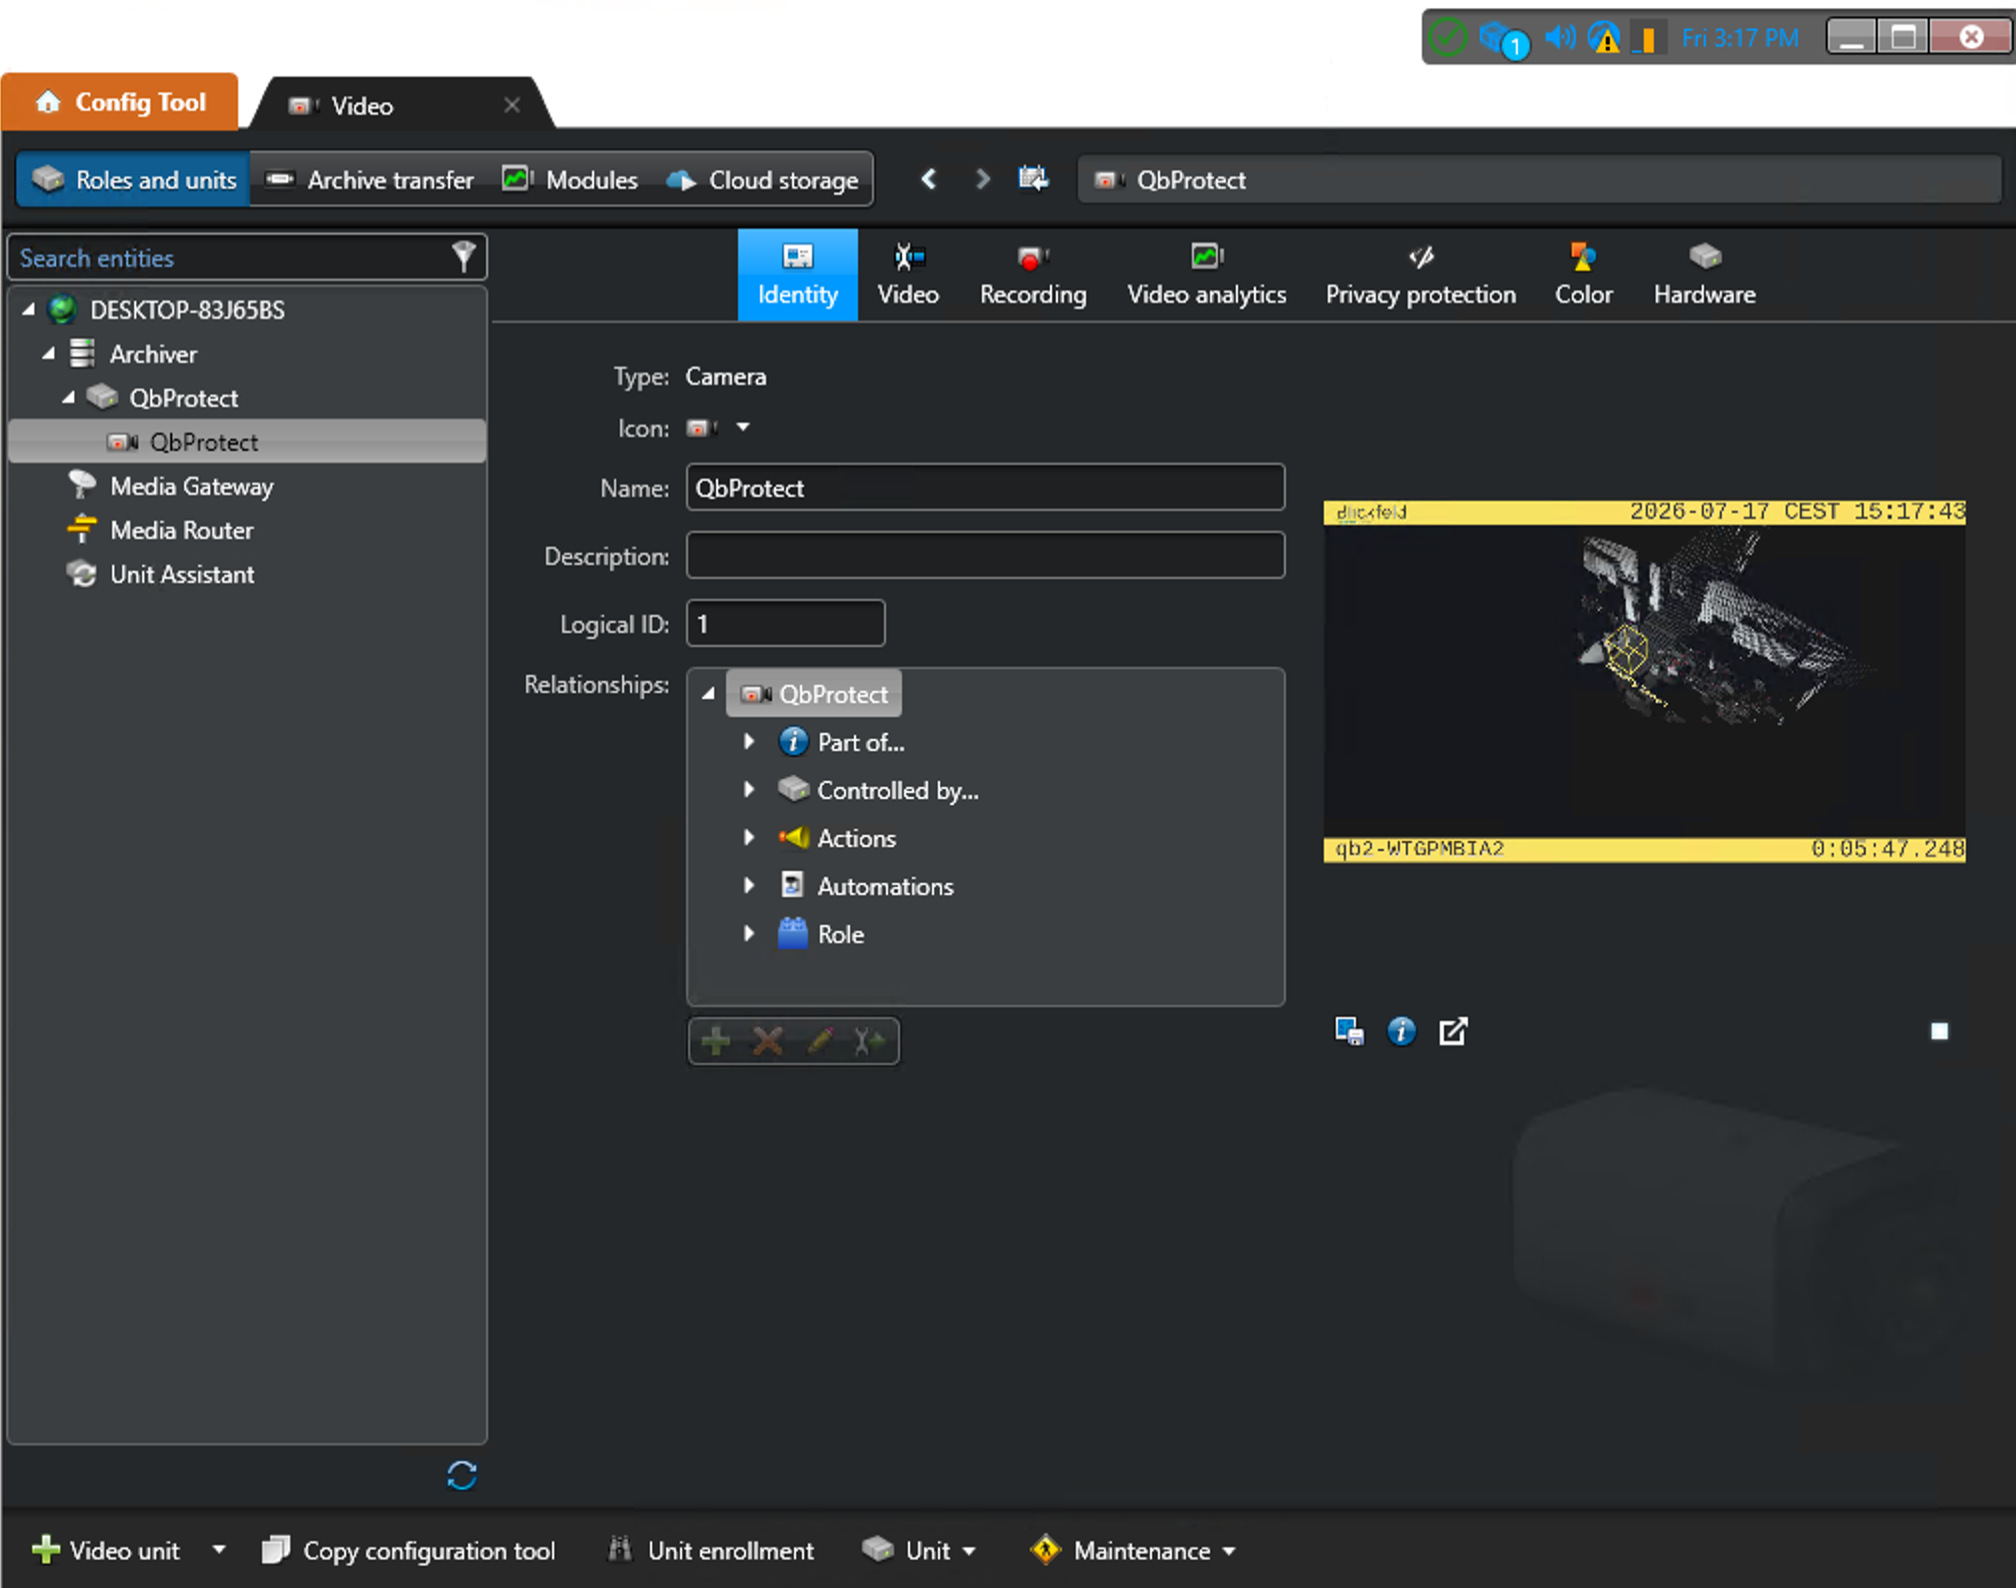 Figure 4. Adding QbProtect into Genetec Security Center: live RTSP preview
 -
Launch the Genetec Security Desk and enter your user credentials
-
Navigate to
Tasks→Operation→Monitoring -
Double click on the added QbProtect to observe the live RTSP stream of a point cloud
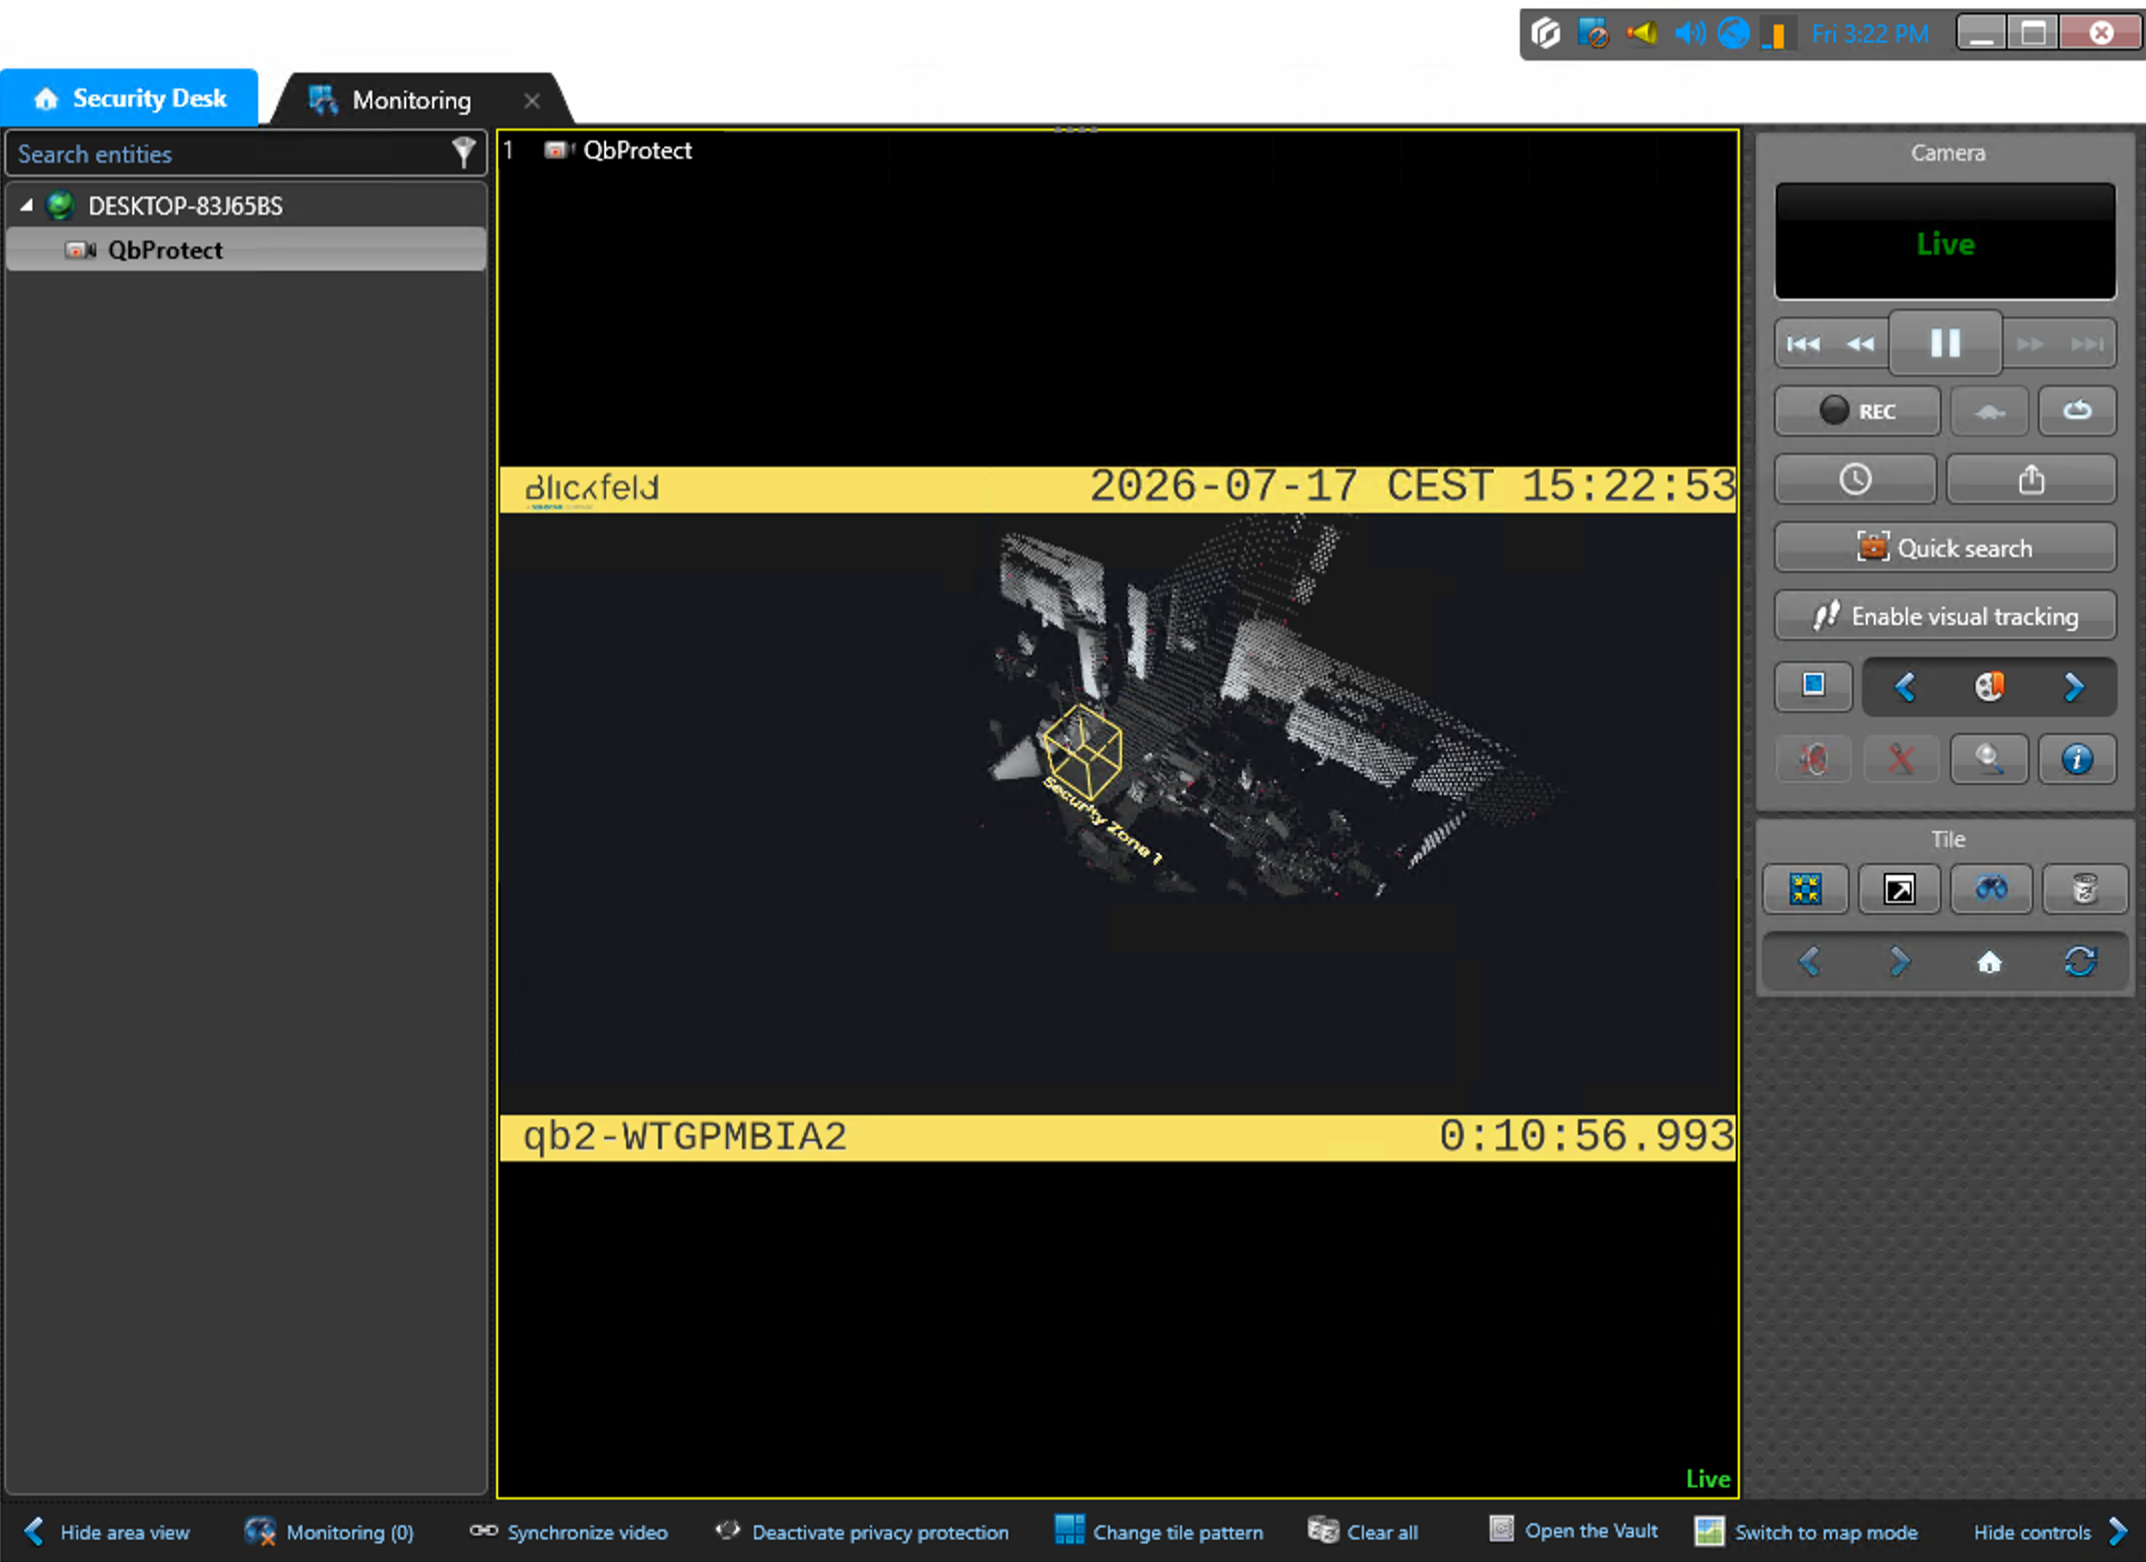 Figure 5. Adding QbProtect into Genetec Security Center: live RTSP video stream in Security Desk
|
The perspective of the RTSP video stream in VMS can be synchronized with the one configured in the WebGUI. For that, navigate to the Viewer page of the QbProtect WebGUI, configure the desired view perspective, and apply the keyboard shortcut Shift+V. |
The live video stream of the QbProtect point cloud can be accessed and observed in Genetec Security Desk Monitoring after successfully completing the required steps above.
Events
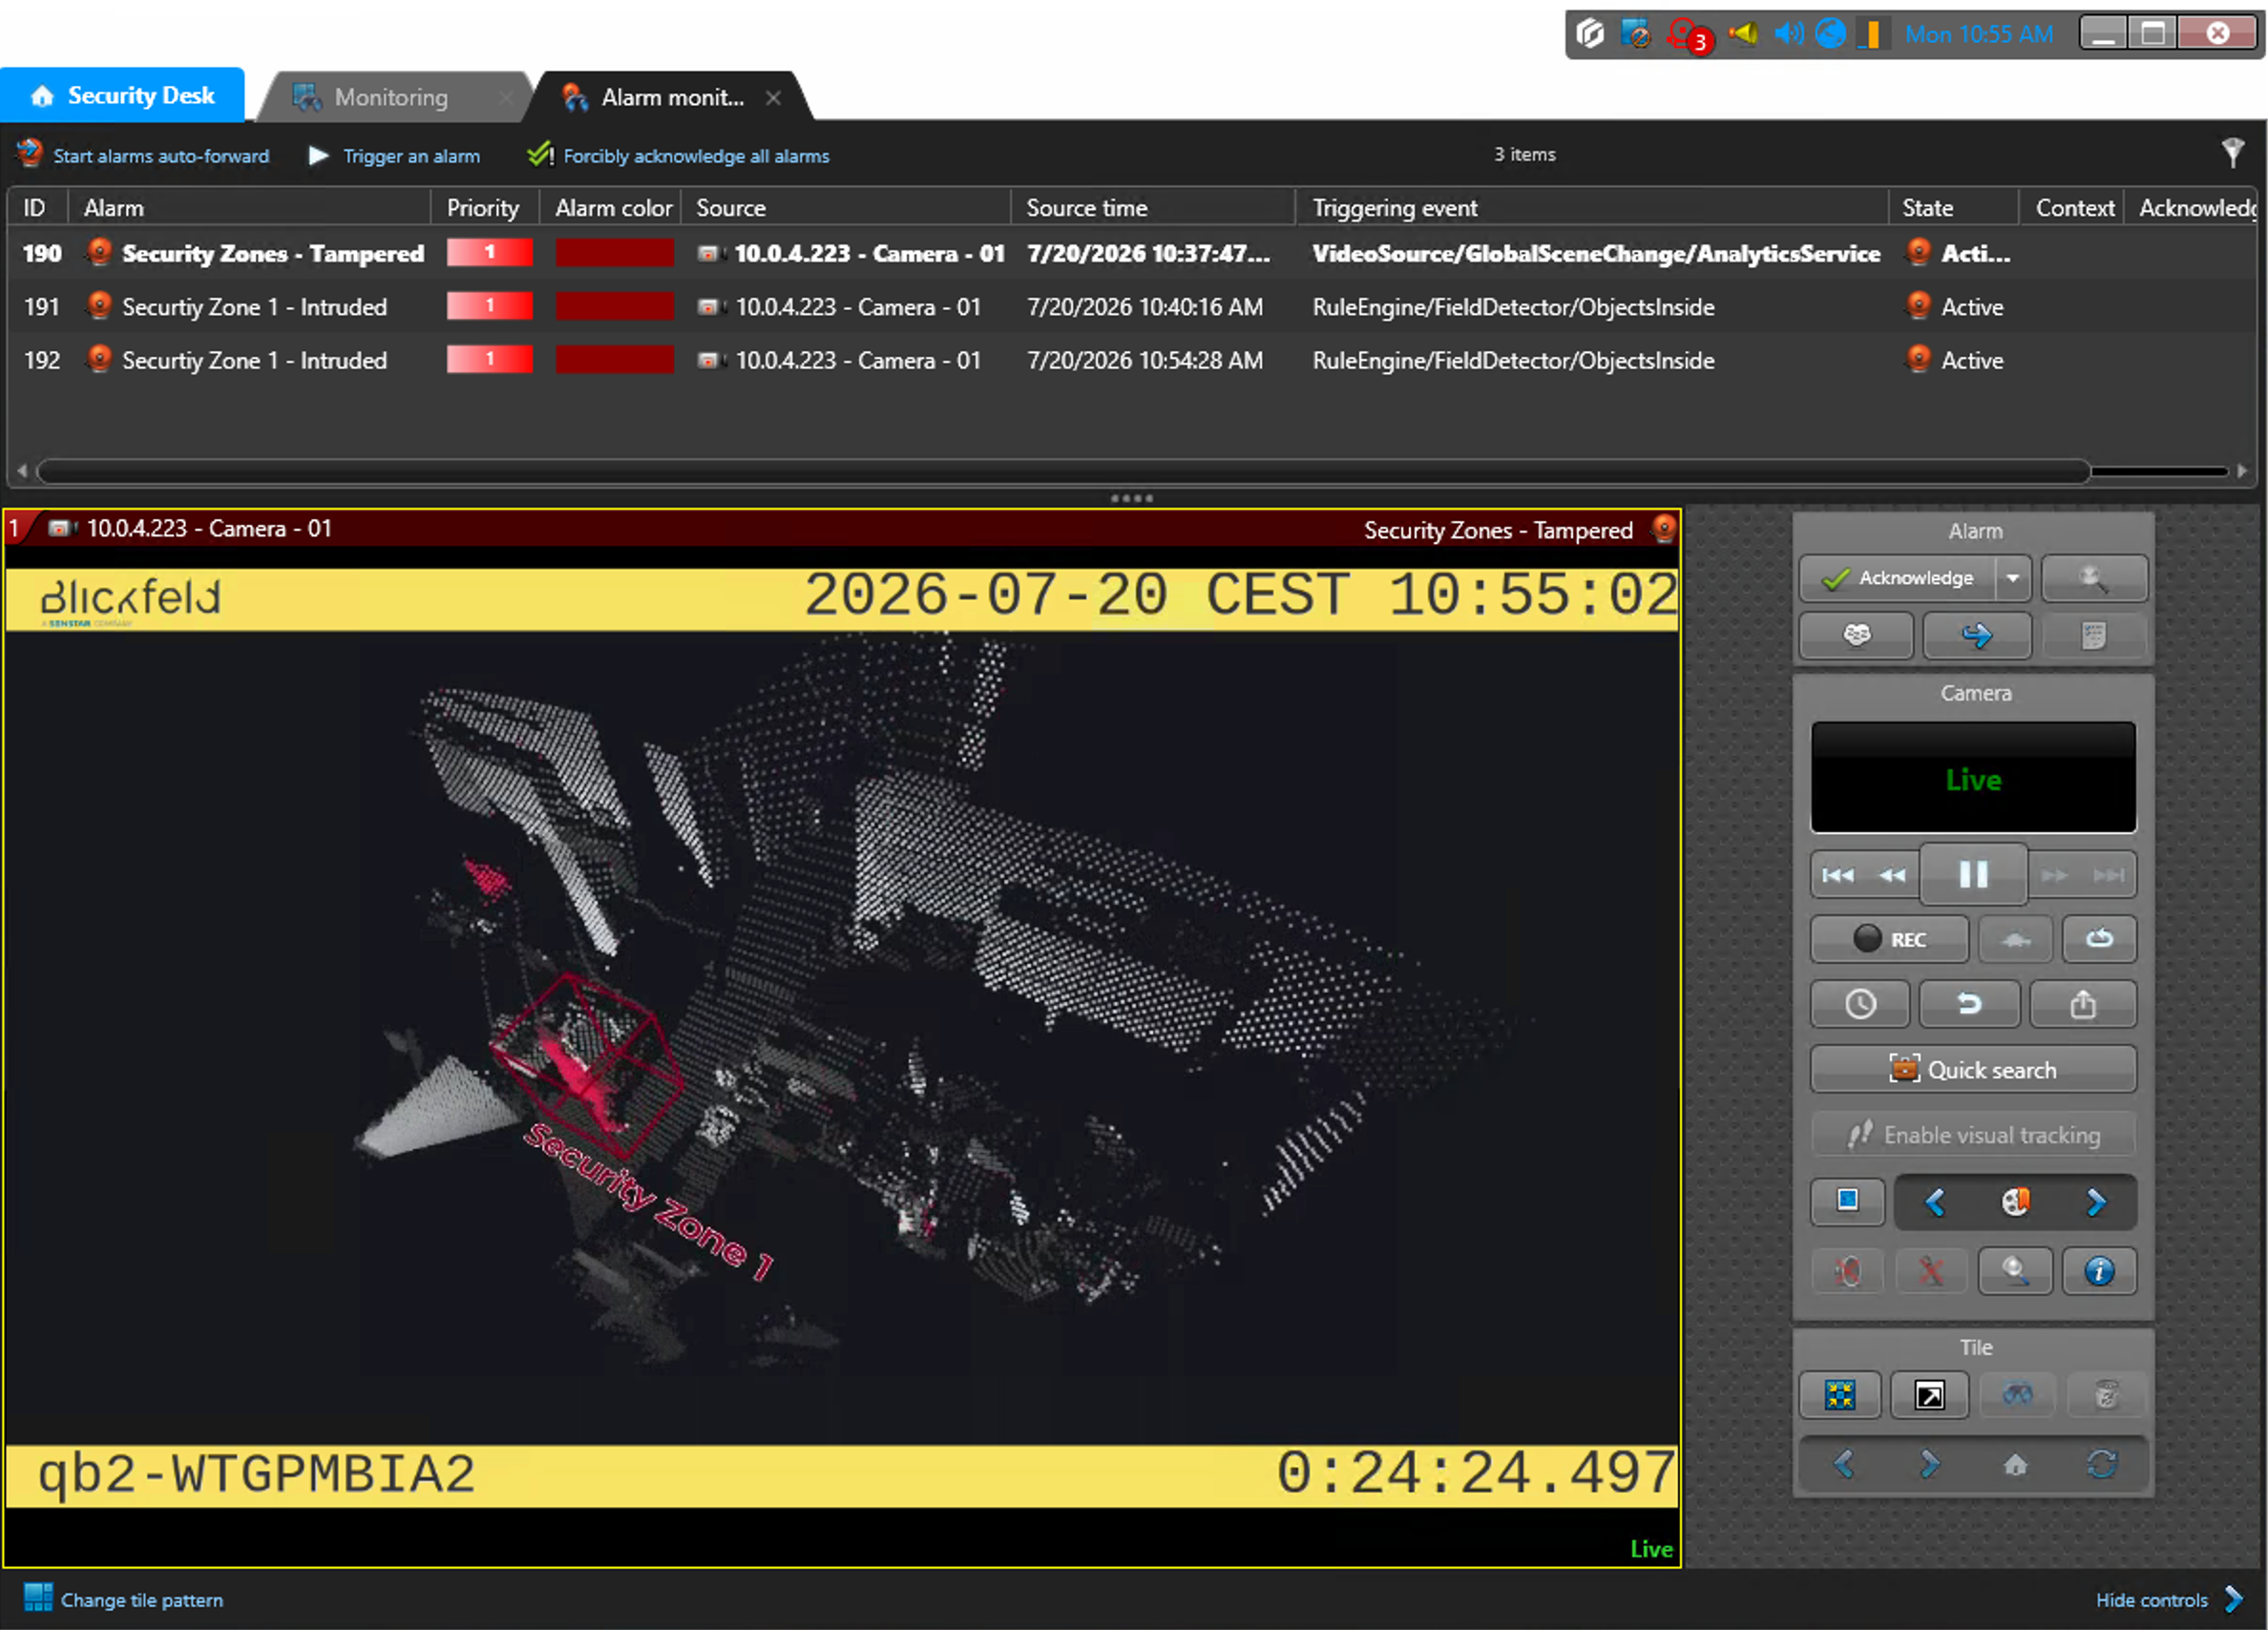
The example below shows how QbProtect events can be used to trigger alarms in Genetec Security Center. After QbProtect has been added to the Genetec Security Center, it can be configured to use QbProtect events for alarm generation. In this example, one security zone Security Zone 1 has been configured using QbProtect WebGUI to exemplify the configuration process, as shown in the Figure below.
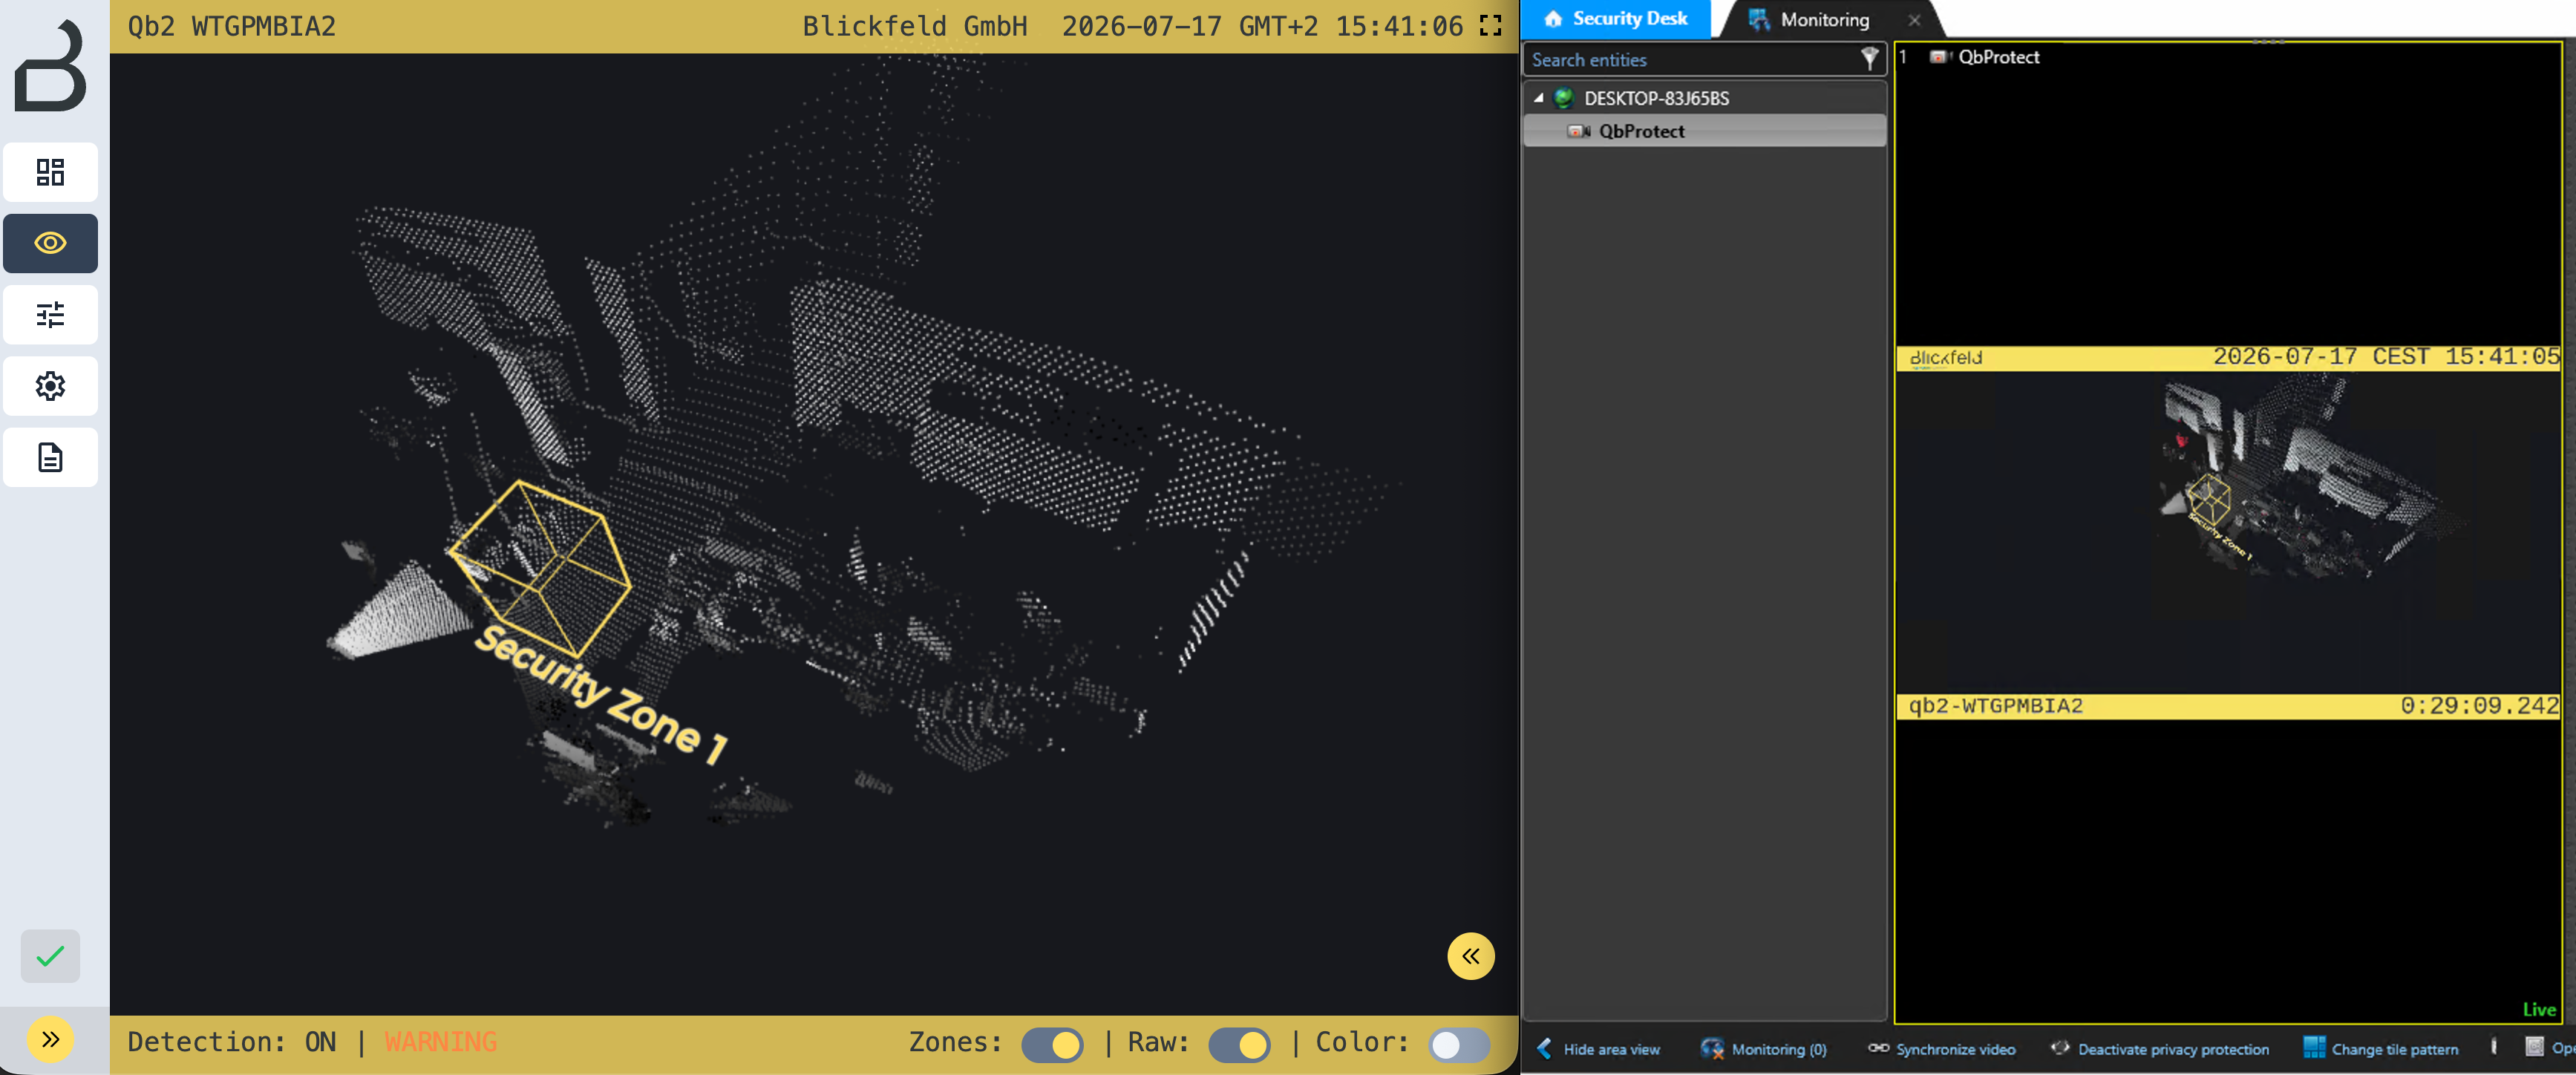
|
Please refer to the Events subsection to learn about the available ONVIF event topics. Be aware that only events in default ONVIF namespaces are supported. |
Configure Alarm Rule Chain
The alarms configuration procedure includes the following steps:
-
Launch the Config Tool and enter your user credentials (optional)
-
Navigate to
Tasks→Administration→Alarms -
Click
Alarmto create new alarm associated with zone intrusion -
Give a meaningful name to the alarm, e.g.
Security Zone 1 - Intruded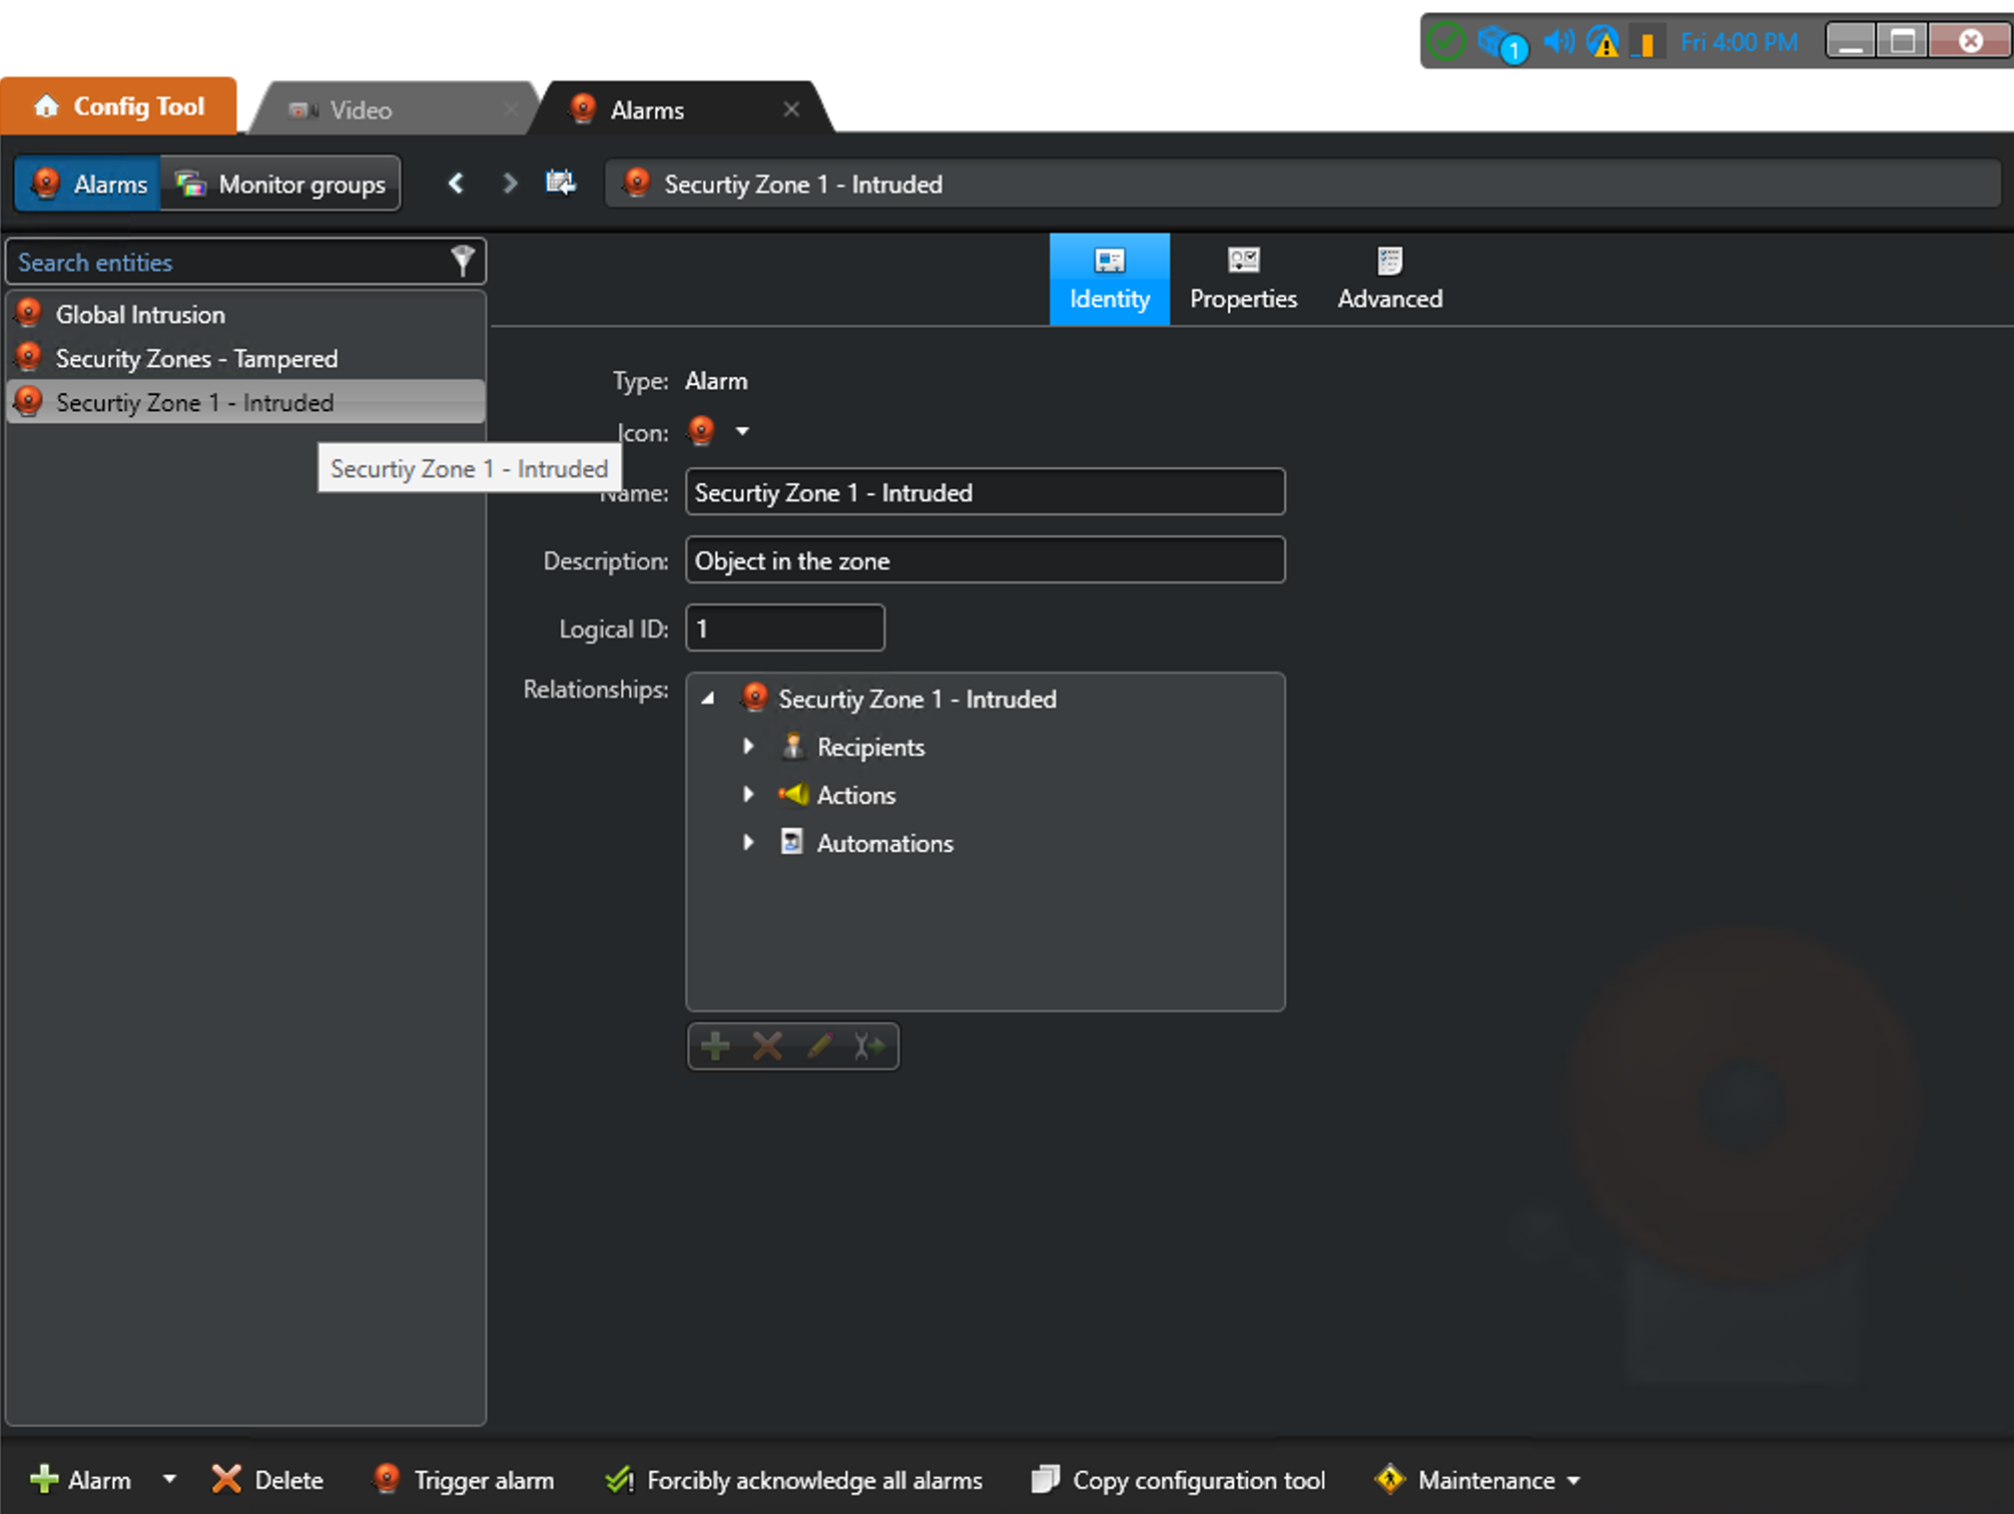 Figure 7. Genetec Security Center: intrusion (per zone) alarm configuration in Config Tool
 -
Click
Alarmto create new alarm associated with zone tampering -
Give a meaningful name to the alarm, e.g.
Security Zones - Tampered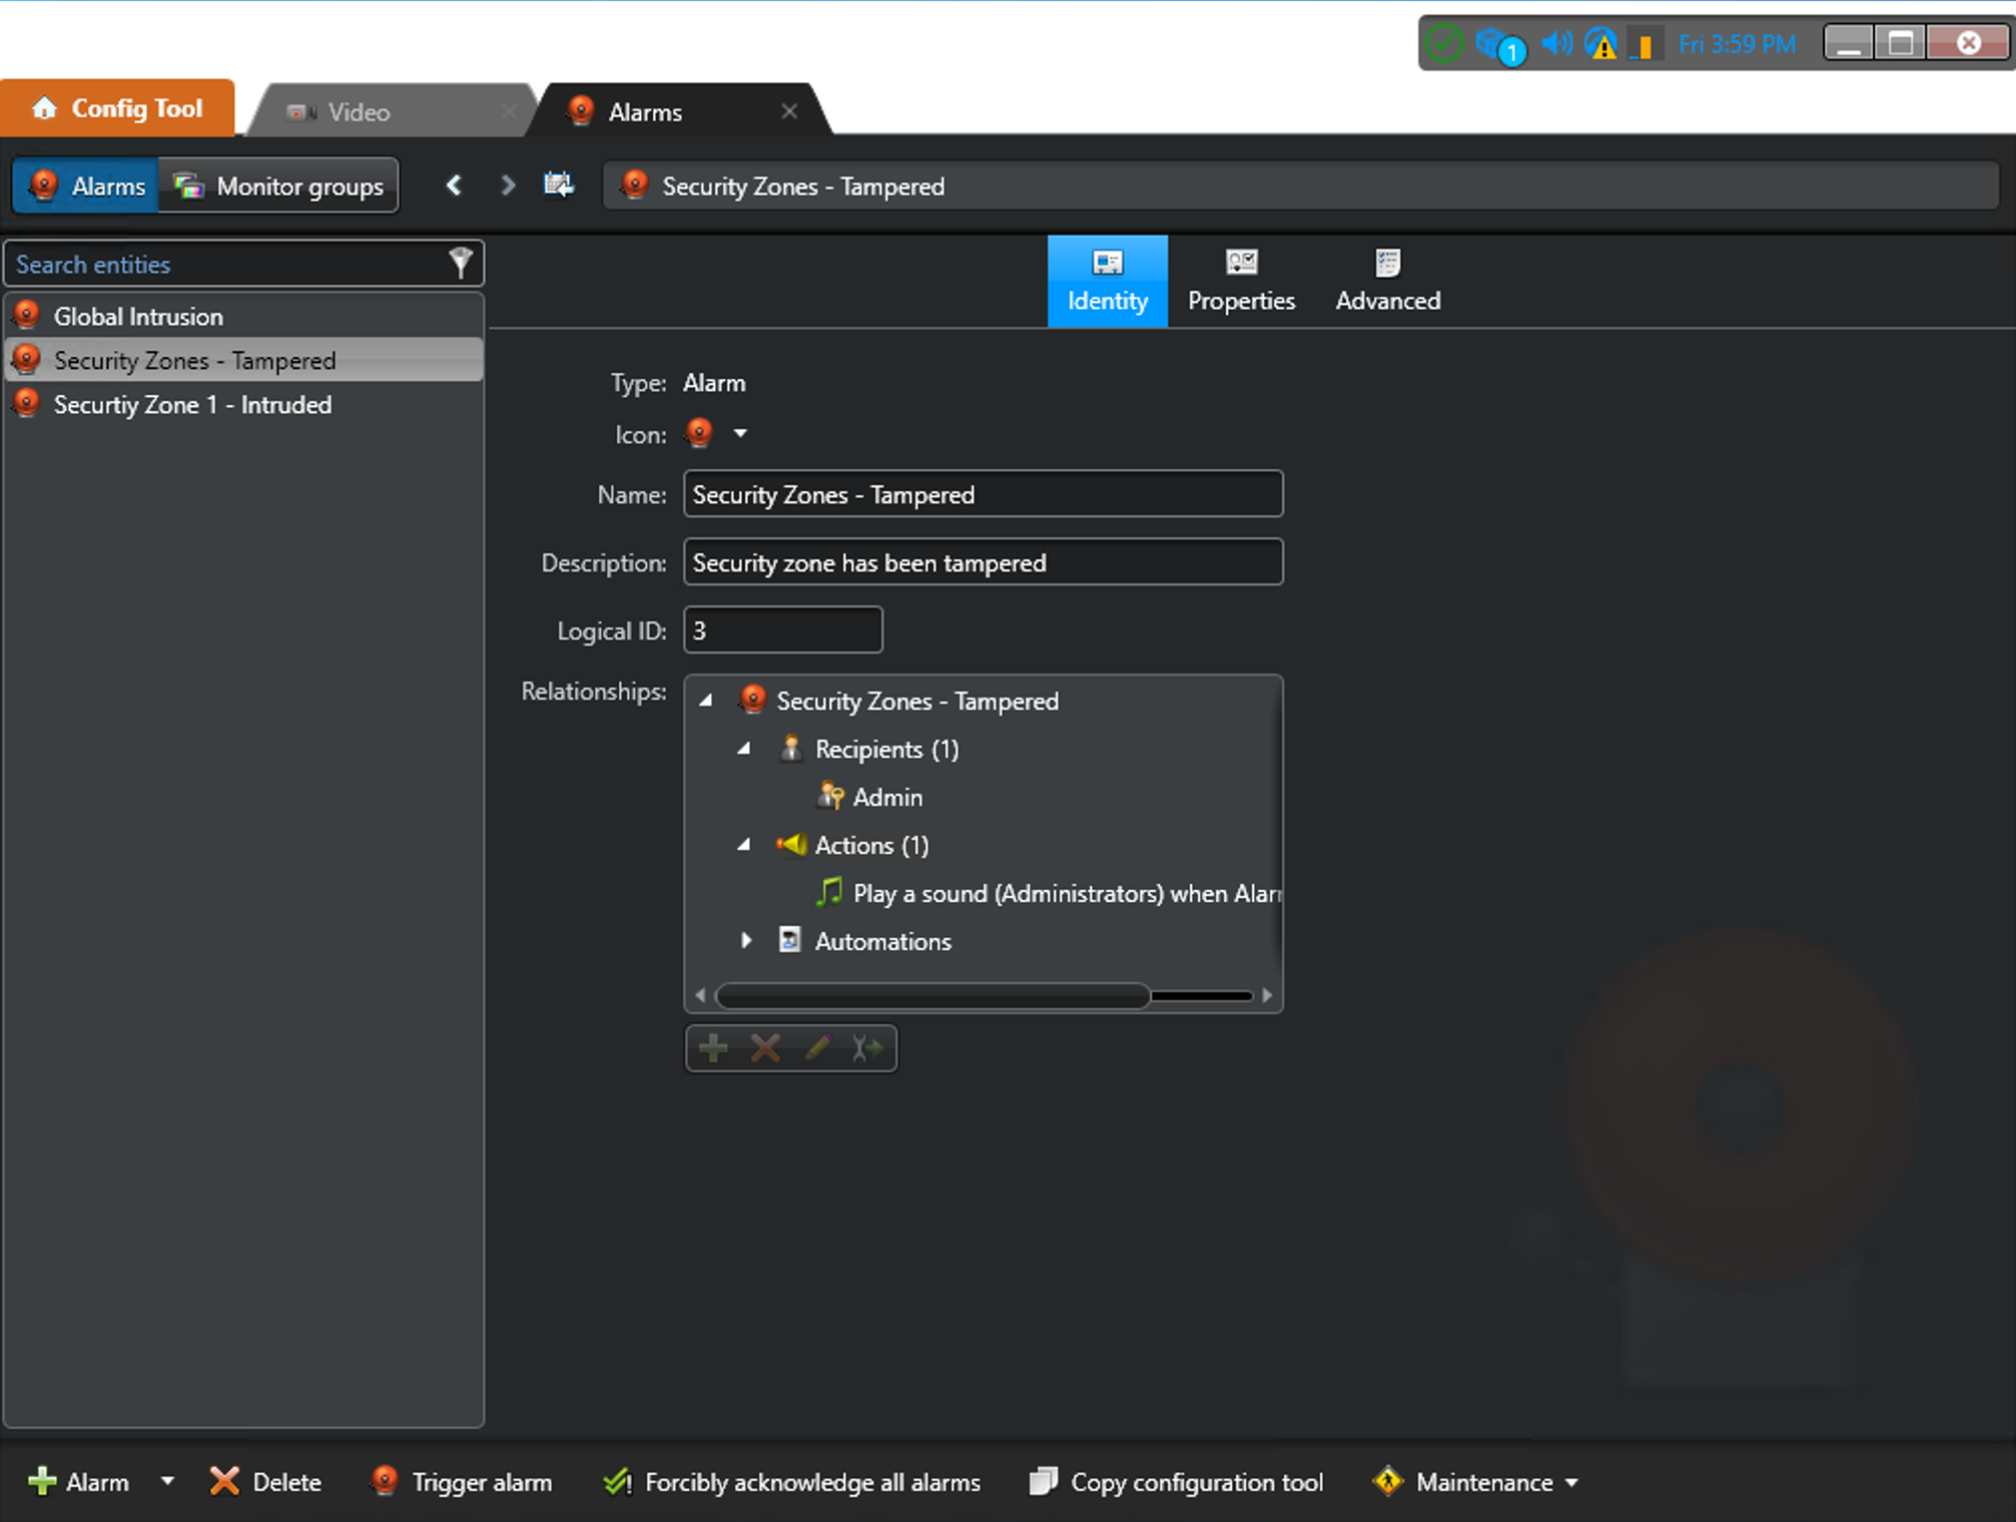 Figure 8. Genetec Security Center: tampering (per scene) alarm configuration in Config Tool
 -
Assign an Alarm recipient, e.g.
Adminto each alarm -
Select an action triggered by each alarm, e.g.
Play a sound→ ClickApply
Configure Events Handling
The events configuration procedure includes the following steps:
-
Launch the Config Tool and enter your user credentials (optional)
-
Navigate to
Tasks→Administration→Video→ Select previously configured QbProtect -
Select
Identitytab →Relationships→Actions→ Click onPlusto create a newEvent-to-actionrelationship -
Select
RuleEngine/FieldDetector/ObjectsInsideand typeSecurity Zone 1as a source of intrusion event → SelectTrigger an alarminActiondrop-down → Select previously configuredSecurity Zone 1 - Intrudedalarm inAlarm drop down→ ClickSave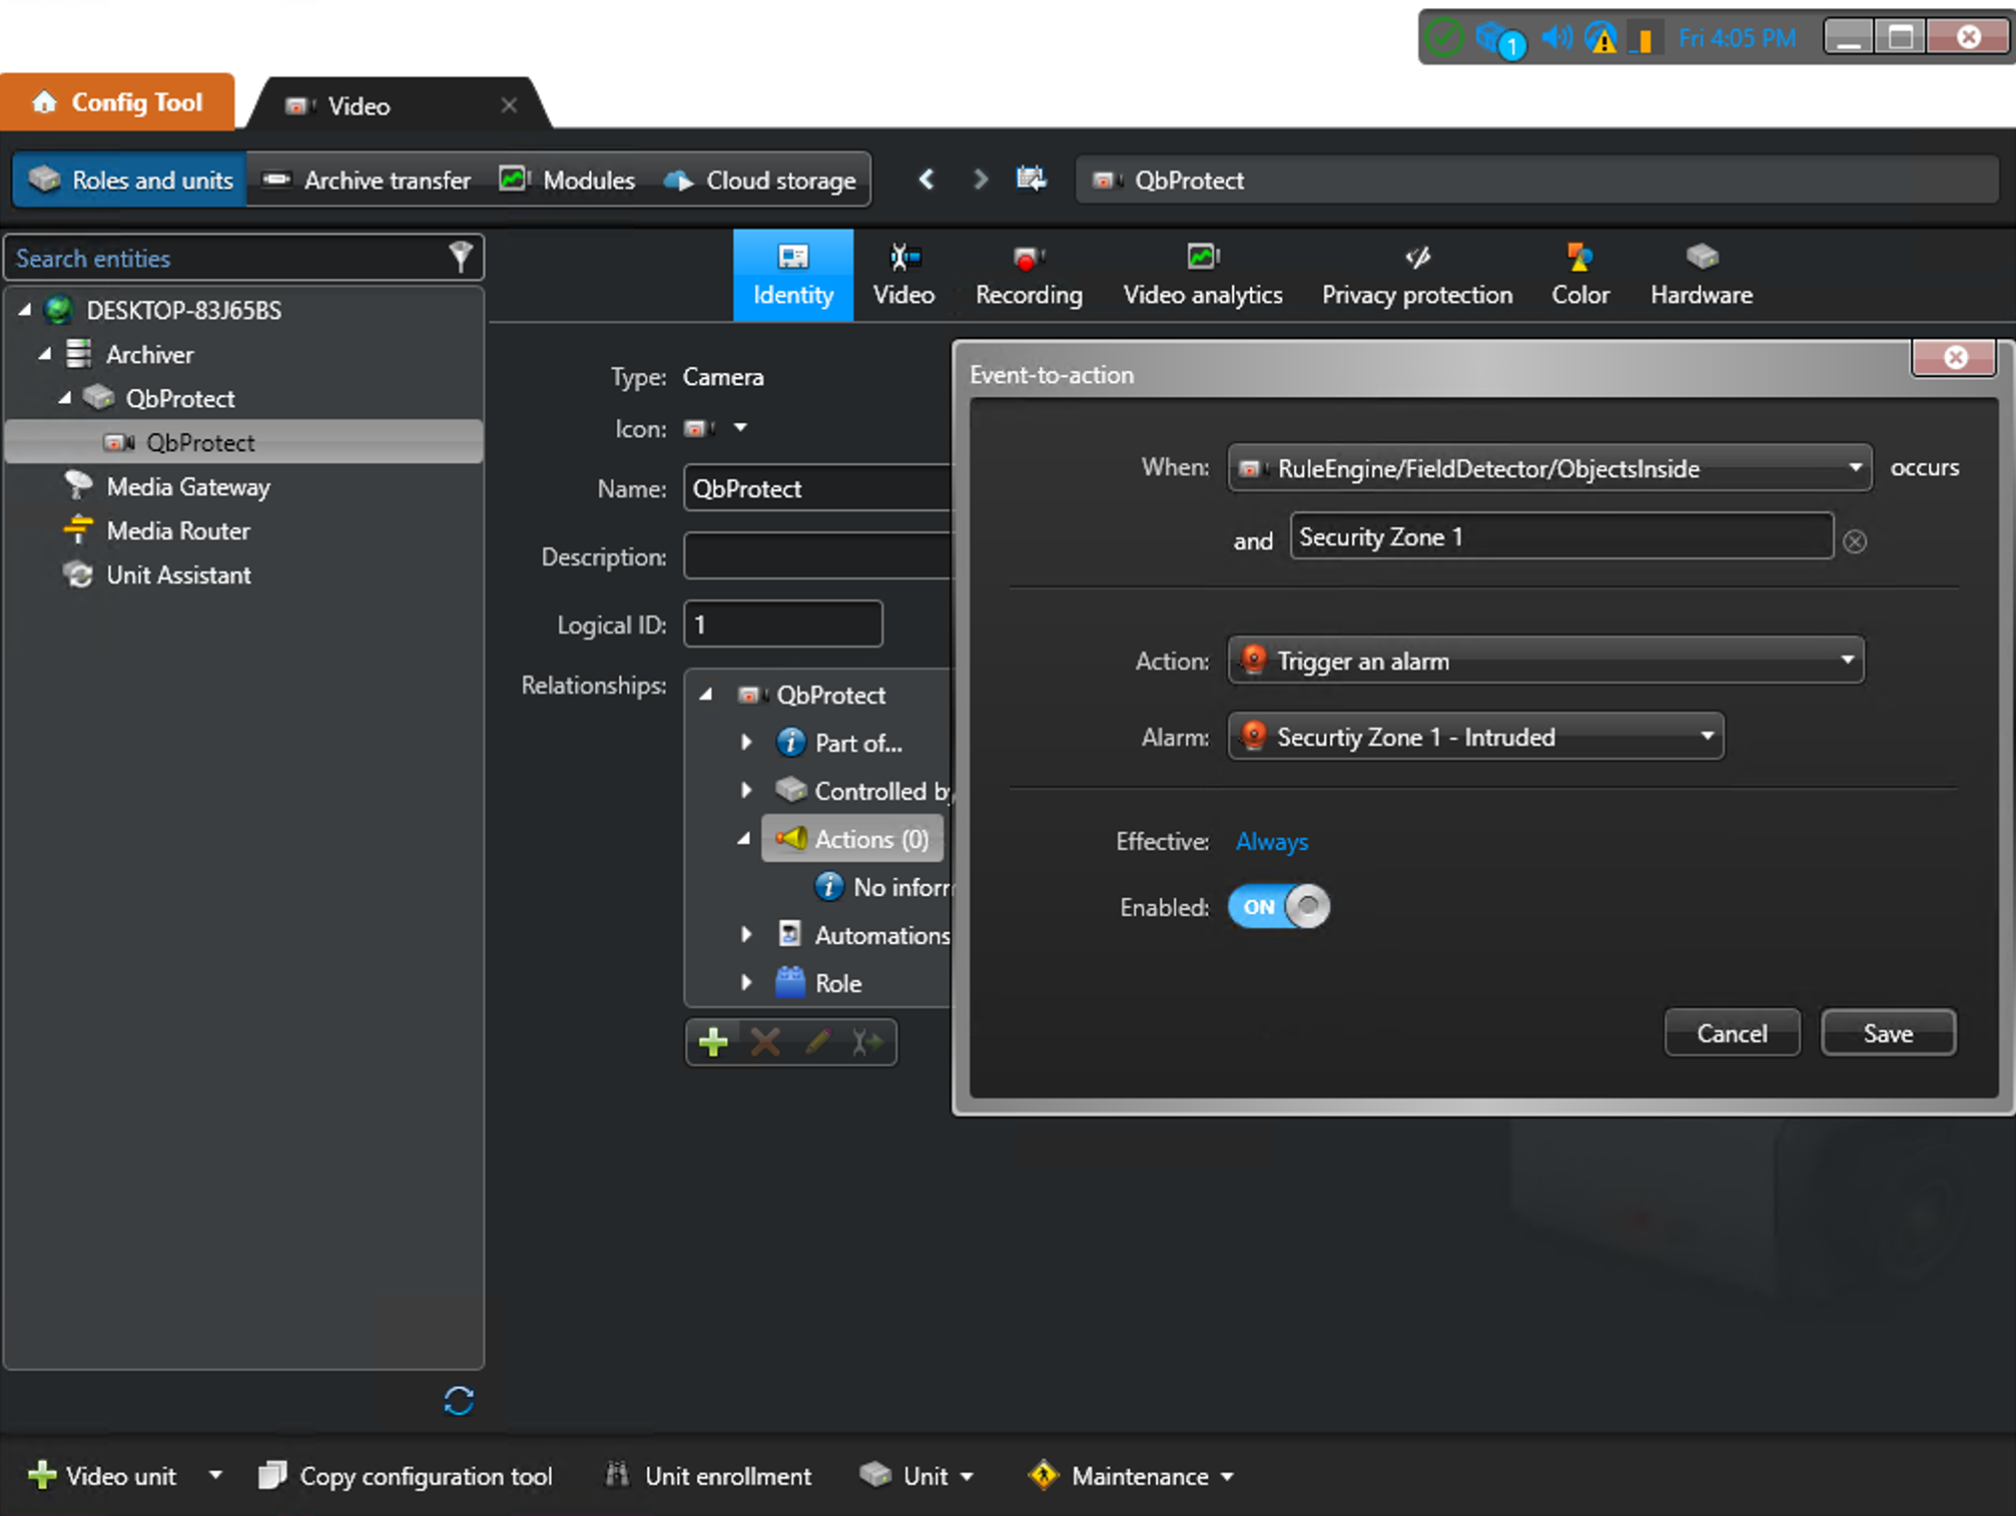 Figure 9. Genetec Security Center: intrusion (per zone) event-to-action configuration in Config Tool
 -
Select
VideoSource/GlobalSceneChange/AnalyticsServiceas a source of tampering event → SelectTrigger an alarminActiondrop-down → Select previously configuredSecurity Zones - Tamperedalarm inAlarm drop down→ ClickSave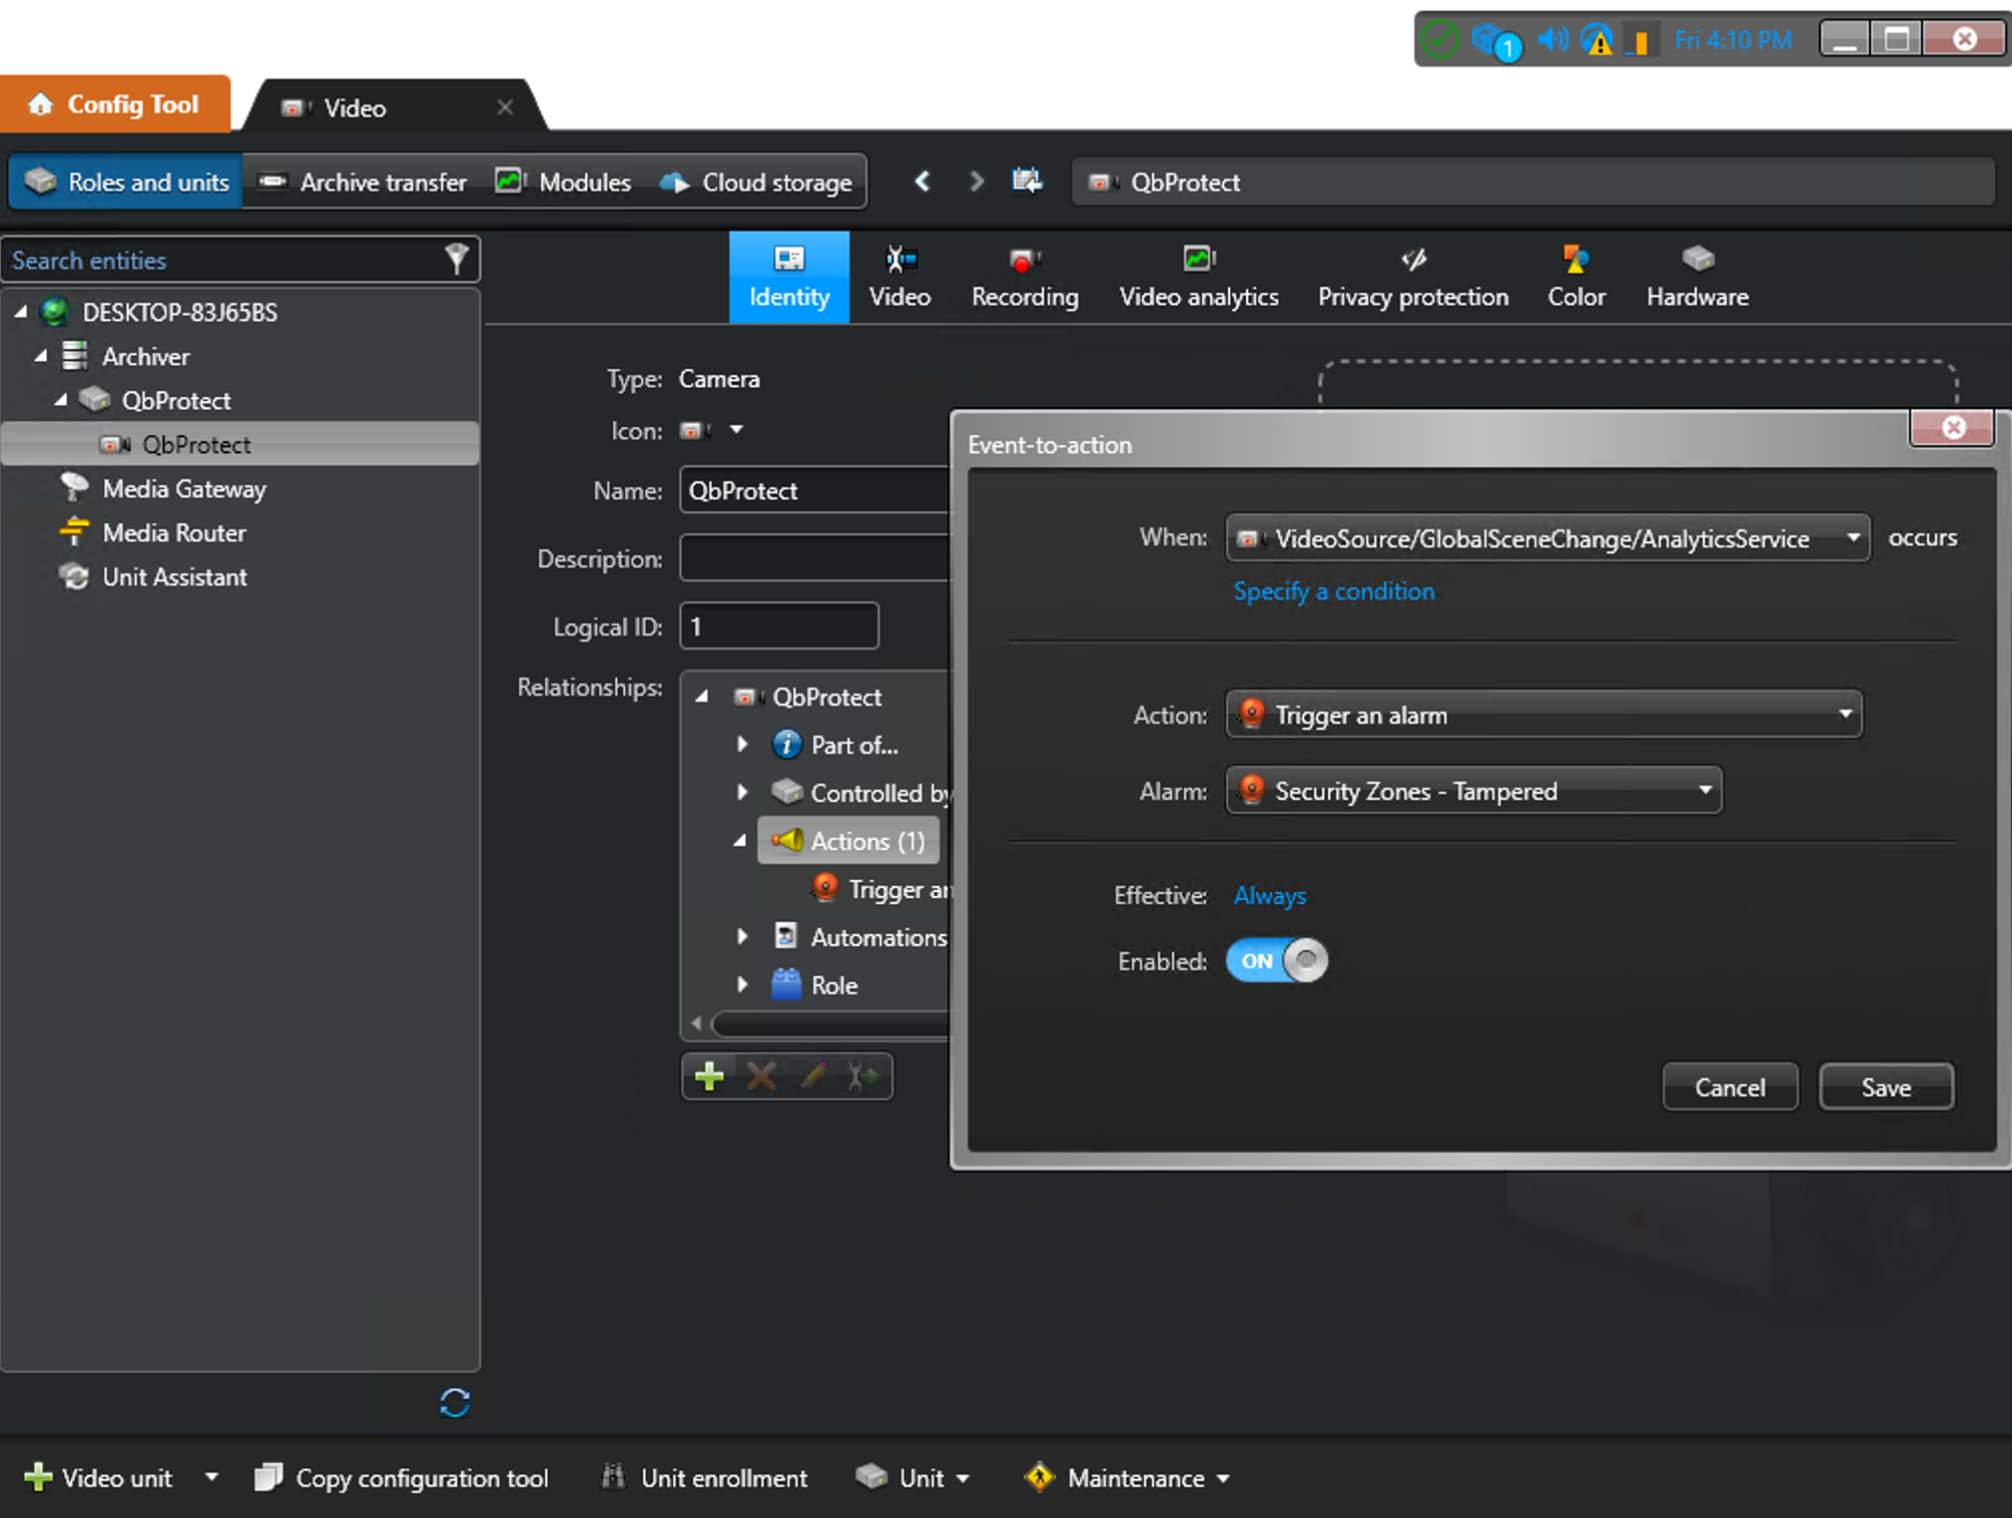 Figure 10. Genetec Security Center: tampering (per scene) event-to-action configuration in Config Tool
Tampering of any security zone in the security scene or the intrusion event in the Security Zone 1 and the associated alarm rule chains will generate corresponding alarms in the Genetec Alarm monitor, as shown in the Figure below.