Senstar
This section provides information on how to integrate QbProtect with Senstar Symphony. Please refer to the ONVIF section beforehand for general information on using ONVIF with QbProtect.
|
The following Senstar Symphony components have been used in the examples below:
|
Add Device
|
Events originating from dynamic event sources (e.g., security zones) have to be correctly exposed to the VMS each time a new zone configuration is introduced via WebGUI. Please either pre-configure all the required security zones in WebGUI before adding the QbProtect into the VMS or re-add the existing QbProtect to the Senstar Symphony server to re-expose events from newly configured dynamic sources. |
The WebGUI of Senstar Symphony Server is used to add QbProtect into Senstar Symphony VMS, as shown in the Figure below.
The procedure includes the following steps:
-
Navigate to the IP address of Senstar Symphony Server in the Web Browser of choice
-
Navigate to
Devices→Cameras→Add Camera Manually. -
Enter the FQDN or IP of QbProtect in the address field
-
Select the
ONVIF_Legacydriver in the driver section -
Provide ONVIF credentials in user name and password fields correspondingly
Please refer to the User authentication subsection to find out how to obtain valid ONVIF credentials required for QbProtect VMS integrations.
-
Click
Connect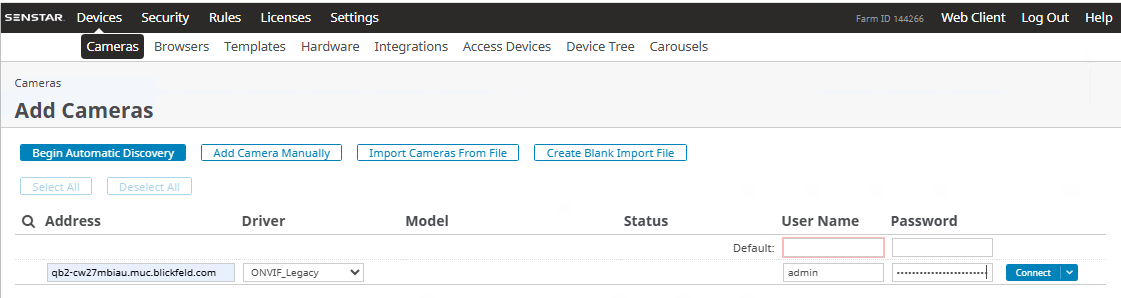 Figure 1. Adding QbProtect into Senstar Symphony
 -
If the connection was successful, the QbProtect device should be detected with
OKstatus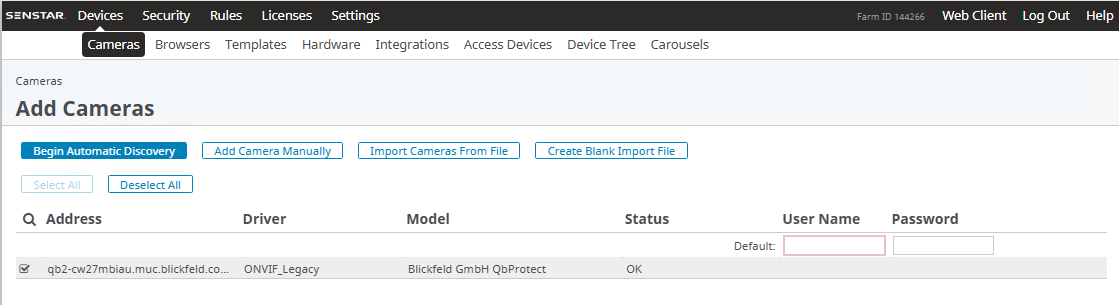 Figure 2. QbProtect successfully added to Senstar Symphony
 -
Click
Next→ Give a meaningful name to the device (e.g.,QbProtect) → ClickAdd 1 Selected Camera→ Wait untill the device is added
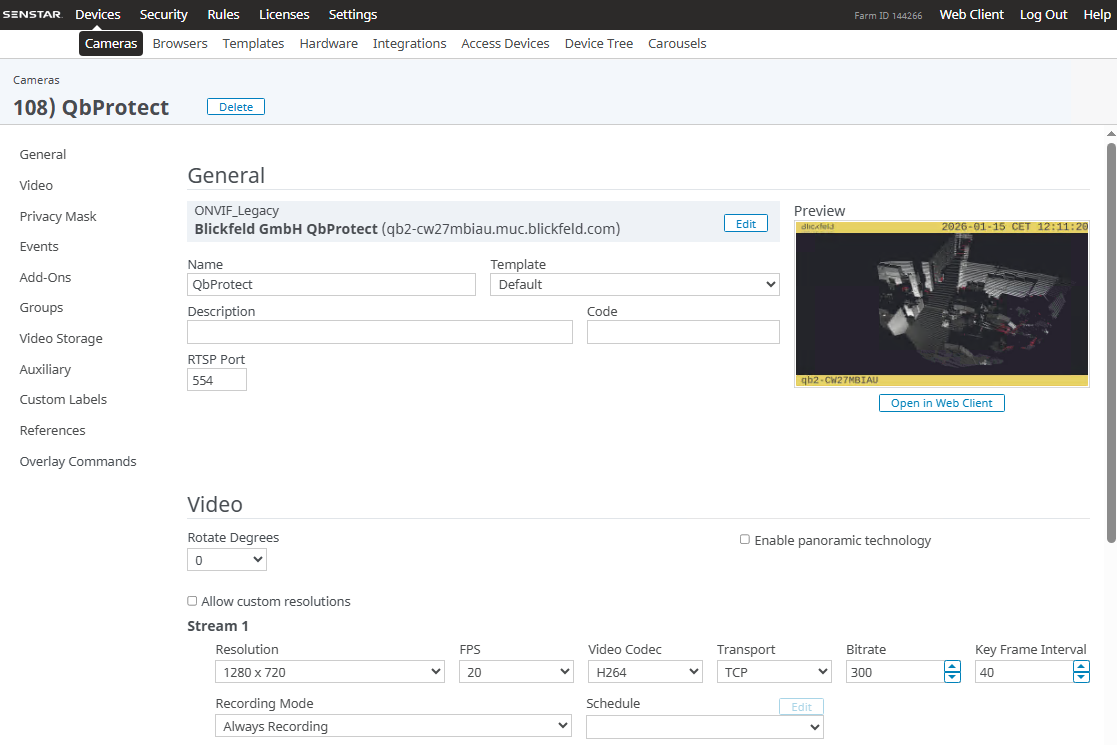
The General device view should depict the general information about the device, current video stream settings, and the video stream preview, as shown in the Figure below.
|
The perspective of the RTSP video stream in VMS can be synchronized with the one configured in the WebGUI. For that, navigate to the Viewer page of the QbProtect WebGUI, configure the desired view perspective, and apply the keyboard shortcut Shift+V. |
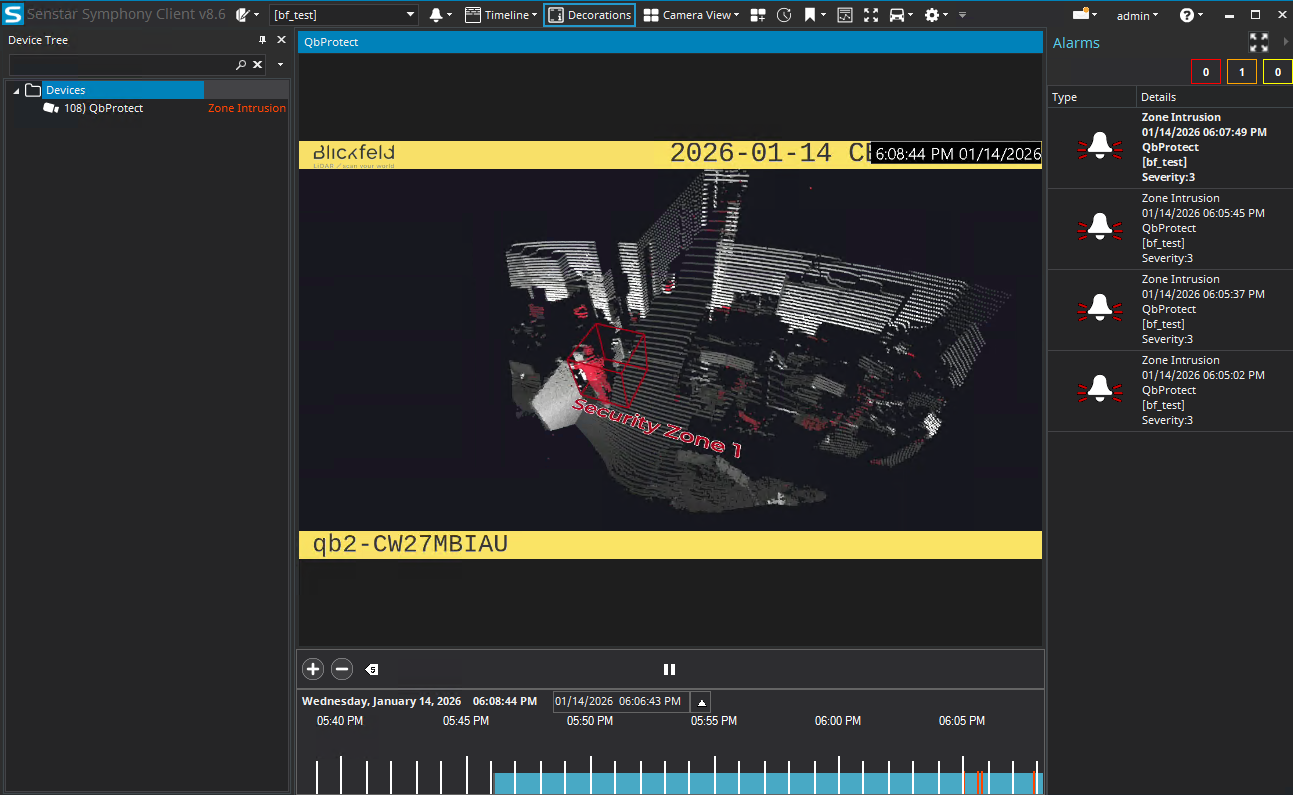
The live video stream of the QbProtect point cloud can be accessed and observed in Symphony Client or its web version after successfully completing the required steps above.
Events
The example below shows how QbProtect events can be used in Senstar Symphony.
|
Please refer to the Events subsection to learn about the available ONVIF event topics. |
Configure Events Handling
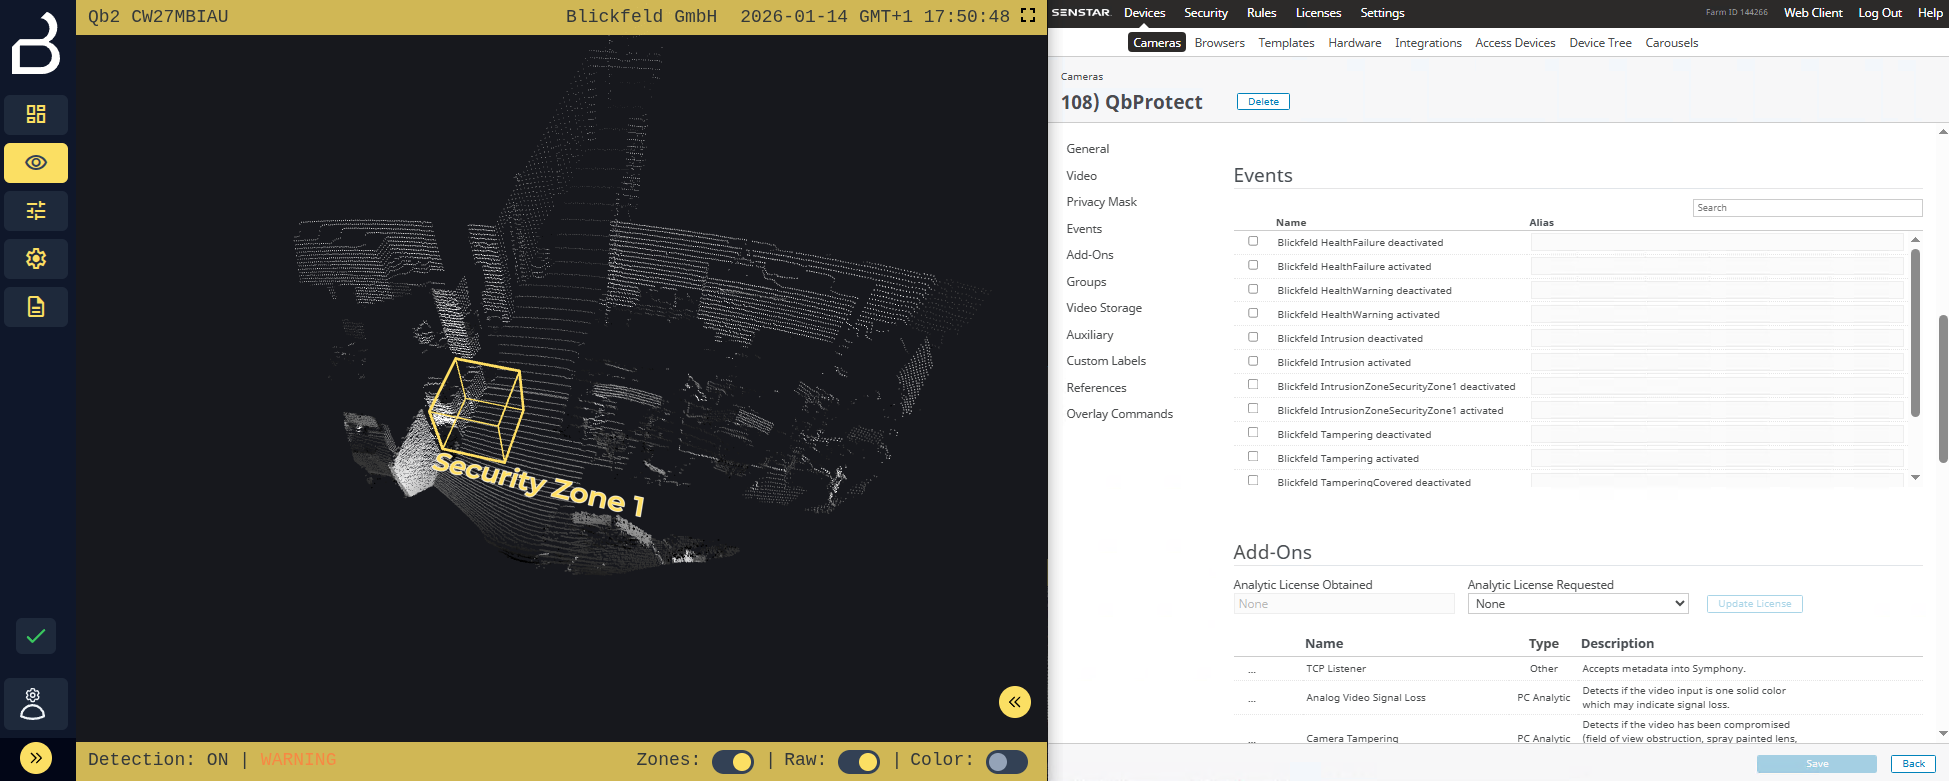
In this example, a single security zone called Security Zone 1 has been configured using QbProtect WebGUI. Supported events can be found in the corresponding Events view of Senstar Server, as shown in the Figure below.
The event handling configuration consists of the following steps:
-
Navigate to
Devices→Cameras→ SelectQbProtect→ ClickEdit→ Navigate toEvents -
Toggle
Blickfeld IntrusionZoneSecurityZone1 activatedevent → Give it an alias name (e.g.SecurityZone1) → ClickSaveto subscribe to the selected event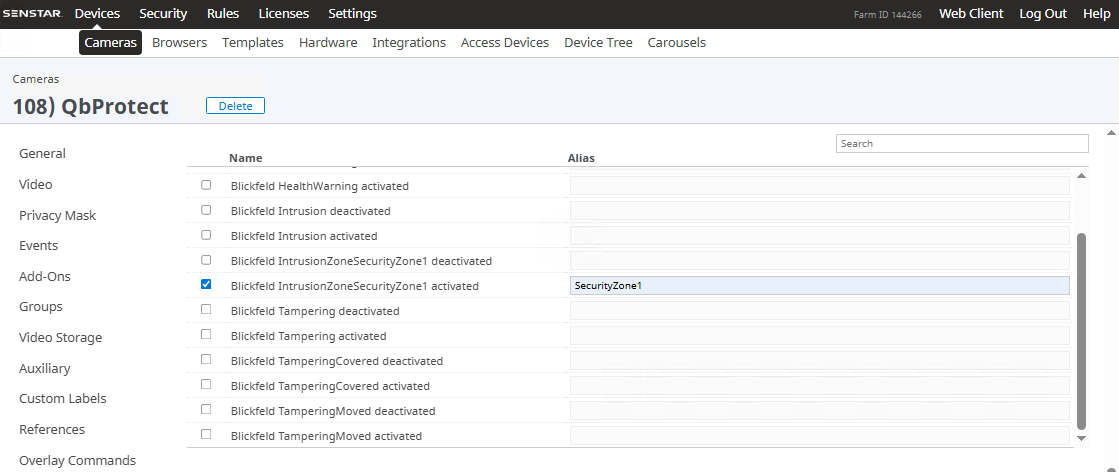 Figure 5. The subscription to the exposed dynamic ONVIF event
 -
Navigate to
Rules→Events→ ClickNew Event Figure 6. Create new event in Senstar Symphony
 -
Click
Add Sources→Camera Events→Devices→ ToggleQbProtect→ ClickOk -
Toggle the previously created event alias
SecurityZone1→ Give a meaningful name to the eventSecurity Zone 1 Event→ ClickSave -
Navigate to
Rules→Events→ ClickNew Event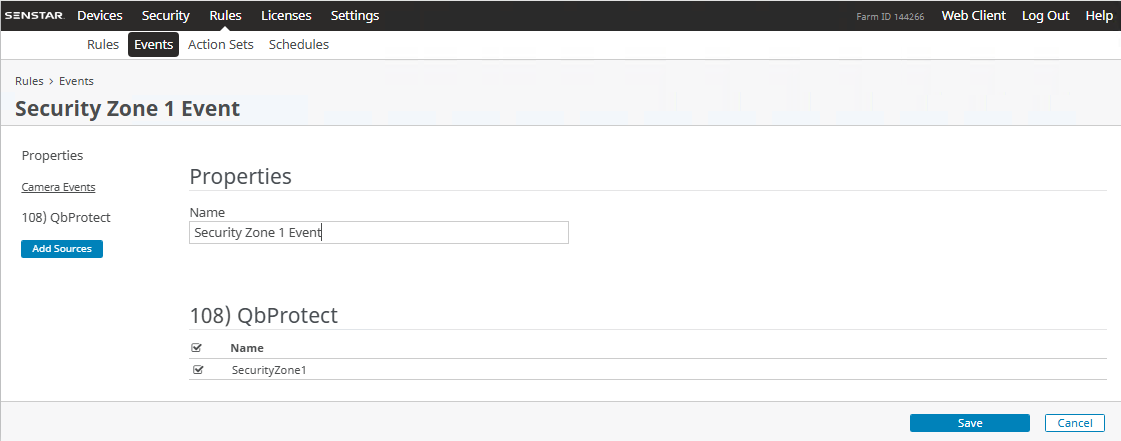 Figure 7. Select event source in Senstar Symphony
 -
The created event should be shown in the event list
 Figure 8. Created event
Security Zone 1 Eventin Senstar Symphony
Configure Alarm Rule Chain
The rule chain consists of event, action, and schedule. It allows mapping of a dedicated action (e.g., manual alarm action, etc.) to the event of the particular type (e.g., intrusion in a security zone). This mapping operates according to the pre-configured time schedule (e.g., daily). The rule chain configuration procedure consists of the following steps:
-
Navigate to
Rules→Rules→ ClickAdd Figure 9. Create a new rule chain in Senstar Symphony
 -
Give a meaningful name to the rule chain (e.g.
Zone Intrusion) in thePropertiessubsection -
Add previously configured
Security Zone 1 Eventin theEventssubsection -
Select
Manual Alarm Actionin theActionssubsection -
Click
EditManual Action → Alarm → Devices → ToggleQbProtect→ ToggleRaise Alarm→ SelectQbProtectinChoose a Cameradrop down → Click Save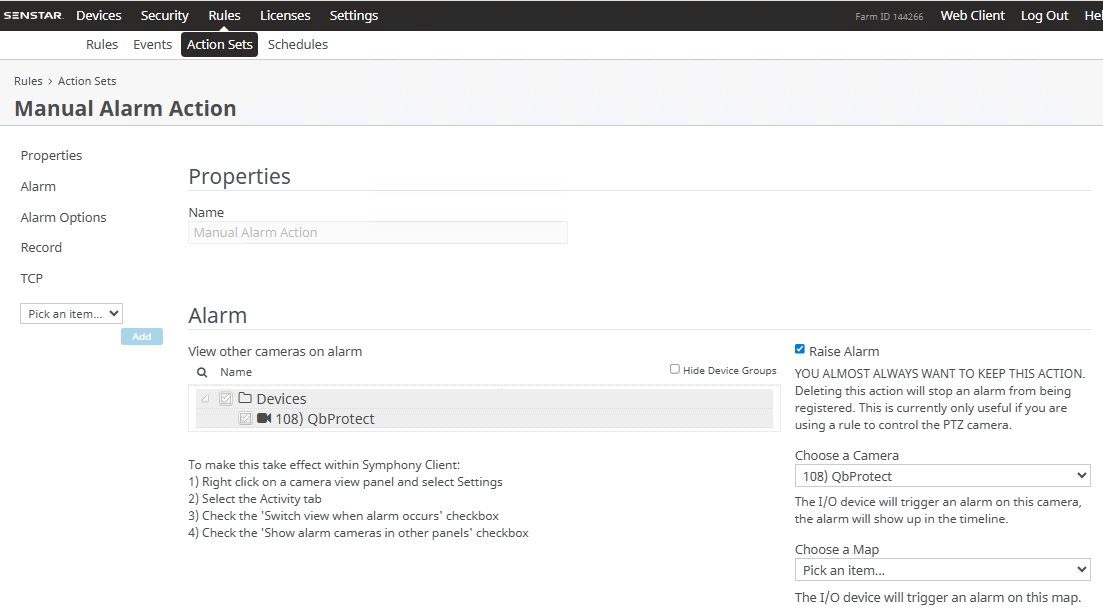 Figure 10. The manual action configuration in Senstar Symphobny
 -
Select
Manual Alarm Schedulein theSchedulesubsection -
Click
Save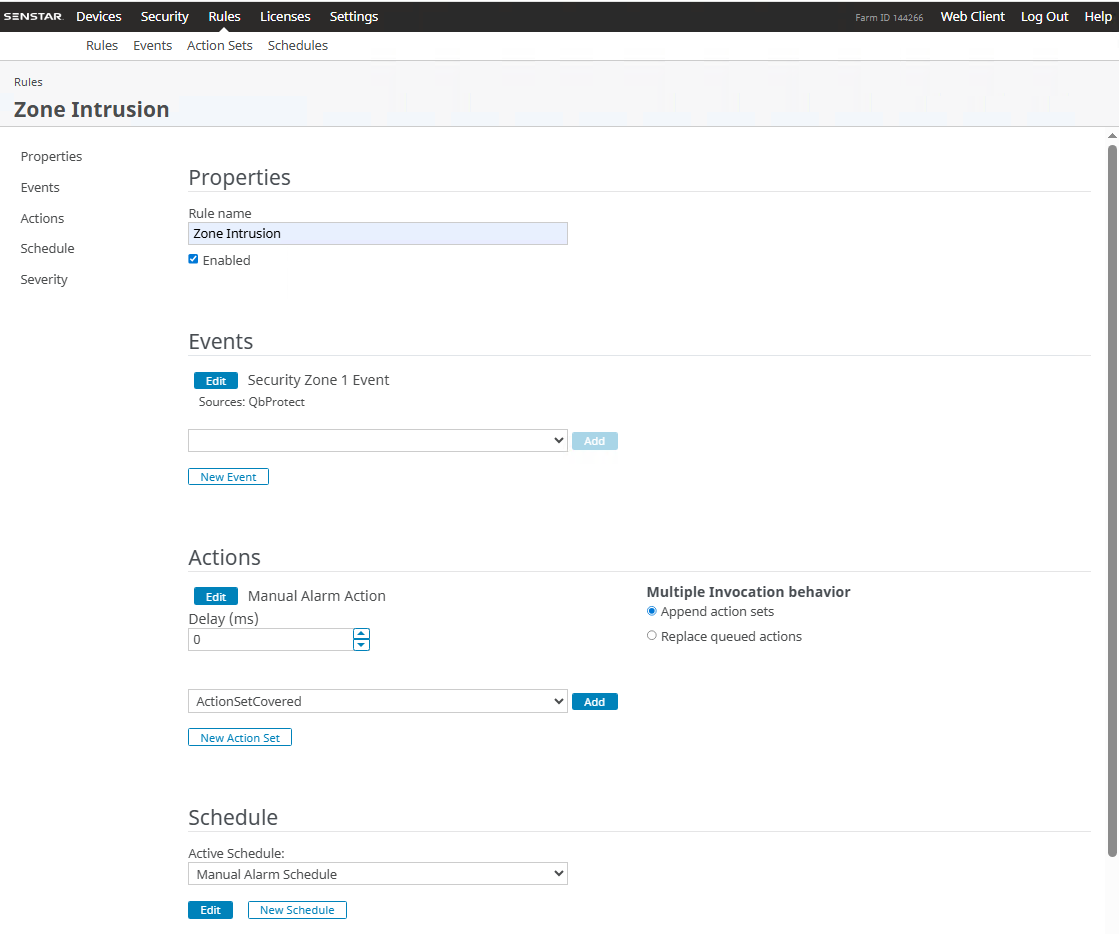 Figure 11. Rule chain configuration in Senstar Symphobny
 -
The configured and enabled
Zone Intrusionrule chain should be shown in theRuleslist Figure 12. Configured
Zone Intrusionrule chain in Senstar Symphony
The zone intrusion event in the Security Zone 1 from QbProtect and the configured intrusion event rule chain will be generating an alarm in Senstar Symphony Client, as shown in the Figure below.